Welcome to the Really Reasonable Ribbon March Blog Hop! Our hop theme this month is Spring and/or Easter! Each of the design team ladies is going to be creating a project using this theme, PLUS ribbon!
I am the FIRST blog this month! Welcome! After visiting me hop on to Cheryl's Blog next! (The full blog list is at the end of the post.)
At the end of the hop, comment on the RRR Blog post, answering the question listed, for a chance to win a $10 Gift Card to the RRR Shop, plus one digital stamp set of your choice from Bonnie Garby Designs. The Design Team appreciates your comments, too!
I am still working on fully finishing some cross stitch projects. I am also working on several LARGE projects. I counted my projects the other day. (I know, why would I do that?!!?) I have 15 WIPs (works in progress), 8 projects kitted and ready to stitch, and 5 items stitched and awaiting finishing - into a flat fold, to be framed, turned into a pillow, and so on. It is a sickness, but please don't cure me! {grin}
Note: For those who are missing my card and mini album projects, I have finished four albums, but I just have not had the time to photograph them! It is the wrong season now, so I am holding them until the proper time. {smile} I also have a few coloring projects that I need to share. I am spending a lot of time MAKING and very little time SHARING.
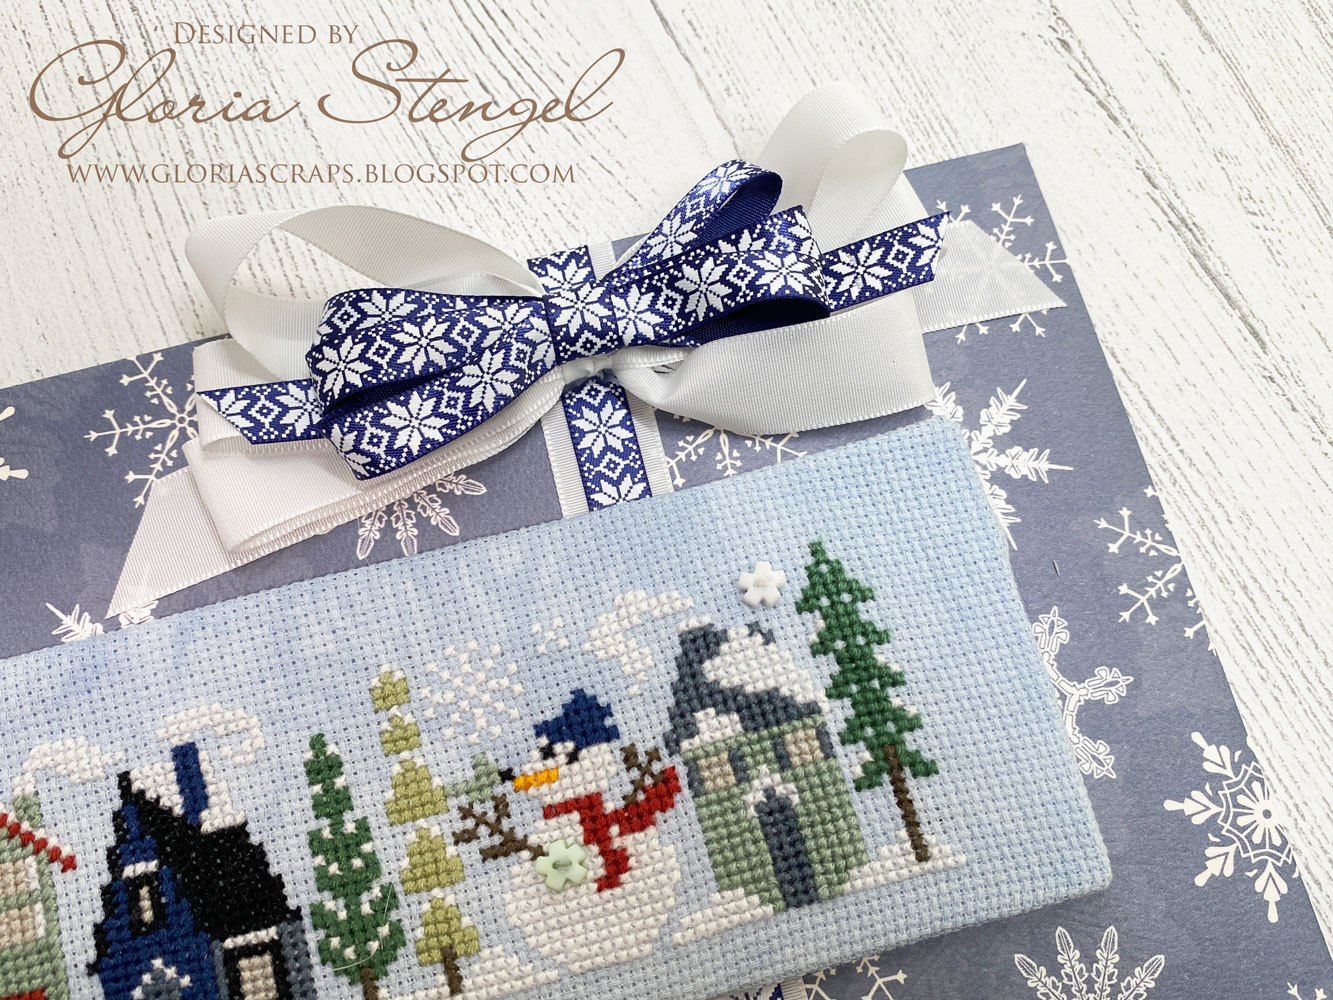
For this month's ribbon hop, I finished another of the sweet monthly samplers. This time it is the April sampler, which matches our theme of Spring or Easter! These are super cute.
The finished stitching is approximately 9" x 3 1/4" and the full project is 11" x 5 1/4". The easel I made for the project stands up beautifully on a table or shelf, or on the top of on of my tiered trays. Currently it is sitting on my computer desk, giving my craft room some spring feeling during this gloomy, rainy day.
The camera is washing out the bunnies a little bit. They stand out better in person, but the white floss on the yellow fabric is not showing up as well in the photos, unfortunately. I wish I had outlined them with a backstitch. But, too late now!This pattern is Sampler of the Month - April by Country Cottage Needleworks. I purchased all 12 months from Fat Quarter Shop online HERE. You can also purchase each individual month at Fat Quarter or at various other online shops.
I still have to finish stitching January, March, May, and December. May is kitted up and started so there is hope that I can finish that one soon! These are not a lot of stitching, however there are a lot of color changes, which slows me down!
I only made one floss substitution this month. I changed the orange to be a bit brighter. The called for color was too pale and dull for my fabric. I did use the DMC conversion provided and not the called for hand-dyed floss. I think hand-dyed floss is far to expensive for doing these smaller projects. And I don't always like the way those flosses look. DMC is about 65 cents for me to purchase, where the hand-dyed is $2.50 or more for less floss!
The fabric is possibly 14 count Aida from a Be Stitch Me grab bag so I don't know the color name, but it is a very pale yellow hand-dyed fabric. I was part of their Fabric of the Month for a year. I received 6 months of the neutral fabrics and 6 months of the colored fabrics. I also purchased several grab bags! It is lovely fabric and a joy to stitch on!
To make the stitching really stand out I added some bows, as always! I pulled out my stash of plaid ribbons this month. I love me some plaid or gingham ribbon! I used 5/8" Moss Plaid ribbon to make a large bow, which I then glued to the top of the project. I then created another large bow from 3/8" Orange Plaid ribbon and glued it to the top of the green bow. I used a little bit of Orange Baker's Twine to tie on a bunny charm. I have no clue where I got the bunny charm. i found it in my box of charms, so who knows how long I have had it!
I used my stash of chipboard and Easter patterned papers to create an easel (flat fold) for the stitched piece. I always place batting onto a piece of chipboard, then wrap the stitching around it and tape it in place.
I once again used Authentique paper because I just have so much of it! They were so generous with their design team and I sure wish they were still around! This month I used the Jubilee collection, which is a very fun and bright Easter collection.

Thanks for joining me today! I hope you enjoyed seeing another stitched piece. Bunny Hop on and see the other projects from the other ladies!
Here is the RRR Blog Hop Order in case you get lost!
Really Reasonable Ribbon's Ramblings
Gloria - YOU ARE HERE!
Cheryl
Bonnie
Misty
Karen
Really Reasonable Ribbon's Ramblings
Really Reasonable Ribbon Supplies Used:
Other Supplies Used:
Cross stitch pattern: Sampler of the Month - April by Country Cottage Needleworks
Fabric: 14 Count hand-dyed yellow grab bag piece by Be Stitch Me
Floss: DMC
Paper: Authentique Jubilee, cardstock scrap
Bunny charm: from my stash
Chipboard: Grafix
Batting: sewing supply
Adhesive: hot glue, Art Glitter Dries Clear Glue
Other tools: paper trimmer, scissors, score board, bone folder, sewing notions