First, let's take a peek at the finished project! I created a 5" x 4" x 1/2" folded mini album to share today.
Heartfelt Creations sent me the Antiquity Paper Collection as an "extra" in my last design team box. This is an older collection from the Sweet Juliet line that was launched in 2013. Since that was before my time on the design team, this is NEW paper to me. So, rather than hoard it, like normal, I cut right into it and paired it with the Butterfly Medley stamps and dies to make this mini!
This mini has lots of fold outs and pockets!
I created a magnetic "latch" to keep the book closed. I also created some lovely roses, and that butterfly looks like he is ready to fly away! Since this is the last week before the March Heartfelt Creations Collection premiers, I wanted to show you how to use some older product with some new! When working with a company which produces a new collection every month...it is hard to use up older items when there is always something NEW to play with!
Here is a peek at the back of the mini.
And a side view.
For all you paper adventurers, come along and see how to make one of these albums! Here is a full tutorial for you! Ready! Set! Go! (The supply list is at the end of the post.)
To create the mini album base, cut black cardstock to 5" x 11 3/4". Score on the long side at 4", 4 1/2", 8 1/2", and 8 3/4". Fold on all score lines. This view is the INSIDE of the album.
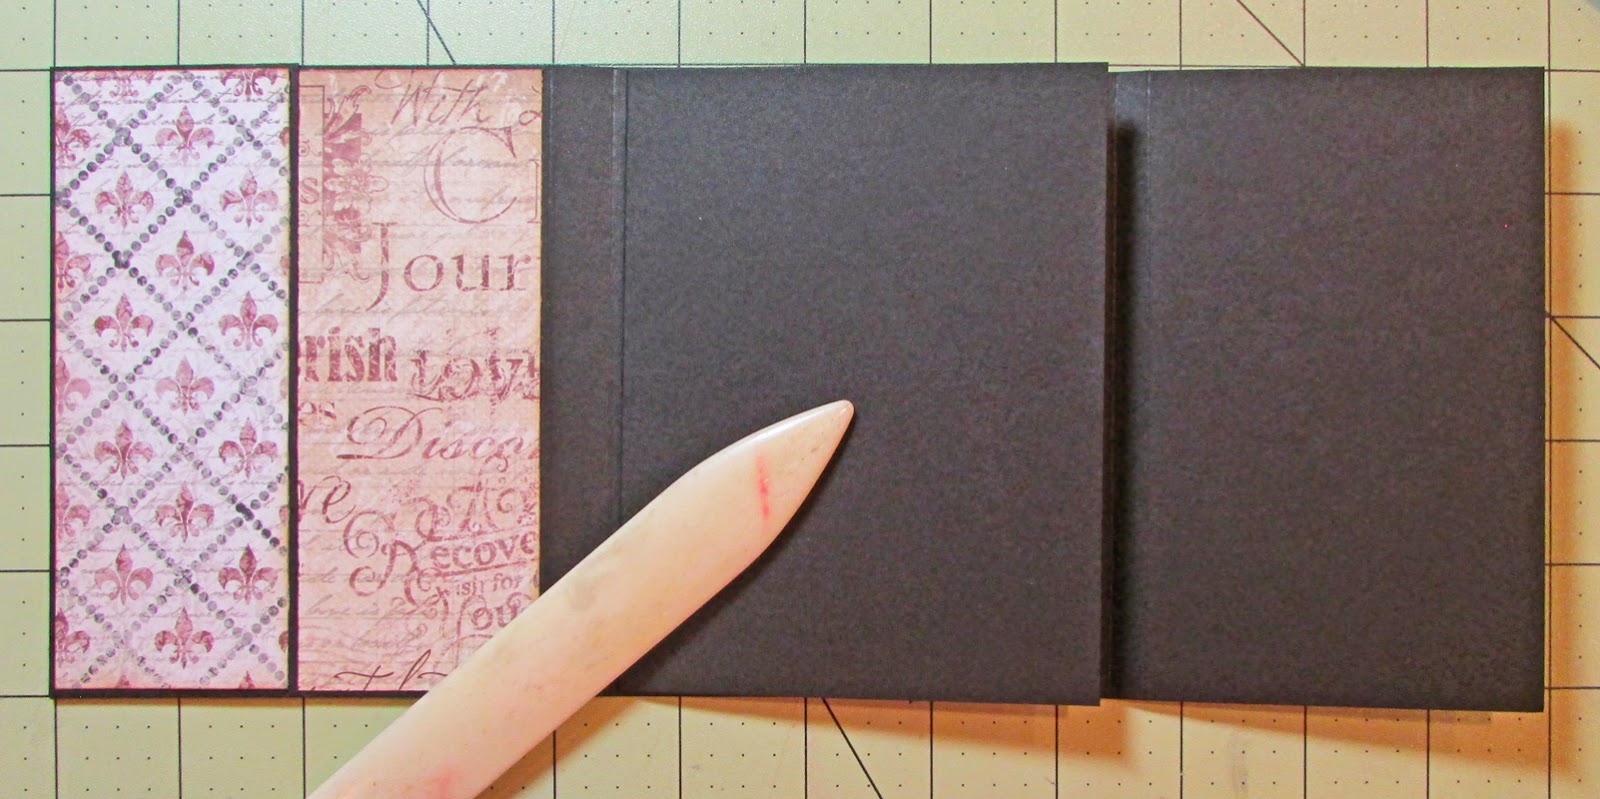
Trim Antiquity paper to 4 7/8 x 3 7/8" and attach to the leftmost panel.
Create a pocket from black cardstock cut to 5" x 2". Attach printed paper cut to 4 7/8" x 1 7/8" to the front of the pocket. Add double-sided tape to three sides of the back of the pocket and attach it to the left side of the first page as shown above. Create all the pockets for the album in this fashion.
Trim a piece of black cardstock to 4 7/8" x 7 1/2" and score at 3 3/4" on the long side. Fold on the score to create a "booklet."
Place adhesive on the back of the "booklet" and attach to the center panel of the album base.
Cut a piece of black cardstock to 6 7/8" x 3 3/4" and score at 2" on the long side. Orient the paper with the two-inch flap at the top as shown.
On the album base, open the booklet section and place the 2" flap on the bottom of the center panel so that the score line is even with the bottom of the booklet edge. Fold the flap up and close the left hand page of the booklet.
Cut Antiquity paper to 4 3/4" x 3 5/8" and attach to the front of the "booklet" flap. Create a pocket from black cardstock cut to 2" x 3 3/4". Attach the pocket to the bottom of the page. Cut printed paper to 1 7/8" x 3 5/8" and attach to the front of the pocket.
Open the booklet page and attach small, low-profile magnets to the left page and the folded flap as shown.
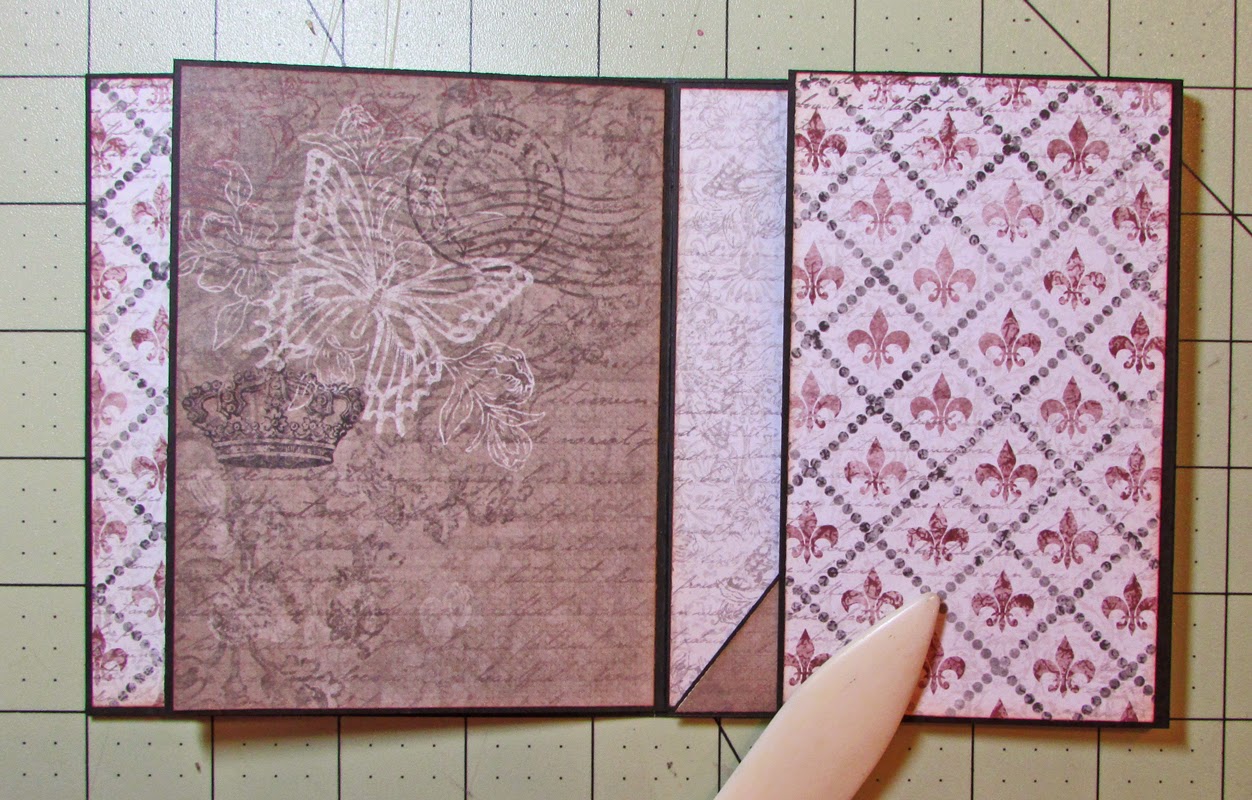
Trim paper to 4 3/4" x 3 5/8" and attach to the left "booklet" flap. Trim paper to 4 3/4" x 3 5/8" and attach to the middle flap, above the fold. To create a diagonal pocket, cut black cardstock to 4 3/4" x 3 5/8" and trim in half on the diagonal. Cut decorative paper slightly small and attach to the cardstock triangle. Add double-sided adhesive to the two outside edges to form a pocket.
Trim paper to 4 7/8" x 2 7/8" and attach to the rightmost panel.
Fold the center diagonal pocket panel down, and decorate the main center panel. Trim Antiquity paper to 4 7/8" x 3 3/4" and attach to the center panel. Create a pocket from black cardstock cut to 5" x 2". Cut printed paper for the pocket to 4 7/8" x 1 7/8". Cut paper for the lower flap to 4 3/4" x 3 5/8" (large butterfly print).
Fold the bottom flap up and the rightmost flap in toward the center. Trim Antiquity paper to 4 7/8" x 2 7/8" and attach to the outside of the last panel. Close the left booklet flap. If you use strong magnets, the flap will stay closed, with the small base flap sandwiched inside.
Open the album to the first "page." We will now add an extra page to the album. Cut black cardstock to 4 7/8" x 4". Score at 1/4" as shown. Fold on the score line and place double-sided adhesive on the back of the 1/4" section.
Place the extra page in the spine next to the first fold.
Trim Antiquity paper to 4 3/4" x 3 5/8" an attach to the extra page. Create a pocket from black cardstock cut to 2" x 3 3/4". Add printed paper to the pocket, cut to 1 2/8" x 3 5/8".
Close the album and add a magnet to the front cover, approximately 2 1/4" from the top and 1" from the right edge. (I decorate the cover last to prevent ruining any embellishments I plan to add.)
Trim paper to decorate the front and back covers and the spine. Cut paper for the covers to 4 7/8" x 3 7/8". Trim paper for the spine to
Create a latch for the album. Trim black cardstock to 1" x 4 1/4". Cover one side with printed paper cut to 7/8" x 4 1/8". Add a magnet to one inside edge of the cardstock strip. Line the magnet up with the hidden magnet on the album cover.
Wrap the paper latch to the back cover and glue in place.
It is time to decorate!
Decorate the cover of the
mini album by first stamping the flowers from the Botanical Rose Cling Stamp Set three times onto rose cardstock with black ink. Color the flowers with
chalk ink.
Use the Botanical Wings Die to cut out the flowers. Create the roses
using the directions in THIS tutorial. (The tutorial uses 5-petal flowers, but you can use the same technique with the 6-petal Botanical Rose flowers.) Create three roses, small, medium, and large. Glue the roses to the front of the
mini album in the lower left quadrant.
Stamp two sets of leaves from Delicate Asters Cling Stamp Set onto green cardstock with black ink. Color the leaves
with chalk ink and cut out with the Delicate Asters Die. Mist the leaves with
water, shape the leaves and set aside to dry. Glue the three leaves to the
flower arrangement as shown.
Stamp the Butterfly Medley Cling Stamp with black ink onto white cardstock. Color the largest butterfly image with chalk inks and cut out with the Butterfly Medley Die. Spray the back of the butterfly with water and shape. Allow to dry. Attach the butterfly to the flowers, bending the wings upward. Add glitter embellishment to the butterfly wings with a Wink of Stella black glitter pen.
Glue three rusty bells to the outside edges of the flower cluster.
Finish the album by trimming tags and journaling
blocks from the Antiquity, Celebrate the Journey, Once Upon a Time, and
Countryside Evening Paper Collections. Refer to the photos below to complete the mini album.
Make sure you visit the Heartfelt Creations Blog to see what the rest of the Design Team has created!
Heartfelt Creations Products Used:
Other products used:
Other ink: Ranger Distress Ink (Vintage Photo), ColorBox Fluid Chalk Ink (Warm Red, Dark Moss)
Cardstock: WorldWin (Smooth Black, Natural, Spring Green), Bazzill Basics (Rose)
Glitter pen: Wink of Stella (black)
Rusted Bells: Darice Rustic Accents
Magnets: Basic Grey Magnetic Discs (small magnets)
Tools: Sizzix Big Shot, Martha Stewart score board, hot glue gun
Adhesive: Scotch 3M tape, Scrapbook Adhesives by 3L 3D Foam Squares, Scor-tape, hot glue sticks


Gorgeous mini, Gloria! Thanks for sharing the step by step too! No one could ever accuse you of not sharing enough photos of "how it's done"!
ReplyDeleteAmazing mini album right up my alley! I will be bookmarking this wonderful tutorial!
ReplyDeleteGloria, your mini album is stunning! Love the earth tones you used, and all of the pockets and folds.
ReplyDeleteHello Gloria, I have just found Heartfelt Creations and love the papers, I'm in England so it is harder for me to get a hold of it but I have some coming which I'm so excited about. I can't wait to get to use them. I just love this album you have made and I think that maybe my first project using this fabulous paper as your album is fabulous, I love your work and thank you so much for the tutorial...
ReplyDeleteLove ~ Lady Anne xxx
Thanks for your sweet words Lady Anne. I hope you share your mini with me when you finish!
DeleteThis is a gorgeous mini. I love all the details, pockets, ok I love everything.
ReplyDeleteWow this is a gorgeous mini album ,thanks for the step by step tutorial on how you made it .
ReplyDeleteThank you so much for the fabulous tutorial!!! You made me believe That I can create one. Yours is absolutely gorgeous!!!
ReplyDeleteHi Gloria, Love this mini book so much...I am going to set time aside to make one for myself...others. Will share it when done...on the list. LOL Hugs
ReplyDeleteI was so looking forward to your post of your project, I was hoping you would have some details on how you made it and what a fantastic surprise! Great tutorial Gloria, very helpful and I have added this one to my list too (like I see Sussi did!). I must try it!
ReplyDeleteFantastic tutorial!!!! I have got to try one of these, this one is gorgeous!!
ReplyDeleteThis is wonderful and the tutorial is one of the best I have seen, this is going in my keeper file to do when I get around tutit! Thanks so much for sharing this beautiful album.
ReplyDeleteTwo mini albums in one week? Be still my heart! The design of this little beauty is magnificent! I love, love, love it! All those great pockets and fold outs...yummy! This is one of my all time fave paper collections, and I've used up almost every scrap, so you know I love the papers! The cover is divine....gorgeous flower and butterfly. And nobody, but nobody writes a tutorial better than you do! Thanks for taking the time to do this when I know you were having a rotten week. I am sooooo going to make one of these! Hugs!
ReplyDeleteStunning mini album, Gloria! That paper collection is gorgeous! Love all your folds and pockets! I too must add this tutorial to my list of "to do" items!
ReplyDeleteHugs,
Tracey