Give Thanks Home Decor Panel
If you are looking for the CutCardStock Tutorial, please click HERE.
Hello, Faithful Readers! It is my turn on the Gypsy Soul Laser Cuts Blog, and I have a mixed media project to share. Mixed media does not always have to be "messy" or "artistic," it just needs to contain a mix of media! I created a home decor piece for Thanksgiving with some traditional items mashed together with mixed media techniques!
The panel is slightly larger than 8" x 8" and will fit on an easel or into a shadow box frame. I love to make this sort of decor because I can change it out with each new holiday or season.
Let's get started!
Cut one piece of chipboard to 8" x 8". Trim solid paper or cardstock to 8" x 8" and attach the piece to the chipboard. I used a piece of Graphic 45 Safari Adventure 12x12 Patterns and Solids. The color was a perfect match for my color scheme!
Trim coordinating printed paper to 7 3/4" x 7 3/4" and attach it to the square panel. I used some of my G45 French Country stash of 12x12 paper. This paper is retired, so I have been hoarding some of it!
Remove the journaling blocks from the Botanical Journaling Blocks package. Using several colors of spray glitter mist, color all three pieces of chipboard and set it aside to dry. I used a combination of orange and gold mist (see the supply list below). My pieces looked like sparkly suede once they were dry!
To make sure the pieces dry flat, place them between layers of paper toweling and weigh them down with some heavy books. Handle the wet pieces carefully to avoid tearing the delicate, laser-cut edges.
Attach the largest Botanical Jornaling Block in a vertical orientation to the center of the 8" x 8" panel. Use a strong glue and a brayer to assure that the panel adheres completely.
Attach the middle-sized piece in a horizontal orientation to the square panel, making sure to place it at the extreme left edge and approximately 2" from the top edge.
Attach the smallest journaling block in a horizontal orientation to the square panel, making sure to place it at the extreme right edge and approximately 3" from the top edge. Make sure that the shapes "hang off" the edges of the main panel.
Double-mat a 5 1/4" x 4" image and use foam adhesive to attach it 1 14" from the top edge and 2 1/2" from the left edge of the square panel. I used a stamped image from Power Poppy (Feeling Fall) colored with Copics. You could use a pre-made image or a photo for your project.
I matted the image with G45 Safari Adventure 12x12 Patterns and Solids (rust) and G45 French Country 6x6 Patterns and Solids (green). I confess, I usually use cardstock to mat things, but the G45 solids are a perfect color match for their printed papers, making it a "no brainer" to use them!
From the Feathers Shape Set, select three of the small feathers. From the Months Word Set select "November." From the Wrought Iron Miniatures Set select one section, as shown, Cover each element with embossing ink and heat emboss with various metallic embossing powders and enamels. I selected powders that looked rusty and aged (see supply list below). Each item has a different texture, depending on which embossing powder or enamel I used.
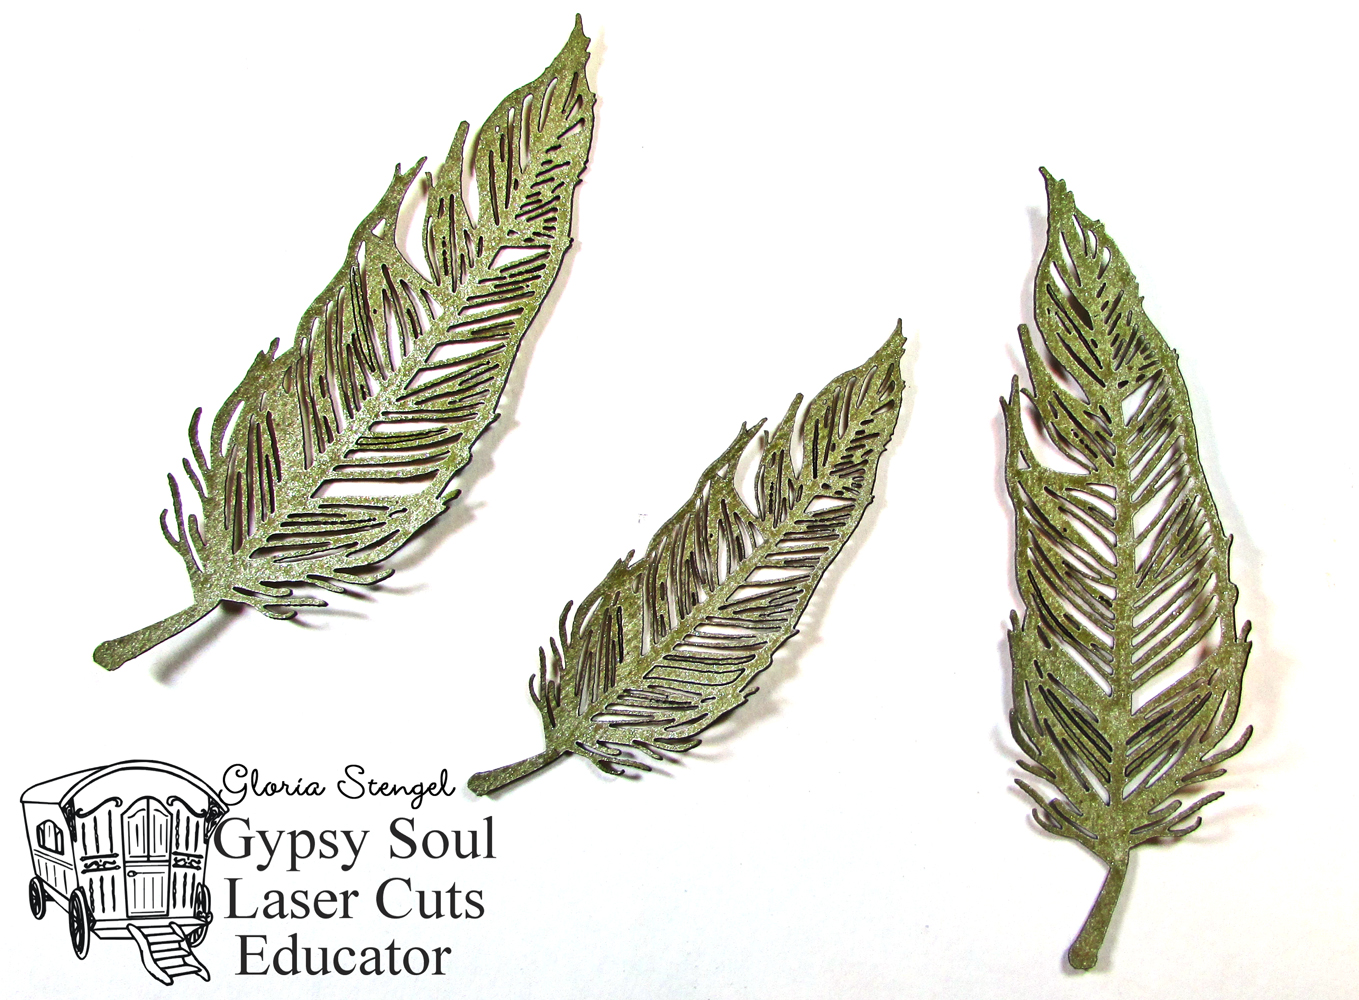
From the Feathers Shape Set, select three of the larger feathers and spray them with green glitter mist. Allow to dry, shaping the feathers slightly with your fingers.
Glue three of the feathers to the upper right corner of the image. Add a ribbon bow and some floral elements.
Glue a piece of the wrought iron fence to the upper left corner of the square panel. Glue the "November" chipboard to the left corner, overlapping the fence.
Glue another piece of fence to the lower left corner of the square panel. Glue three more feathers to the panel as shown, tucking the feathers under the left edge of the main image. Add some floral items as desired.
Thanks for looking!
Gypsy Soul Laser Cuts:
Botanical Journaling Blocks
Feathers Shape Set
Months Word Set (special order)
Wrought Iron Miniatures Set
Partner products:
Graphic 45 papers: Safari Adventures 12x12 Patterns and Solids, French Country 12 x12, French Country 6x6 Patterns and Solids
ColourArte: Radiant Rain Shimmering Mists (Persimmon, Spanish Moss)
Other:
Spray mist: Ranger Color Wash Wild Honey, Sunset Orange; Lindy's Stamp Gang Sea Grass Green; Dylusions Fresh Lime
Embossing powder and enamel: Stampendous Aged Bronze enamel; Lindy's Stamp Gang Oakleaf Olive, Byzantine Bronze, Reindeer Moss Green; Emerald Creek Oil Rubbed Bronze
Ink: Top Boss Watermark; Ranger Distress Old Paper, Memento Tuxedo Black
Markers: Copic
Cardstock: Hammermill digital white
Stamps: Power Poppy Feeling Fall, Olive and Oak Expanded
Die cuts: Elizabeth Craft Designs Stitched Rectangles
Flowers: Petaloo, Wild Orchid Crafts, floral picks
Ribbon: Really Reasonable Ribbon Pale Gold Taffeta
8x8 chipboard: WorldWin Papers
Adhesive: Scotch 3M ATG tape, Scrapbook Adhesives by 3L foam squares, 3M foam tape, hot glue, white glue


Beautiful ♥
ReplyDeleteWhat a beautiful piece Gloria!! I love your "wellies" and gorgeous Fall leaves! And your design with all the laser cut pieces is incredible!! Wow!
ReplyDeleteJust beautiful Gloria!!
ReplyDelete