Today, and I am sharing a fun, springtime wreath, all decked out with fairies! I had the Graphic 45 Secret Garden DCE on the desk, and decided to use a piece of that (much hoarded) paper as the background of my wreath!
I admit, making dimensional wreath projects is not in my main wheelhouse, but with the Gypsy Soul Laser Cuts chippies, it makes it pretty easy to take one on! I had a blast making my wreath and adding a tiny fairy hut, with some sweet fairies flitting around!
I depleted my stash of yellow flowers for this project, but it was worth it!
Let's get started!
We will be using the Wreath Rings Set - Medium Circle for our basic wreath shape. Set the other rings aside for other projects.
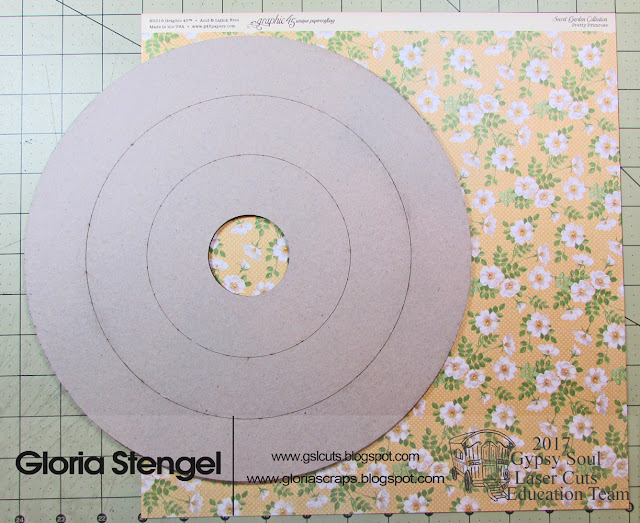
Brush one side of the wreath ring with matte gel medium and place it face down onto a piece of decorative paper (G45 Secret Garden Pretty Primrose). Use a brayer to smooth the paper. Set the project aside to allow the adhesive to dry.
Use a craft knife to cut round the inside and outside circles. Use sanding blocks to smooth any rough edges.
Prepare the pieces of the Mini House Shadow Box 2.
Assemble the house. Use white ink or paint to give the house a weathered look. I used a spray ink and a foam brush to paint my house.
Once the paint has dried, glue the house to the bottom right side of the wreath, as shown. I used hot glue to attach my little house. I also added a bit of support on the back of the house with a cardboard shim.
Use pigment inks to color the vines, fairy, and word art from the Scribble Frame Fairy set. Allow the ink to dry.
Glue the fairy frame to the top of the 3D house, as shown.
Add dew drops to a small glass bottle and glue the bottle to the inside of the house. Add a butterfly charm, as shown. Attach the word art to the upper left of the wreath. (I am not sure the correct name of the dew drop thingies, or where they came from...but you could put any small, sparkly stuff in your bottle!)
Use black ink to color two small fairies from the Garden Fairies - Small set. Allow the ink to dry. Glue one fairy to the top of the "H" and the other fairy to the bottom left of the scribble frame.
Use hot glue to attach yellow and white flowers, and green leaves, to the frame and the main wreath, as desired. Add yellow and green enamel dots, as desired.
Celebrate spring!
Gypsy Soul Laser Cuts:
Wreath Rings - Medium Circle
Mini House Shadow Box 2
Scribble Frame Fairy
Garden Fairies - Small
Other:
Paper: Graphic 45 Secret Garden DCE
Pigment ink Colorbox (moss green, turtle, pistachio, pepper, cocoa)
Spray ink: Dylusions White Linen
Enamel dots: Whimsy Stamps
Flowers and leaves: Petaloo, Prima, Maya Road, Wild Orchid Crafts
Spirals: Wild Orchid Crafts
Dew drops: Unknown/stash
Butterfly charm: Making Memories
Glass bottle: SKyBluePink
Adhesive: Liquitex matte gel, Ranger Multi-medium, Ranger Glossy Accents, hot glue


I'm not really a 'wreath' person (the actual reason is I don't like to put nail hole in the door's fresh paint!). But, you have made me change my opinion of 'theme' wreaths completely - your enchanted creation would look charming on my 'inside' front door - as the 'outside' front door would probably allow the weather to destroy it (New England winters, you know!). Spring, faeries, magical houses, magickal gatherings - all the things I adore in one simple (idea, not execution LOL) wreath.
ReplyDeleteYou're a true design muse!
Thanks, Tristan! I CAN put my wreath outside, as I live in so. CA, but...I also won't put a hole in the door and cannot find my wreath hanger thingie. I am sure it's packed with the Christmas decor! So, this little wreath must stay inside. ;)
DeleteSo very creative and so much attention to detail! Well done you!
ReplyDelete