
If you are looking for my Graphic 45 Voyage Beneath the Sea project, please click HERE.

Welcome to the Craft Hoarders Anonymous April 2016 Blog Hop! My blog is the first blog in the hop! After visiting me, hop over to Donna Idlet's Blog next! For the full list of Bloggers, see the list at the end of this post! Keep an eye out for Bloggers who are giving away Blog Candy!
Each month, I really do try to dig into the hoard and share something that uses up all the product I have collected over the years. This month, not only am I using up the hoard, but I made a project that has been "on the list" for over a decade!
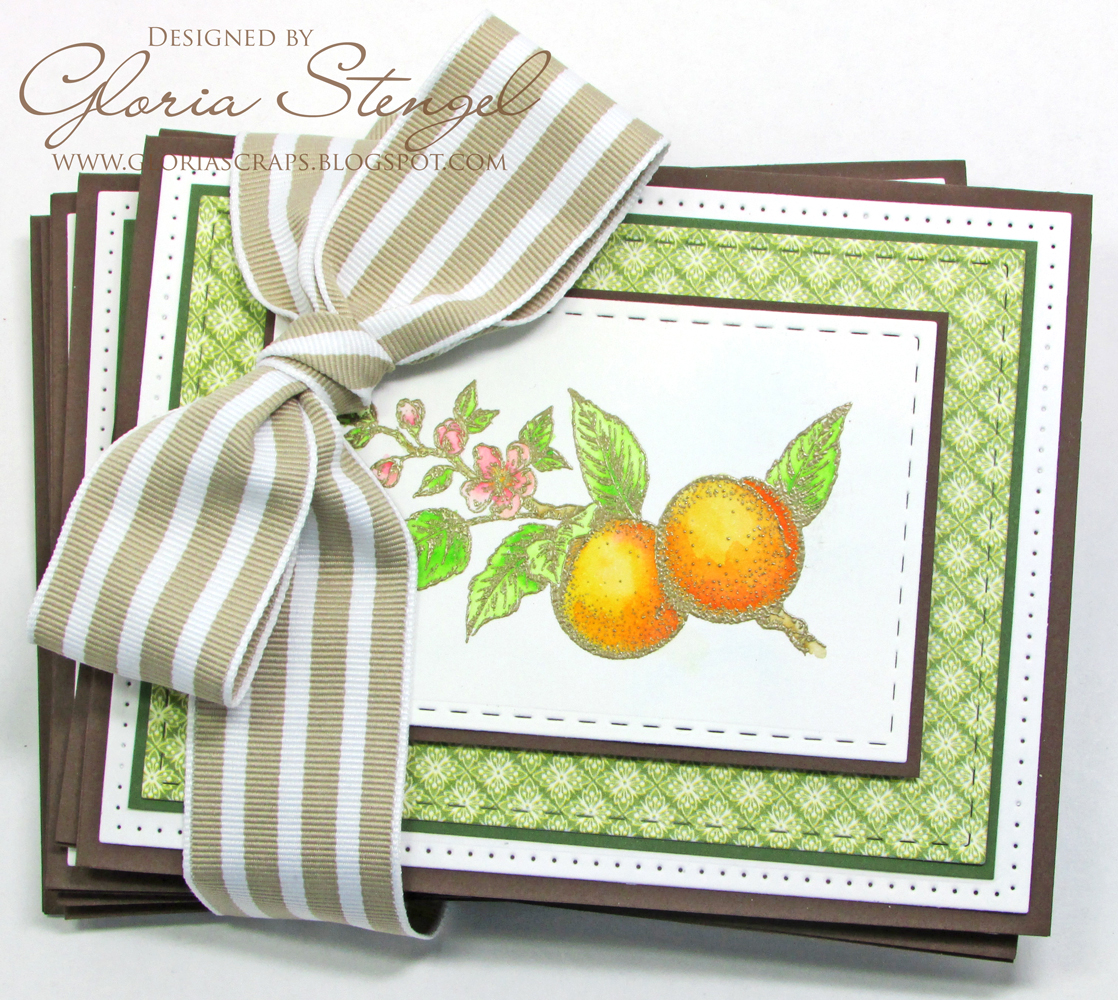
I created a gift set of six 4 1/4" x 5 1/2" cards...flat and easy to mail cards! The cards fit perfectly into a regular A2 envelope and require one stamp to mail. Hear the angels singing!

Each card has a different stamped image, hand colored by little ole me! The design is the same for each, using bits of left over paper from the hoard.

Now for the story portion of our post. I purchased these two stamp sets from Stampin' Up in approximately 2002 (Sun Ripened and Sun Ripened II). My original intent was NOT to collect fruit stamps! Honest! I wanted to make sets of fruit-themed cards to give as Christmas gifts. Our house was on the market that Christmas, so I never got around to making the cards. I have used the stamps a few times over the years, but I NEVER got around to making a card set with them. It just never happened. I have held onto them out of....fruity love for almost 15 years, people! They are wood mount stamps, hogging up space...but I love them!

My other dirty, little secret is my embossing powder bin. I have a clear shoe box-sized tote filled with embossing powder. I don't heat emboss very often, but, if I want to, I sure have the powders needed! I even have some custom blends! {It's a sickness, what can I say.}

To create my card set, I stamped each image with embossing ink and heat embossed with detail embossing powder. That just means that the powder is very fine, which is good for detailed images. I used antique gold powder as it looks a lot like brown, but has a rustic finish.

I colored each image with Zig Clean Color Markers and a water brush. I love that fine line between the saturated colors of Copics and the soft look of water coloring. Plus, these colored up super fast! You only need one or two colors and water to make the shades and blends!

Once the images were dry, I sponged the backgrounds with pale blue chalk ink. I used a "new to the hoard" set of rectangle die cut templates to cut out the images, which are each 2 1/2" x 3 3/4". Each template in the set has stitching or piercing around the edges.
I matted each image with dark brown cardstock, cut to 2 5/8" x 3 7/8". Since each image fit into the same size die template, each layer is the same size! Perfect for making several cards at once!

The base card is 4 1/4" x 5 1/2" and made from dark brown cardstock. I found a pack of 65# cardstock in my hoard, leftover from some project or another. This is pretty thin for making cards, but since I was doing a lot of layering, it was perfect!
I cut a white layer with the pierced rectangle from the die set (4" x 5 1/4"), I then used the stitched die to cut a selection of Graphic 45 paper. I found a bunch of green prints in the hoard that matched the leaves in the images! Each printed layer is 3 1/2" x 4 3/4" and matted with dark green cardstock (more of that super thin card) cut to 3 5/8" x 4 7/8".

Two of the cards are in the portrait format, but the measurements are the same.

I attached the images with foam tape to pop them up a bit, but they are still pretty low profile cards. Super easy to mail, unlike the cards I usually make. A set like this is perfect for a gift or to donate to my church since they fit into a standard envelope and take just one stamp.

For the inside of the cards, I cut more white paper with the pierced rectangle die. I stamped each panel with a sentiment in brown ink. I had a stamp set with 6-7 sentiments in the same font style, which were perfect for this card set!

And just like that, I have a set of fruit-themed cards! I kind of think they were worth the wait!
Thanks for visiting this month! I hope you are inspired to make something that has long been on your "to do" list!
Now hop on to Donna Idlet's Blog!
Make sure you visit all the ladies in the group. They have some AMAZING projects to share.
Craft Hoarders Anonymous Blog Hop List:
Gloria Stengel (you are here)
Donna Idlet
Pam Bray
Karen Zueger-Brownell
Glenda Brooks
Teresa Horner
Barbara Rankin
Tracey Sabella
Marisa Job
Debbie Seyer
Wendi Robinson

Designer paper: Graphic 45 Children's Hour 8x8 November Collective, October Collective, December Montage; Home Sweet Home 6x6, Time to Flourish 6x6
Ink: Tsukineko tinted embossing ink, Colorbox Chalk French Blue, Memento Rich Cocoa
Markers: Zig Clean Color
Water brush: Zig
Stamps: Stampin' Up Sun Ripened, Sun Ripened II; Verve Floral Notes
Embossing powder: Stampendous Ultra Detail Opaque Gold
Dies: Elizabeth Craft Design Stitched Rectangles
Adhesive: Scotch 3M ATG tape, Scrapbook Adhesives by 3L 3D Foam Squares
Just amazing..your stamping and color work are perfect!! xo
ReplyDeletewhat lovely images and your coloring is simply perfect! I love the gorgeous green papers you chose to work with!
ReplyDeletestunning batch of cards and just love all your layers!!!!
ReplyDeleteVery nice! Love the Summer Country feel of these cards!
ReplyDelete