Craft Hoarders Anonymous January 2017 Blog Hop

Welcome to the Craft Hoarders Anonymous January 2017 Blog Hop! Your favorite Hoarders are back! We will be hopping once per quarter during 2017, which means, check for the hop again in April, July, and October. All of the participating designers are offering prizes, so make sure you check each blog!
I am offering this prize (ships to contiguous USA only):
The prize pack includes: 12x12 Stampin' Up scrapbook kit, 12x12 Heartfelt Creations Cascading Fuchsia Paper Collection, 6x12 Making Memories kit and metal photo anchors, three Heartfelt Creations Everyday Heroes stamp sets, Stampin' Up basic black ink pad, Tim Holtz Traveler stencil, and a selection of 6x6 papers.The Heartfelt Creations paper pad was bent in the mail, but not torn and needs a new home. The stamp sets were used once, if at all, when I was on the team, and also need a new home. All other product is BRAND new.
For a chance to win, just post a comment to this post and I will do a random draw on Januray 19th!
Let's get started on the Hoarders post! Our theme this month is Winter, New Year’s, Calendar ideas, Valentine’s Day, or Love/Anniversary.
My blog is the first blog in the hop! After visiting me, hop over to Tracey Sabella's Blog next! For the full list of Bloggers, see the list at the end of this post!
I hoard the Graphic 45 calendar collections (Place in Time, Time to Flourish, Children's Hour), which gave me the idea to create a monthly calendar display along with a matching photo folio for each month of the year. In 2016, I managed to make three calendars and one folio. (Not an auspicious start!) My one resolution for 2017 is to work on my calendar projects each month!
In fact, I will share a calendar page and folio the third Sunday of each month! I will begin the series on January 15th! For those who want to create with me, you can work on your own storage box over the next few weeks!
I created this large, 9" x 9" x 9" chipboard storage box to hold the series of calendar-themed home decor layouts and photo folios. I made the box from sheets of chipboard (see the tutorial below). I also made a lid, and added handles to the sides of the box.
I chose Graphic 45 Raining Cats and Dogs paper for the box and lid. Why? Because I had HOARDED a 25-pack of each paper in the collection! I had planned to teach a class using the papers, but the class fell through, leaving me with...hoarded paper!
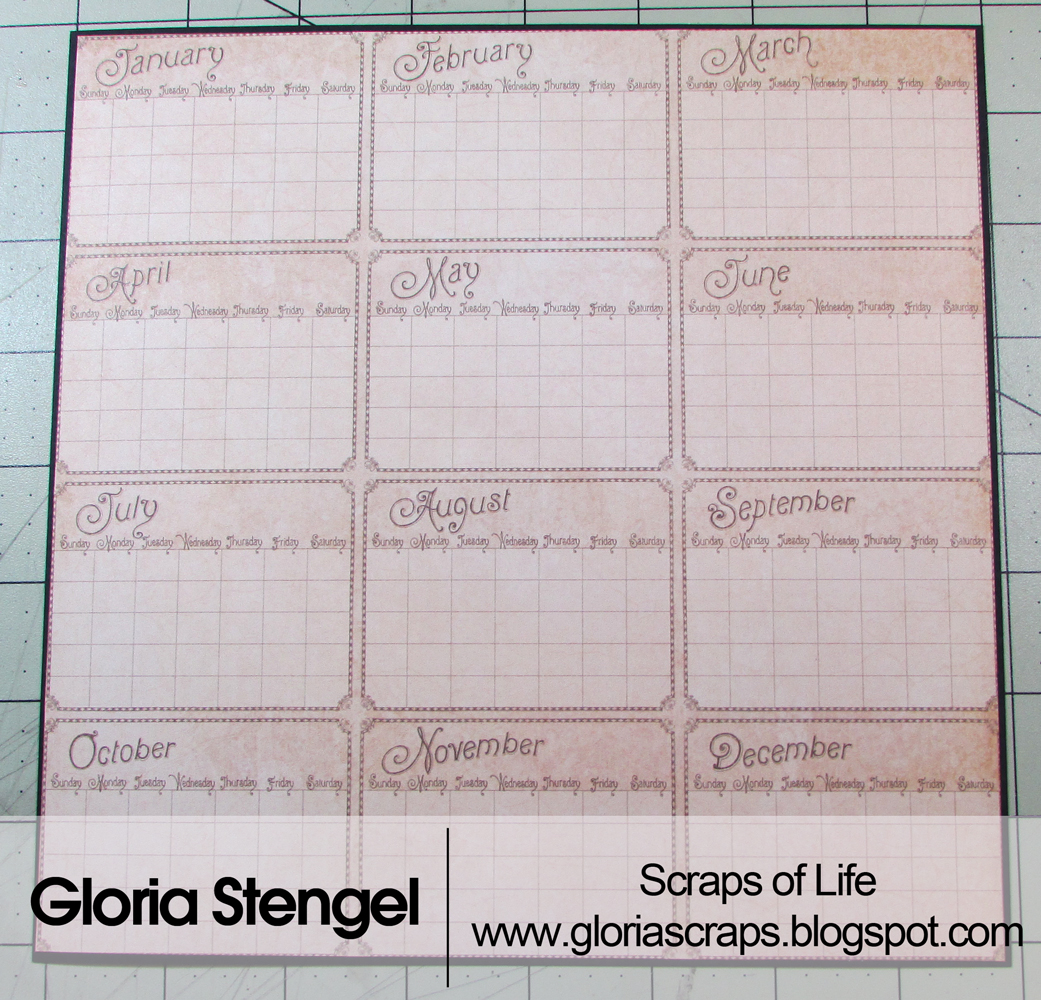
For the box lid, I used the Place in Time mini calendar page (this is a retired item, but it is part of the 8x8 pad if you are looking to find it on Ebay or somewhere). If you cannot find this paper in your hoard, you can find free printable calendars all over the Internet. Just Google it.
I trimmed the month strips from G45 Place in Time, Time to Flourish, Children's Hour, using the colors found in the Raining Cats and Dogs papers.
I added some chipboard from the Children's Hour set (I have 2 of each HOARDED away). I topped it all off with a G45 clock key and a loopy twine bow.
Lift the lid off the box, and you see a nice, big storage space for your pages. You can fit pages up to slightly smaller than 9" x 9". My pages and folios are approximately 8 1/4" x 8 1/4". I only have a few finished, so I am storing them flat for now, but once I have all 24 finished, they will sit upright so that I can flip through them easily.
So far, I have made the January, August, and October calendar pages, and finished the March folio. I will re-post those tutorials on their given months. For example, on January 15th, I will re-post the January calendar and create a NEW January folio tutorial.
Now, let's make the storage box! All supplies are listed at the end of the post. We are creating a 9" x 9" x 9" box. If you plan to store 12x12 layouts, you will need to adjust your measurements.
I use heavy weight chipboard. You can buy this in packs on Amazon.
Cut five (5) chipboard panels to 9" x 9".
Cut one (1) chipboard panel to 9 1/8" x 9 1/8" (for the lid). Mark this slightly larger piece so that you don't mix it up with the panels you cut for the box.
Cut four (4) chipboard panels 2" x 9 1/8 " for the lid.
Locate strong washi tape or book binding tape. You need something sturdy but a bit flexible.I used Graphic 45 washi tape to construct my box.
Lay out the pieces of the box, base and four sides. and attach them together with layers of washi tape. You will have a large cross of chipboard when you finish attaching the pieces.
Gently bend the sides up, attaching the corners together with washi tape. Wrap extra tape around the box.
Repeat the process with the 9 1/8" x 9 1/8" lid top and the 2" x 9 1/8" lid strips. I used the G45 gold washi tape for the lid. (Because the black roll fell on the floor and the cat stole it!) The lid should fit perfectly onto the box.
Use black gesso or black acrylic paint to cover all exposed edges. Allow the paint to dry.
Flip the box so that the right-hand side is facing up. Measure 4 1/2" from the top of the box and 3 1/2" from the left edge and make a hole. Measure 4 1/2" down and 5 1/2" from the left and make a second hole. This is to mark where the handles will be attached.
Repeat the process with the left-hand side.
Cover the inside of the box with paper. Cut five (5) pieces of G45 Raining Cats and Dogs Pitter-patter paper to 8 7/8" x 8 7/8". Sponge the edges with black ink. (I forgot this step, so I have a few white edges showing! GASP!)
Glue the check pattern to the four side surfaces. Glue the umbrella pattern to the bottom of the box.
Use a paper piercing tool to mark the holes for the box handles.
Cover the outside of the box with paper. Cut four (4) pieces of G45 Raining Cats and Dogs Cat's Meow paper to 8 7/8" x 8 7/8". Cut one (1) piece of Raining Cats and Dogs Animal House paper to 8 7/8" x 8 7/8". Sponge the edges with black ink.
Attach the four red floral print pieces to the sides of the box. Attach the black floral piece to the bottom of the box (not shown).
Use a paper piercing tool to mark the holes for the box handles.
Cover the inside of the box lid with paper. Cut one (1) piece of G45 Raining Cats and Dogs Animal House paper to 9" x 9". Sponge the edges with black ink and attach the black floral pattern to inside of the lid.
Cut four (4) pieces Raining Cats and Dogs Pitter-patter paper to 1 7/8" x 9" and sponge the edges with black ink. Glue to the sides of the lid.
Cover the outside of the box lid with paper. Cut one (1) piece of G45 Raining Cats and Dogs Playful Pals (black dot) paper to 9" x 9". Sponge the edges with black ink and attach the paper to the top of the lid.
Cut four (4) pieces Raining Cats and Dogs Puppy Love (plaid) paper to 1 7/8" x 9" and sponge the edges with black ink. Glue to the sides of the lid.
Cut Kraft-tex (found on Amazon) into two pieces 1" x 4". Round the corners.
Measure in from each end 3/4" and 1/2" from the top edge. Make two holes for brads, as shown. Place the decorative brads through the holes and secure on the inside of the box.
Place a dot of glue under each edge of the handle for extra stability.
Trim two scraps of Pitter-patter paper and attach to the inside of the box to cover the exposed brad fastenings.
The box assembly is finished! Now, let's decorate the lid!
Trim chipboard to slightly smaller than 8" x 8". Cut black cardstock to 8" x 8" and attach to the chipboard. Trim G45 Place in Time mini calendar paper to slightly smaller than 8" x 8" and attach to the black cardstock.
From G45 Place in Time, Time to Flourish, and Children's Hour papers, trim the month labels. For my decoration, I trimmed January, September, and December from Time to Flourish; February, March, and July from Place in Time; and the rest of the months from Children's Hour. I chose month strips that were similar in color to the paper I chose for the outside of the box.
Glue the month strips in a fan shape and attach to the right side of the panel as shown.
From Children's Hour chipboard, select the "Memories" tab, the mom reading tag, a small flower circle, and the blue button. Glue the chipboard onto the panel as shown.
Punch a circle from some scrap paper and glue it behind the opening of a G45 shabby metal clock key. Add the key to the center of your fan shape.
Tie a loopy bow from twine and glue to the chipboard button.
Use strong adhesive to attach the panel to the top of your box lid.
Thanks for visiting this month! I hope you are inspired to make something fun with some of your hoard! Make sure to come back on January 15th for the start of the calendar series.
Now hop on to Tracey Sabella's Blog!
Make sure you visit all the ladies in the group. They have some AMAZING projects to share. and there is blog candy to be won! Don't forget to leave a comment for your chance to win my prize! The prize draw will take place on January 19th!
Craft Hoarders Anonymous Blog Hop List:
Gloria Stengel (you are here)
Tracey Sabella
Pam Bray
Bonnie Garby
Teresa Horner
Barbara Rankin
Donna Idlet
Marisa Job
The Hoarders will be back again in April with our next hop!
Designer paper: Graphic 45 (8x8 and 12x12) Place in Time, Time to Flourish, Children's Hour; 12x12 Raining Cats and Dogs
Decorative chipboard: Graphic 45 Children's Hour
Metal clock key: Graphic 45 Shabby Chic Metal Clock Keys
Chipboard: WorldWin Papers heavy weight
Kraft-tex: C&T Publishing
Decorative brads: hoarded item
Adhesive: Scotch 3M ATG tape runner, foam tape, wet glue, hot glue


Wow...this is gorgeous! Thanks for the great tutorial!
ReplyDeleteGloria! This calendar box is gorgeous. I love all the details you put into the box! Great tutorial too.
ReplyDeleteBeautiful! I do care packages and this has given me ideas.
ReplyDeleteWhat a really stunning box this is! I also appreciate the idea of using washi for construction - I always make paper strip 'hinges' and scor-tape them - I never even thought about using washi tape which would be very flexible. Thanks!
ReplyDelete...and thanks for the chance to win that awesome prize package - wow!
Tristan, I usually use tyvek (spelling?) but could not find my envelopes, so I just used the washi. I have gobs and gobs of washi. LOL
DeleteWhat an awesome box. As usual the tutorial is excellent. Thanks for letting us help you dehoard. 😀😀😀
ReplyDeleteLove it, beautiful calendar box and great inspiration.
ReplyDeleteGloria, I love this storage box idea! Your projects are always beautiful and your instructions are spot on. Thanks for sharing!
ReplyDeleteI love that beautiful storage box.
ReplyDeleteI had to share this blog hop with my FB fanpage, I hope you don't mind! Thank you for the idea - and the directions!!!!
ReplyDeleteShare away! Thanks for stopping by!
DeleteThanks for sharing. The box is beautiful.
ReplyDeleteThis is lovely! I really like how you decorated the lid with the strips of the different months.
ReplyDeleteThis would be a perfect place to store family events and birthday cards.. Love your box!
ReplyDeleteWOW, can't think of another thing to say. This is completely amazing.
ReplyDeleteI just love your tutorials. Not only are you crazy talented, you are also an excellent teacher. I learn so much from you. Thank you so much!
ReplyDeleteKatie, thanks so much for the sweet comment. I love to teach, and it is nice when someone gives me feedback on how I am doing! ;)
DeleteYour art is absolutely gorgeous as always, Gloria. I'm so glad I found the hop and I look forward to seeing all the great inspiration.
ReplyDeleteBlessings,
Karen Letchworth
Fantastic box...I didn't realize it could be so easy to make a box...WASHI TAPE...love it. Thank you for sharing!
ReplyDeleteYour projects are always impressive but I can't believe you even made the box from scratch, wow!! Love everything about this, but especially the creative way you used the month strips to decorate the lid.
ReplyDeleteYour comment made me laugh! Making stuff from scratch is not my "thing" but every now and then the Yankee engineer in me takes over! hee hee
DeleteYour Graphic 45 project is amazing. Thanks for sharing the info and pictures. Thanks for being part of the hop and your fantastic prize.
ReplyDeleteLove this pretty storage box! I'd love to make one to keep my washi tapes in!
ReplyDeleteI'm just in awe of your beautiful box. What a fabulous idea. I'm going to have to give it a try. I'm a paper hoarder and I have so much paper. Thanks for sharing all the details.
ReplyDeleteWOW! Awesome creations. I need to get back into making album. I did not make any last year.
ReplyDeletenatgodfrey4@gmail.com
I cannot wait to make one of these - your instructions rock! Thank you!
ReplyDeleteI am amazed and delighted with your fabulous project! I love that you listed out your instructions and have pinned them onto my specific Graphic 45 projects board! You are so talented and am so appreciative of all the work you show us!! Am delighted with you New Year's blog hop!!
ReplyDeleteThanks so much! I hope you get a chance to make this box. It really is easy to do!
DeleteYour project is absolutely beautiful! Thank you for sharing your instructions. They are very helpful.
ReplyDeleteOH, I just adore your beautiful box, Gloria! I always enjoy your work so much and am super inspired by you as well!!! Thanks for sharing this on your FB today! Now I know what I'm off to do...hop!!! Wishing you a wonderful weekend! Hugs!
ReplyDeleteHugs right back, my friend!
DeleteWow--this is fabulous. Love the papers you used.
ReplyDeleteWhat a beautiful box!
ReplyDeleteBeautiful box! I see a new project in my future.
ReplyDeleteway cool project!! LOVE the way you made the box.
ReplyDeleteI cannot believe this is paper! Love the idea of using washi. Very clever. Thank you for inspiring!
ReplyDeleteYour cards and projects are always amazing Gloria. Thanks for sharing your talents with us.
ReplyDeleteGloria - this is pure genius!! Love it!
ReplyDeleteHappy New Year Gloria ! This is an awesome idea; you always no how to mix those Graphic 45 prints for a fabulous projects :) <3
ReplyDeleteOh! Wow! This is just gorgeous! Thanks for the tutorial! Happy New Year!
ReplyDeleteLove this project! Beautiful!
ReplyDeleteThis box is as pretty inside as it is outside. The different papers coordinate so well, even though they're from more than one collection. Thank you for the tutorial that makes it look "almost" do-able!!
ReplyDeleteYour box is a delight! I'm impressed that you started it from scratch!! I tend to just re-cover boxes. G45 papers are 'hoard enablers'!! I have a hard time deciding which side of the page to use. lol! I would love to adopt your wonderful Heartfelt, SU, and other goodies into my home! : )
ReplyDeleteWow, just amazing.Thanks for sharing.
ReplyDeleteLove this! Such a great idea 💡!
ReplyDeleteWhat a gorgeous project! Now I know what I'm going to do with my Raining Cats & Dogs collection. Thank you so much for sharing!
ReplyDeleteReally enjoyed seeing your box and going thru the how to. I love the creativity!
ReplyDeleteThe colors you used were great as well. I love black and white and bold colors.
I think I could make this box! I will use what I have of Graphic 45! Thank you!
ReplyDeleteWhat a great start and your tutorial makes the box look really easy to construct. So how much black tape did you find lying around the house before you finally got the roll of tape back from the cat!!?? Or did the clever kitty hide it from you like mine does since my kitty is a hoarder too!!
ReplyDeleteGloria, I always rely on you for your great skill in combining paper combinations on cards! Now, I'm going to follow your wonderful and detailed directions for a fabulous box for journal pages for the start of a new year! I've made up my mind I'm going to craft something almost every day and the box will be a great start in January! Thanks a bunch for a lovely and inspired start to my new year. And thanks for the chance at a great prize. Happy New Year!
ReplyDeleteHi Gloria, this is gorgeous and just what I need, thanks so much for the tutorial, and also a chance to win a lovely prize. xxxx
ReplyDeleteBeautiful box and tfs the tutorial.
ReplyDeleteLove the box. Can't wait for the months.
ReplyDeleteWhat a wonderful project!
ReplyDeleteLovely. This is a great tutorial. Thanks
ReplyDeletejust found this wonderful site, just in time for this blog hop. so excited to see what others have to share. looks like i will be doing less around the house today :)
ReplyDeleteWOW what a great creation! I often lack inspiration, so your tutorial is a good gideline for me! Now I have to get the Graphic 45 calendar collections / that, no doubt, will be the first challence for me. Again, thank you for this amazing box, cannot wait to find the papers and get started! Please keep on making this kind of creations for all of us, sooooo grateful!
ReplyDeleteI love the box!! Can't wait to make one.
ReplyDeleteI love those papers. I have hoarded a few of those myself!
ReplyDeleteHi Gloria,
ReplyDeleteSo glad I stumbled onto your blog. Great tutorial, easy to follow and understand. Can't wait to see more.
Did you ever get your tape back? ��
This is beautiful!! I may have to come back for your other tutorials. Love the project idea.
ReplyDeleteSo gorgeous, Gloria!! Love how you decorated your lid!! ~ Blessings
ReplyDeleteWow! So beautiful, AND practical--a wonderful make with so many gorgeous details!
ReplyDelete:)
What a beautiful project! i love this idea and I think I could actually make it. Thank you for the all the photos and details of how you created it, those really help me. I love all the months you already have created, just gorgeous works of art! you have inspired me! thanks for the chance to win as well!
ReplyDelete~Ginny~
How clever to create something so lovely and so practical with your hoarded stash! You've given me a great idea of how to use some of my own paper that's been waiting for the right project. Thanks so much for sharing it. I look forward to the various monthly designs.
ReplyDeleteOh. My. Goodness. This is astounding! You know I love all things G$%, especially all things G45 made by Gloria and this is over the moon wonderful. I am just going to have to make this. Thank you sooooooooo much, my friend!
ReplyDeleteThis is a beautiful box. Thank you for sharing the tutorial.
ReplyDeleteI have plans to make this box. So, if I be of help to you to get rid of some Raining Cats and Dogs paper, just let me know hihihihi Love your work and following the monthly calender blog sao this box will be a fantastic storage! All the best Mieke
ReplyDelete