
Challenge #22 Have a
Nice Trip!
Many of us travel around the holidays, so let's celebrate
our adventures! Dig into your hoard and find some items that are vacation or
travel themed. Do you have a hoard of cruise ship ephemera? Do you have a box
of transportation stamps? Do you have a stash of camping themed papers? Or
piles of Disney embellishments? Show them off! Create a vacation or travel
themed project for us!
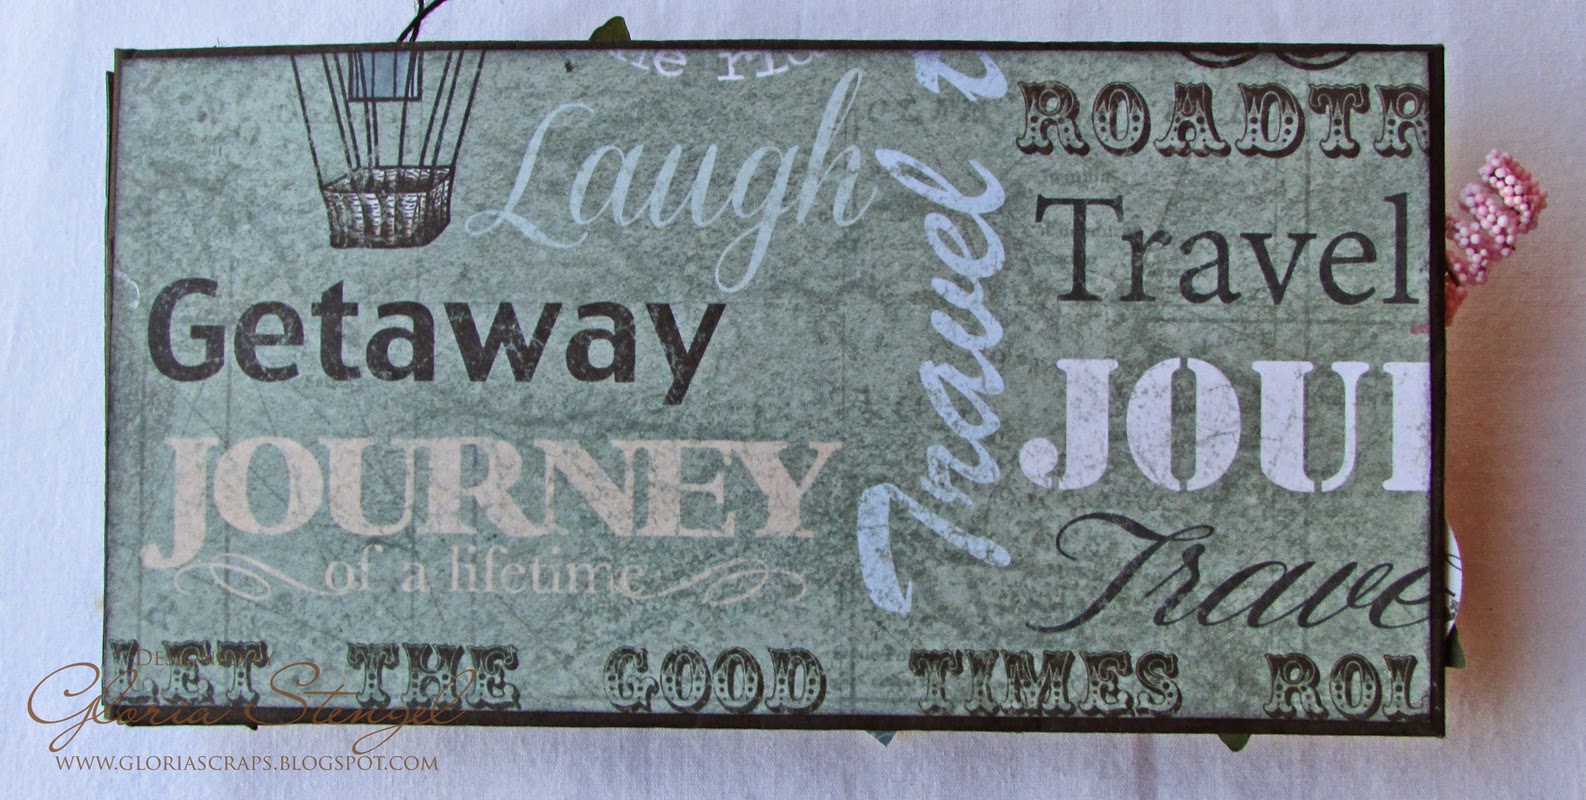
I have created a lot of travel themed projects over the years, so I was a bit stumped at first about what to make. But I saw a little paper bag mini album on Pinterest. I have no idea who "invented" these, but the first one I saw was made by Stef Miller. I thought, ok I will make one of those guys! I have a huge hoarded stash of paper bags in all sizes! Here is how mine turned out!

This album is approximately 3 1/2" x 7" and just a simple, quick and easy project! I spent a lot of time on choosing my papers and decorating the front, but all in all, it is not a "worky" project.

Here is a side view. I just adore how this turned out. It is perfect to add a few photos and some journaling. You can change up the theme and give this a a birthday "card."

I used mostly Heartfelt Creations papers. I love the Once Upon a Time and Celebrate the Journey collections. They are stunning! I also added a tiny bit of Graphic 45 Come Away With Me. I tucked a few images from the G45 collection under the Journey ticket. {Yes, I have a ton of hoarded paper! It makes for a serious storage issue!}

I also have a tiny issue with hoarded flowers. Just a tiny.....issue...

I used some Spellbinders and Heartfelt Creations dies to cut out my circles and tags.
I bet you want to know how I made this guy, right? Well, here goes!

You need two black treat bags, approximately 3 1/2" x 6 3/4". I purchased these at Michael's in the gift wrap selection. Every time I go there, I look for these and purchase them in kraft, white, and black. They have lots of colors, but black is almost always out of stock, so if you see them, grab them!
Lay Bag #1 so that the bottom fold is to the left. Score Bag #2 at 1 1/2" and 2" from the bag opening. Score lightly, as you will GENTLY fold the bag to make the right-hand "spine."

Place some double-stick tape on the back of the opening of Bag #2. Slide Bag #2 into the opening of Bag #1, up to the first score line. Use a circle die or punch to create a cut out tab into Bag #1 as shown.

Gently fold the bag on the score lines. The opening of Bag #2 will come just flush with the end part of Bag #1. We will tuck the bag under the flap to form a closure.

I needed to add a bit more to my bag book, so I created a flip page from some black cardstock. Cut black cardstock to 3 7/16" x 5". Score on the short edge at 1". Place double-stick tape on the small flap.


You may need to add a piece of decorative paper to the cover just to make sure that it will tuck snugly under the flap of Bag #1. Here is the cover before I added the flowers and other items.

I decorated the "flap" of the cover with paper and flowers. With the cover open, Bag #1 becomes the fist page, and it is also a pocket page.

I tucked a few tags and journaling spots into my bag pocket.

To make the larger tag, I cut down a Graphic 45 regular tag, then covered it with paper.

The next page is the cardstock flap that I made. I used foam squares to pop the clock image off and act as a tag holder.

I used Heartfelt Creations Luggage and Tags die to cut the tags.

I created another tag holder by popping the circle and mini tag with foam squares.

I love how this little page turned out! {yes, I think I am soooo clever!}

The last page is actually Bag #2. The bag bottom creates a flap, which I used as a journaling spot holder.

This paper is just beautiful! I love the shabby pastels with dark brown and black accents.

Here is a peeky at the two journaling spots.
The back is just plain. I trimmed one piece of paper to cover the back of Bag #1.
I hope you enjoyed this little project. It is a cute and easy project that you can make in a few hours.
Remember, LINK your project up using the Link Tool on the Craft Hoarders Anonymous Challenge Blog.

Make sure you visit the Craft Hoarders Anonymous Design Team and check out what they have to share!
Amber Milone
Christy Butters
Debbie Seyer
Donna Idlet
Ginny Nemchak
Pam Bray (on vacation)
Wendi Robinson
One talented participant will receive this prize donated by Spellbinders.

Paper bags: Michael's crafts
Designer paper: Heartfelt Creations Once Upon a Time, Celebrate the Journey; Graphic 45 Come Away With Me
Die templates: Spellbinders Nestabilities Standard Circles Large, Standard Circles Small; Heartfelt Creations Luggage and Tags, Classic Leaf
Cardstock: Worldwin Black
Stamps: Heartfelt Creations Open Leaf PreCut Set
Large tag: Graphic 45 Regular Tag Album, black
Screw-top Brad: Skyblue Pink
Ink: Ranger Distress Vintage Photo, Black Soot
Flowers: Prima, Wild Orchid Crafts
Adhesive: Scotch 3M ATG tape; Scrapbook Adhesives by 3L 3D Foam Squares; Scor-tape; Scrap Perfect Best Glue Ever
Fantastic!!!! I have got to try this.............TFS!
ReplyDeleteOh, I do, I do love this! It's a great design to begin with, but then you went and made it so "purty" with all those lovely papers and images. I'm bookmarking this page and pinning! Fabby!
ReplyDeleteOhmygoodness, Gloria, this mini is so very beautiful! I love those yummy papers and the way you brought everything together. Just gorgeous!! Thanks for the tutorial.
ReplyDeleteSo beautiful Gloria, I love this and will have to try it!! I will miss you but this is not goodbye my friend!! xoxo
ReplyDeleteLOVE your amazing bag booklet, Gloria - so beautifully coordinated, with lovely design elements and featuring such fun images! Sigh - beautiful! hugs, de
ReplyDeleteI love this! Just so beautiful and so very creative! I'm beginning to find I actually do love these little mini albums!
ReplyDeleteBeautiful, This is such a lovely keepsake! The paper line and the colors are so delicate and feminine. Loved it.
ReplyDeletestunning project, and thank you for the tutorial
ReplyDeleteHey, Rock Star!!! Wowza, what an amazing project!!! You are awesome, girl! Miss ya! HUGS!!!!!
ReplyDeleteThis project looks beautiful with amazing papers!
ReplyDeleteWhat an amazing creation! So many beautiful details!
ReplyDeleteWell, you are so clever. I've never seen a paper bag mini made this way before. Now I have to try one. Love how gorgeous yours came out with those beautiful papers, flowers & ribbons.
ReplyDeleteOh Wow that is just absolutely stunning!!!
ReplyDeleteMaravilhoso........
ReplyDeleteWow! This little paper bag mini turned out so pretty. I love the design paper you used and the flowers. Great idea on adding the flap and tags. I enjoyed being a Guest Designer at Craft Hoarders Anonymous and visiting all the DT blogs and creations. :D
ReplyDeleteDeborah xxx
Love this Gloria! This makes me want to drop every thing and get into making this!
ReplyDeleteWaouh!!!!!! good morning , beautiful, beautiful, is absolutely, splendid. cheer. a very soon. Michèle in french
ReplyDelete