

Good morning, Blogger Peeps! I have the amazing honor of being one of the featured Graphic 45 Designers in the Spellbinders' Summer Road Trip Partner Blog Hop! Spellbinders is featuring the Spellbinders Sapphire Mini Die Cutting Machine and dies, sold ONLY at Jo-Ann Craft Stores and online at Joann.com!
For this hop there will be 3 daily winners chosen and 1 Grand Prize winner! The daily winners will receive the featured product from each of the companies featured on that day! To see the Blog Hop List, scroll to the end of this post. To participate in today's Graphic 45 Give Away, please click THIS LINK.
I was given the Spellbinders Sapphire Numbers and Letters One die templates set and the Fancy Corner set to work with, but this little machine can cut thin dies up to 2 1/4" wide! I decided to use the Graphic 45 Raining Cats and Dogs Collection for my project, which is also available at Joann.com right now!

I decided to create a little mini album from two paper bags...and to make it a brag book for my cats! This album is approximately 3 1/2" x 7" and is adorable in a black, red, and teal color scheme!

Here is a another view, with the cover "untucked." I just adore how this turned out. It is perfect for adding a few photos and some journaling. This is the sort of project that enables you to change up the theme and use any papers or colors. I love the Spellbinders Sapphire letters that I used to spell out my album title. The capital "M" is approximately 1/2" tall, making these the perfect size for cards, mini albums, and other small projects.

The gorgeous Graphic 45 papers, paired with black accents and the black die cut shapes make for a stunning project! With products like these, how can you make a bad project?!!
I bet you want to know how I made this guy, right? Well, here goes!

You need two black treat bags, approximately 3 1/2" x 6 3/4" each. You can purchase these bags at your local chain craft store in the gift wrap section. They have lots of colors, but black is almost always out of stock, so if you see them, grab them!
Lay Bag #1 so that the bottom fold is to the left. Place Bag #2 so that the bottom fold is on the right. Score Bag #2 at 1 1/2" and 2" from the bag opening. Score lightly, as you will GENTLY fold the bag to make the right-hand "spine."

Place some double-stick tape on the back of the opening of Bag #2. Slide Bag #2 into the opening of Bag #1, up to the first score line. Use a circle die or punch to cut an opening into Bag #1 as shown.) I actually went back with a Spellbinders Circle Die and cut a larger opening, as you can see below.)

Gently fold the bag on the score lines. The end of Bag #2 will tuck under the left flap to form a closure.

I needed to add a bit more to my bag book, so I created a flip page from some black cardstock. Cut black cardstock to 3 3/8" x 5". Score on the short edge at 1". Place double-stick tape on the small flap. Tuck the cardstock flap into the opening of Bag #1 to form a flip page.

Cover all surfaces with Raining Cats and Dogs papers. I used the 8x8 paper pad for my project. The open mini measures approximately 3 1/2" x 12 1/2".

I decorated the "flap" of the cover with Spellbinders corner dies, flowers, and Raining Cats and Dots chipboard and a sticker. I topped the chipboard tag with a twine bow.

I decorated the cover with more flowers and chipboard, plus a few items from the Raining Cats and Dogs Banners set. I spelled out "My Cats" with the Spellbinders Numbers and Letters One die cuts.

With the cover open, Bag #1 becomes the fist page, and it is also a pocket page. You can see that I used the Spellbinders Nestabilities Standard Circles Small Dies to cut out the opening on the bag. I used the Sapphire Fancy Corner Set to create corners for the journaling tag.
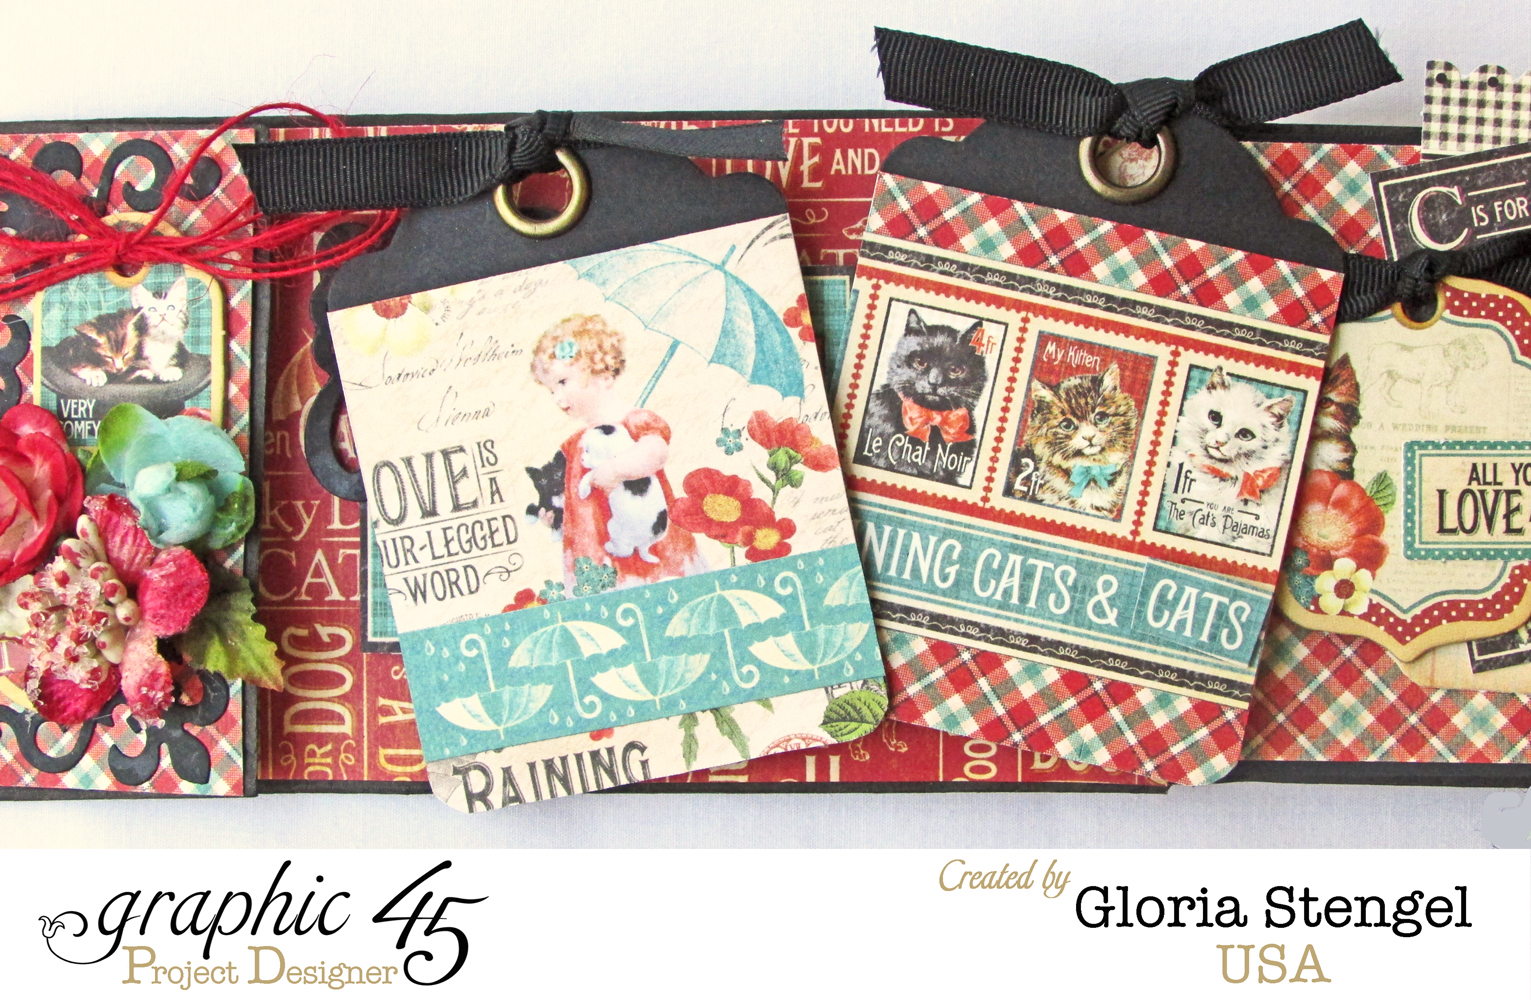
I tucked a few Graphic 45 Black Artist Trading Tags into my bag pocket. I covered the tags with paper. I had a little fun by trimming out the word "cats" and cover the word "dogs" so that my second tag reads "raining cats and cats"! {giggle} You can tuck some photos into the bag pocket as well.

The next page is the cardstock flap that I made. The chipboard element holds some tags, or it could hold a photo.

I used foam squares to pop the cat chipboard tag off the page. Place the adhesive on the left side only so that the tag can act as a holder for your journaling tags and photos.


This paper is just beautiful! I love the red and teal flowers, and the black accents. There is also a lot of paper in this collection that can be used for projects NOT about pets! I love how versatile Graphic 45 papers are!

I trimmed one piece of paper to cover the back of Bag #1.


Spellbinders' Partner Blog Hop
Mon, June 29th
Tues, June 30th
Xyron
Wed, July 1st

Artist Trading Tags - Black
Raining Cats and Dogs 8x8 Pad
Raining Cats and Dogs 6x6 Patterns and Solids Pad
Raining Cats and Dogs Tags and Pockets
Raining Cats and Dogs Decorative Chipboard
Raining Cats and Dogs Journaling Chipboard
Raining Cats and Dogs Stickers
Raining Cats and Dogs Alphabet Stickers
Raining Cats and Dogs Banners
Spellbinders Products:
Sapphire Dies: Numbers and Letters One, Fancy Corner Set
Nestabilites Dies: Standard Circles Small
Grand Calibur
Other Products:
Paper treat bags: craft store
Flowers: Petaloo, Wild Orchid Crafts
Leaves: Prima
Twine: Really Reasonable Ribbon red and black jute string
Ribbon: Really Reasonable Ribbon 1/4" black grosgrain
Adhesive: Scrapbook Adhesives by 3L 3D Foam Squares, Scotch 3M ATG tape, Aleene's Fast Grab Tacky Glue, hot glue
Fabulous project, Gloria! Love everything about it. Those Spellbinders dies are the perfect size. Love the G45 papers, of course. All of the extras make this one gorgeous mini. Love it!
ReplyDeleteLove your mini album the papers are gorgeous ,thanks for the tutorial on how you made it so easy to follow .
ReplyDeleteThis is the PURR-fect project for this collection! I love the bold red and black combo, all the great flaps and folds and hidey holes for tags. Pure genius...pure Gloria! Love it and love you!
ReplyDeleteThanks for the tutorial-I have 6 indoor cats whom I love so much. I can't wait to make your project and add my kitty pictures to it. Thanks for sharing! >^..^<
ReplyDeleteOh my goodness, this is SO cute!! As always, you did a beautiful job. I love the concept of this mini album and I'm anxious to give this a try. Thanks so much for sharing!!!
ReplyDeleteWOW! It's pretty amazing what you can do with a black paper bag and some adorable papers! Gorgeously creative!
ReplyDeleteOh, this is gorgeous. I just love Graphic 45 products.
ReplyDeleteSuch a pretty little album Gloria. With Graphic 45 you can never go wrong. Thanks for sharing.
ReplyDeleteGreat paper bag album. Love the papers and techniques
ReplyDelete