If you are looking for the Heartfelt Creations October Alumni Blog Hop, click HERE.
It's my turn on the Gypsy Soul Laser Cuts Blog and I have a huge project to share. And by huge, I mean a time-consuming project! Depending on how "fancy" you get, this project could take a while, so you will want to get your Advent Calendar Shadowbox on order TODAY! (Check availability at the Gypsy Soul Laser Cuts Store).
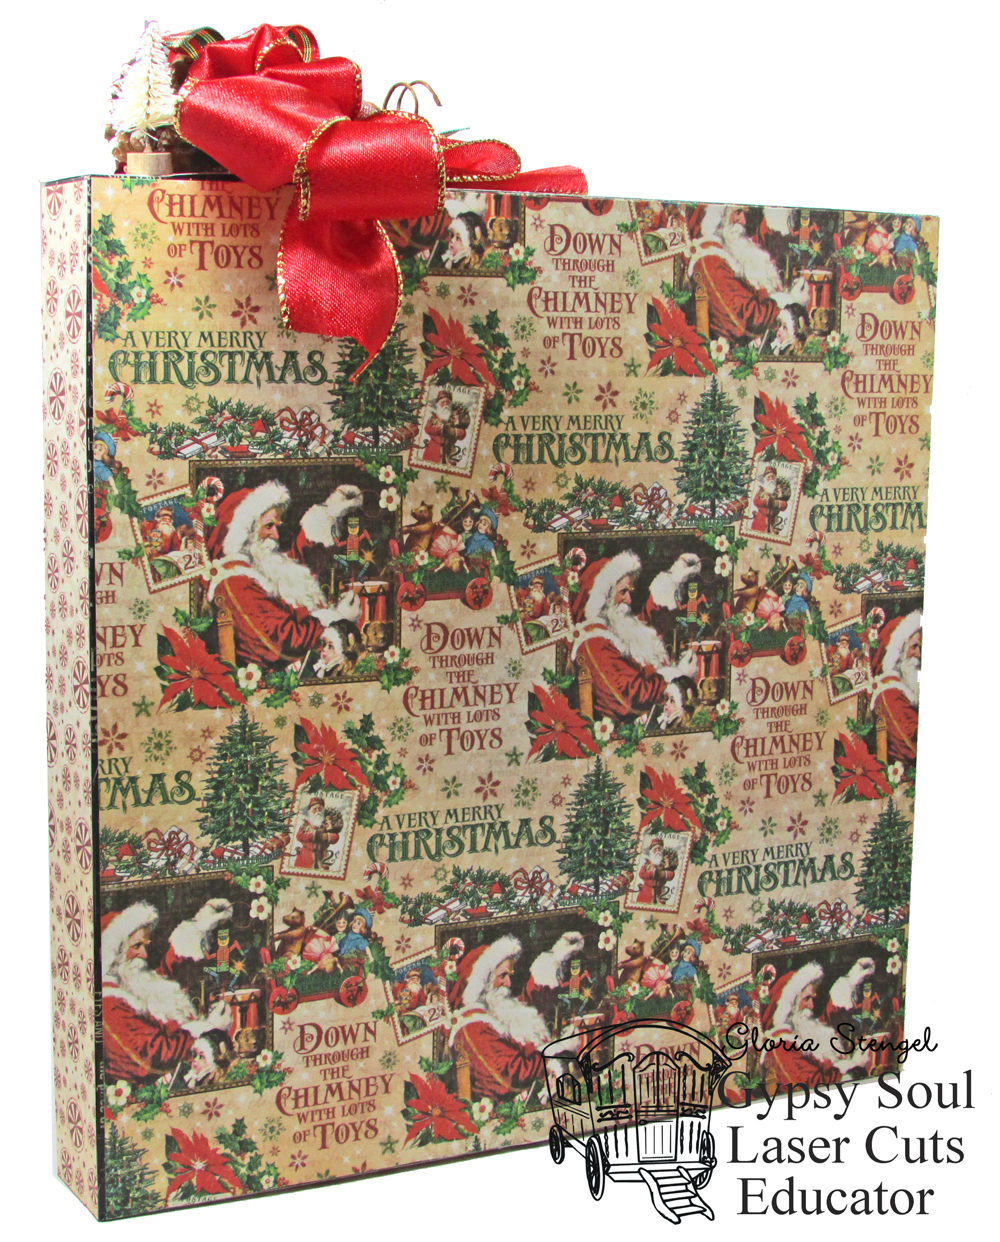
I have always had some sort of advent calendar set up during the holidays, even after my kids got "too old" for one. The calendar I have been using is getting a bit tired and worn, so, I figured, time to make a new one! This shadow box version of an advent calendar is approximately 11 1/2" x 11 1/2" x 1 1/2" with an 8" x 8" center opening.
There are 25 small boxes (roughly 1 1/2" square). You can purchase the pre-cut chipboard boxes or you can use a template to make them yourself. If you have an electronic cutting system, there is also a cut file for cutting the little boxes! You can decorate the 8" x 8" opening to your heart's content.
My mission for this project was to NOT harm or damage any full 12x12 pieces of paper! I wanted to use up my scraps for the various Graphic 45 Christmas papers in my stash! I did very well, using only on full 12" x 12" sheet!
The back of the box is just slightly smaller than 11 1/2" x 11 1/2" which means I had to use one full sheet of paper!
1. To begin, unpack your shadow box and wipe the pieces with a damp cloth to remove the soot created during the cutting process.
2. Spray the pieces with black glimmer mist. Once the mist has dried, you may wish to seal the pieces with a clear sealant. (I noticed that the mist I used was rubbing off! You may wish to paint your pieces instead). Assemble the shadow box. (You will have three small pieces "left over" to use for creating box #25. I chose to skip that step.) After I assembled my shadowbox, I wrapped the outer edges with washi tape for extra stabilization.
3. Assemble the small treat boxes. Use strong tape or glue.
4. If using glue, allow the glue to dry before going to the next step. You may also wish to rub the edges of each box with ink.
5. To cover each box, trim a strip of paper to 1 3/8" x 5" (cut 25). Trim two squares to 1 7/16" x 1 7/16" (cut 50). Use a 1/2" circle punch to cut a notch into the top of one square (do this for 25). Use the box as a guide for the notch placement.
6. Wrap the 5" long strip around the box, securing at the front. Glue one of the squares to the bottom of the box. I used a mix of Graphic 45 St. Nicholas, A Christmas Carol, Twas the Night Before Christmas, The Twelve Days of Christmas, and Christmas Emporium papers for my project.
7. Add the notched square to the front of the box. You may add paper to the inside of your boxes, if desired. Since my project is decorative only, I skipped that step.
8. Place a box into each opening of the advent calendar. Trim a piece of decorative paper to 8" x 8" and attach to the center of the shadowbox. I used a piece of G45 Twas the Night Before Christmas 8" x 8" paper for the center.
Trim a second piece of decorative paper to 8" x 8" and cut on the diagonal. Attach to the lower right corner of the center opening (shown in Step 14 below). Trim four paper strips to 1 3/8" x 8" and attach to the inside edges of the shadowbox.
9. Cut four pieces of decorative paper to 1 7/16" x 11 3/8" and attach them to the outside edges of the box.
10.Use a craft knife to separate the Faux Metal Number Plates 1-25 from the background. Attach two micro brads to each number. (Micro brads are very tiny! They fit into the holes of the number plates perfectly.)
11. Use foam adhesive or glue dots to attach a number embellishment to each box, 1-24. Arrange the numbered boxes in your advent calendar as desired.
12. Select the numbers element from the package of Mixed Media Fragments 1. Cover the surface of the chipboard with embossing ink. Sprinkle with gold glitter embossing powder and heat.
13. Select one of the Postage Frames and paint it with white paint or white ink. Once the paint is dry, cover the surface with glitter glue. Stamp the image onto cream paper and attach to the back of the postage frame. (Stamp is G45 St. Nicholas 3.
)
14. Glue the gold mixed media numbers to the upper left of the center window. Fussy cut a Christmas image from decorative paper (G45 Christmas Emporium or Place in Time December) and attach to the lower right corner with foam tape. Add the postage frame as shown. Assemble the last box (#25) and glue to the center window, at an angle as shown.
15. Add holiday decor and embellishments to the #25 box as desired. I added some floral picks, bells, and a very old metal pin embellishment to my box.
16. Decorate the top of the box with more holiday decor and ribbons. The red and gold ribbon is a found item - it was wrapped around a gift one of my kids got last year from their grandmother. They always save any pretty ribbon! The plaid is Really Really Reasonable Ribbon Red/Green/Gold Christmas Plaid.
It was fun to use up some of my hoarded Christmas floral items. (Now I can buy more!)
Happy Christmas! Thanks for looking!
Gypsy Soul Laser Cuts:
Advent Calendar Shadowbox
Advent Calendar Boxes (25)
Faux Metal Number Plates 1-25 (similar)
Mixed Media Fragments 1
Postage Frames
Partner products:
Graphic 45 papers: St. Nicholas, A Christmas Carol, Twas the Night Before Christmas, The Twelve Days of Christmas, Christmas Emporium
Graphic 45 stamps: St. Nicholas 3
Graphic 45 Washi Tape
Other:
Glittle Glue: Stickles Star Dust
Ink: Colorbox MFT Sweet Tooth, Ranger Distress Gathered Twigs, Versafine Onyx Black
Mist: Tattered Angels Glimmer Mist Beetle Black (similar)
Micro brads: cranberry, red, dark green, olive
Ribbon: Really Reasonable Ribbon Red/Green/Gold Christmas Plaid, red/gold sheer
Tools: Stampin' Up 1/2" circle punch
Adhesive: Ranger Glossy Accents, Scrapbook Adhesives by 3L 3D Foam Squares, Scor-tape, craft glue dots, 3M foam tape, white glue, hot glue


Wow, this turned out beautifully! Love the numbers especially!!
ReplyDeleteVery creative and beautiful! Thank you for sharing.
ReplyDeleteYou are soooooooooooo very kind to make this tutorial! I can't wait to make one for 2017 Christmas!
ReplyDelete