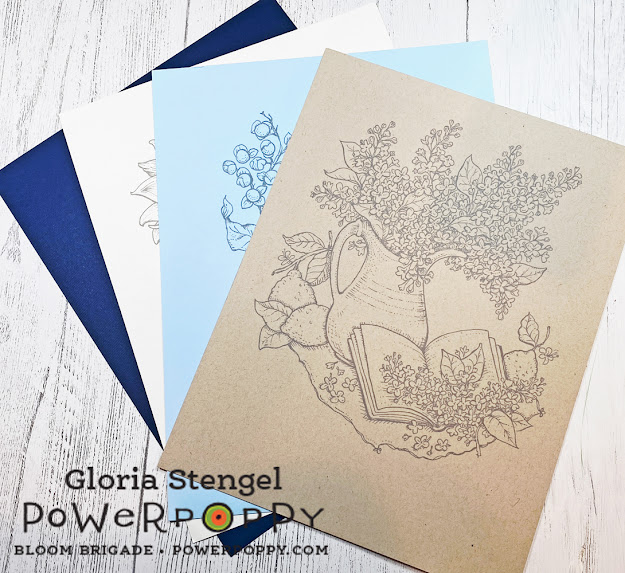
HOW TO PLAY: Stamp or print a Power Poppy Stamps image onto COLORED CARDSTOCK! Then, color away! Use ANY color cardstock, as long as it's NOT white cardstock.
On to my creations!
The project that started me thinking about coloring on colored cardstock was this class from Vanilla Arts called
Illustrated Monarch.
The class was to color the Monarchs and Milkweed image onto tan cardstock. I had a lot of fun coloring on the tan paper with Copics and Prismacolor pencils.
The tan cardstock was light enough that the Copic markers looked fine, if muted, and the colored pencil looked AMAZNG!
So...I thought...what OTHER colors could I print onto and color?!?
I chose a few images to print onto a few colors of cardstock. I found that if I wanted to color an image onto very dark cardstock such as black or navy blue, I would have to somehow trace the image with a white pencil or use a similar technique. The printed image did not show up quite enough to allow me to see the lines, especially on a detailed image. Also, Copic markers are too transparent to show up on super dark cardstock.
I asked my artist daughter about using colored paper and she said the standard colors she used were white, off white or cream, tan, and gray. But, I was sure that light blue, pink, even red would work! I tried a few different papers and colors and learned lots of things!
This is another example of playing around before you start an actual project. Be prepared to "waste" a little printer ink and a few sheets of cardstock! It's worth it to experiment!
I learned that you need to test the paper with the medium you wish to use. I printed this sunflower image from Sunflower Power onto cream linen cardstock. I had hoped to use watercolor pencils for the image, but the paper was too thin to accept the water! I also found out that while the Copics looked amazing, they "oozed" too much on the linen cardstock (no surprise there). The colored pencils loved this lightly textured paper!
In my discovery I learned that you also need to allow Copics to DRY before you can see how the color really looks on colored paper.
I had my heart set on using Copics on this sky blue cardstock, but they wanted to bleed. Any attempt to push the color back with the blender only made a "drool" line on the paper! The paper had a bit of a rough texture, and no coating so the alcohol ink just wanted to soak in and wick out!
The colored pencils loved this paper! And they looked amazing on the blue background! I had found my perfect match!
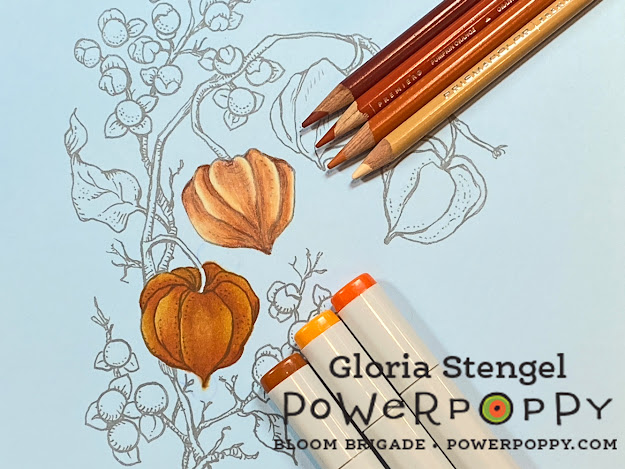
I printed the Chinese Lantern image onto the sky blue cardstock at about 7" x 5". I printed the lines in pale gray as well. I colored the image with Prismacolor Colored Pencils, which worked beautifully! I hope you enjoyed my versions of the challenge for this week! If you want to join me and show off some of your Power Poppy Projects, please be sure to share what you come up with by using the linky on the Power Poppy website HERE! Every entry -- no matter what the week -- is thrown into a virtual hat for our random drawing at the end of the month for a $25 gift code to the Power Poppy Shop! Have a great week! I can't wait to see what you create!
Cardstock: Neenah Desert Storm (tan), unknown blue
Prismacolor pencils for Chinese Lantern: Terra Cotta, Pumpkin Orange, Mineral Orange, Beige, Dark Brown, Crimson Lake, Scarlet Lake, Poppy Red, Sunburst Yellow, Goldenrod, Prussian Green, Kelly Green, Apple Green, Spring Green, Dark Green, Sienna Brown, White
*Note: Copic and Prismacolor color combinations are not listed for the Monarch and Milkweed project to protect the integrity of the Vanilla Arts class.


Beautiful Gloria!
ReplyDelete