
Hello coloring friends! I am still in the process of sharing some coloring projects that I completed over the past year to 18 months. The end of the week is packed with paper crafting posts, so I decided to share this one today, rather than on Saturday!


I have the US version, which has off-white paper that is pretty thick. It feels like nice cardstock, with a tiny bit of texture, making it great for colored pencils.
This picture is also in Colormorphia by Kerby Rosanes, which is a compilation book, and contains double-sided pages. At this writing Colormorphia is cheaper and contains more images to color; 80 pages, with several double-page spreads.
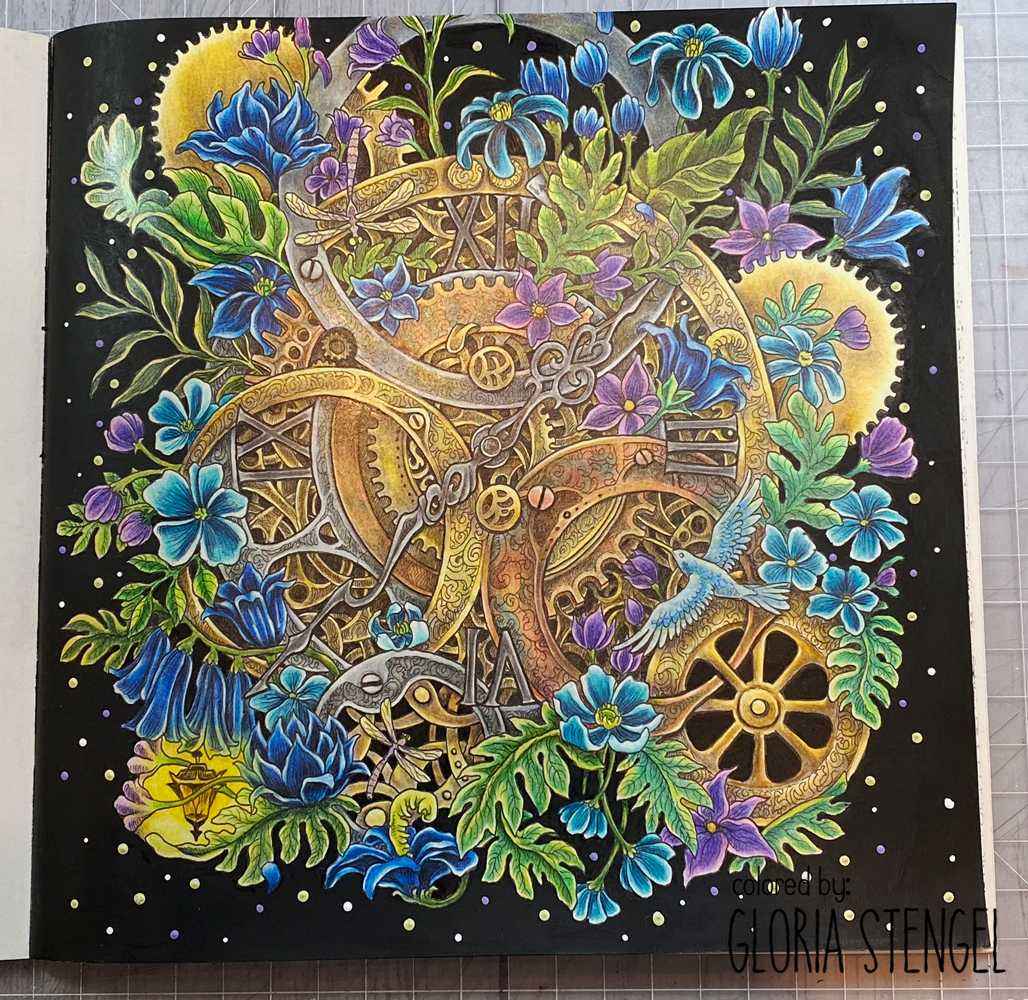
 In order to create a night scene, I painted the background black, using black acrylic paint. I used cheap Apple Barrel matte black acrylic paint. For the tiny areas I did use a Posca paint pen, but it was a slightly different shade of black, and was a little shiny, so I eventually went back over those areas with a tiny paint brush and the black Apple Barrel paint. Talk about NOT relaxing! I am not very good with a paint brush, so this process was a little stressful!

Tip: I used a bit of low tack painter's tape along the left edge to make sure I did not get paint on the facing page and to keep a nice, crisp edge. This is more important if the facing page also has an image to color.
 I decided to use Faber-Castel Polychromos colored pencils for this picture. It was a huge risk because I had never used them before! They were a new purchase at the time, and I was itching to break into them! I have the set of 120, which costs around $180 on Amazon and Blick's. I got mine a bit cheaper at Jerry's Artarama, but their prices are higher at this writing.

Polychromos are an artist grade pencil, and not a necessary purchase for coloring hobbyists, but....I wanted them, so I grabbed them when they went on sale! I am happy I did because they have fast become my FAVORITE set of pencils. They fit my coloring style, and they are available open stock, which allows me to replace individual pencils.
Y'all, I have a lot of pencils sets...it is a sickness really...but these are indeed my favorites. My second favorites are a Chinese set that cost me under $30...so....there is no accounting for my taste!
 I am not going to list all the pencils I used because it won't matter if you know that information. I used so many colors, with so many layers to achieve the look I wanted, that unless you mimic my technique exactly, you won't get the same results by knowing which pencils I used.

My advice is to make some swatches to see what combinations look good to you. You can always make a copy of your picture to experiment a bit before working directly into your book. (Most coloring books allow for you to make copies of pages, onto your preferred paper, for your personal use, but check the fine print in your book.)


Note: I did NOT use any sort of blender solution or blender pencil. As a rule, I rarely reach for a blender solution such as Gamsol, because it never works well for me...and the odor can give me a migraine. I will only occasionally use a blender pencil. I find that the pencils themselves can do all the work! {smile}
 I made sure to color the lantern prior to coloring the flowers to make sure I remembered to show a bit of glow.
 Since I had so many shades of metal, I didn't want a clown party of colorful flowers. I looked at a lot of pictures of flowers and of phosphorescent plants (is that the correct term?) before choosing my colors.


Here is where I find a bit of fault with the Polychromos pencil set. I am not a huge fan of the greens! Many of the greens are dull and need some under-painting or...something. I had a whale of a time getting the greens the way I wanted, but I stuck to it!
 I chose blue and purple for the flowers. There is just something about blue and purple that makes me think of glowing flowers, so that is the route I took! I decided on two different blue combinations and one purple/pink combination.
 Again, getting this all colored and shaded, with highlights and shadows was "a job of work" to quote Ralph Moody's grandpa (The Fields of Home by Ralph Moody). I spent many happy hours listening to TV shows or YouTube videos, sermons, pod casts, and some music while working on this during our moving process last year.
 To me, the secret of finishing such a large and complicated piece is to bite off small chunks at a time. I like to work on single items, and in sections. For example, I colored all the metal first, but worked on it in sections. I then colored the leaves, then the flowers, and so on.


I confess the birds and insects got a bit of a shallow treatment as I don't enjoy coloring those items. I wanted them to fade away just a bit. There are also two hidden objects in this picture (NOT a fan of those times 1000), but since one object is the lantern, I used that to my advantage.
 I finally finished all the coloring! Then I decided I wanted a bit of a "firefly" sparkle around the outside. I added dots of paint all around, and I confess that I HIGHLY REGRET doing that now! I think I came pretty close to ruining the whole thing! Sometimes, I should walk away sooner!


I am happy you joined me today for some coloring fun! As much as I love getting back into my paper crafting goodies, I still love and enjoy coloring as much....or even more! I have a boatload of works in progress (WIPs), and I might do a video...a color and chat maybe...while I work on something...you never know!

Colored pencils: Faber-Castell Polychromos 120 set
Acrylic paint: Apple Barrel matte black, Arteza gouache lilac, lemon yellow, white (for the dots)
This piece is soo FANTASTIC! i love the depth and the colors you chose, and the contrast of the metal gears and the flowers. The camouflaged dragonflies are fun to look for. You did an amazing job with this!
ReplyDelete