Wednesday, January 30, 2013

Inspired by Stamping Challenge #44

Inspired by Stamping offers an inspiration challenge every Thursday (actually, it posts at 8pm PT on Wednesday nights)! I am still waiting for my design team package to arrive in California....all the way from Australia! But, I played in the challenge anyway!


 I love that heart made of roses! So pretty! Here is my card.


I used two (or three) shades of pink and red for my card. I also tried to use paper that had roses printed on it. It's a whole lotta pink! I had intended to make a Valentine's Day card, but I also had it in my head to use the fancy tag shape for my sentiment. And, as "luck" would have it, none of my Valentine's Day messages would fit on the tag!

The pink doily that is peeking out on the bottom started out white. I rubbed on some pink chalk ink and colored that baby!


I love the red, pink, and white baker's twine! You cannot have too much baker's twine, I always say!


A dear friend gave me an early birthday gift the other night, so this card is for her. If she's peeking, I hope she acts surprised when she gets this in the mail. I suppose the fact that I actually MAIL a card is cause for surprise as well.

Basic rules of the challenge: Please use the colors in our photo as your main colors. Upload your card/project to your blog or online gallery and leave a link to your project using the linky widget at the bottom of the IBSIC Blog post. When uploading to online galleries please add IBSIC #44 to your post. (Each challenge is up for one week.)
 
At this time ALL products (stamps, paper, dies) are welcomed with our challenge. You do not have to incorporate an IBS stamp set or flowers.


Cardstock: American Crafts Pomegranate; Stampin' Up! Whisper White
Designer paper: Recollections Love
Ribbon and twine: Really Reasonable Ribbon
Flowers: Wild Orchid Crafts
Die cuts: My Favorite Things Fishtail Flag Stax and Layers; Spellbinders Fancy Tags
Stamps: My Favorite Things Gift Card Greetings II
Ink: Clearsnap Colorbox Chalk Rouge; Tsukineko Memento Tuxedo Black
Doily: Wilton
Adhesive: Scotch tape runner; Beacon Fabri-tac; Scrapbook Adhesives by 3L foam squares 


Tuesday, January 29, 2013

French Country Mini - Hampton Art Stamps

If you are looking for my The Rubber Cafe Guest DT post, please scroll down!

Can y'all stand another mini album?! I thought you could! Today I have a 5x8 inch accordion mini album to share with you. I made this for the Hampton Art booth at CHA. (I am sorry for the quality of the photos. When I took these we were having some gloomy weather! And now the album is no longer with me, but "on the road," so I cannot retake the photos!)


The actual album is the insert from one of the Graphic 45 5x8 Kraftboard Altered Art Boxes. I often just use the box and am left with the albums. (Hey, it happens!) For this project I decided to only decorate the front of the pages. Since this was for the CHA booth and would sit on a shelf, I felt the back should just be "naked."

Here is a closer peeky of each page.


I trimmed the yellow paper to fit the album page and then I cut out a large tag shape from the blue floral paper and attached that to the right side. I stamped several layers of stamps, then inked over the top to give a vintage look to the cover.

 
The second page is a pocket page for holding tags and journaling blocks. I use Scor-tape on three sides of the pocket to make sure it is strong enough to hold the tags.
 
I created some faux postage with a few of the stamped images. I have a selection of postage-edge dies, punches, and decorative scissors that I use to create my fake postage stamps.


Here is a peek at the tickets. Once again, I used stamps to decorate the tags and journaling blocks.


This page has a photo mat and more faux postage stamps.


The last page is another pocket page. I used stamps to create a large postcard image for the top of the page. I really  have a passion for postage and vintage stamps!


I created more tickets for this pocket. These stamped images are AMAZING and so vintage!

Thanks for stopping by!

Hampton Art Stamps:
Graphic 45: French Country, A Ladies' Diary

Clearsnap Ink:
Colorbox Chalk French Blue, Ice Jade, Deep Lagoon, Butterscotch, Pumpkin Spice, Amber Clay
Colorbox Graphic 45 Decades Antiquing Venetian Lace, Bon Voyage, Antique Moss

Designer Paper: Graphic 45 French Country
Mini Album: Graphic 45 accordion fold Kraft Album (Graphic 45 5x8 Kraftboard Altered Art Box insert)
Chipboard: Graphic 45 Bird Song
Cardstock: American Crafts Black; Neenah Natural White, Cream
Other ink: Close to My Heart Grey Wool; Tsukineko Memento Tuxedo Black
Die cuts: Spellbinders Labels Twenty-eight; My Favorite Things Postage Stamp Stax; Sizzix Tim Holtz Alterations Tag and Bookplate
Punches: Stampin' Up tab punch; Fiskars postage punch
Decorative scissors: Fiskars
Embellishments: Prima (vintage trinkets); Pro 31 Designs (flowers); Really Reasonable Ribbon (ribbon and twine)
Other: Office supply (tags); Teacher store (library card); Craft supply (doily); bottle cap
Adhesive: Scotch ATG; Scor-tape, Aleene's Tacky Glue; Scrapbook Adhesives by 3L foam squares; Beacon Fabri-tac

Here Comes Spring - The Rubber Cafe

Good morning. Happy Tuesday! I am happy to share my second January Guest Designer project for The Rubber Cafe with you!


Today I am sharing two cards, using the Grater Floral (G-794) and Hand-picked Floral (H-975), that are perfect for getting you thinking of spring! 


First up is this bright and fun card using the Grater Floral stamp.


I used fresh and pretty papers for my card. I wanted to give you all that breath of spring since many of you are in the grip of winter and are probably longing for spring! (I am in San Diego, where it is always spring or summer! Hey! No throwing snowballs!)


I stamped the image onto white cardstock and colored it with Copic markers. I love the simple design of this set. I have a passion for wildflowers, preferring them to roses or other "fancy" flowers.


I finished off the inside of the card with a sentiment from the Fabulous Phrases (J-1095) stamp set.

For my second card, I used the Hand-picked Floral stamp.


 I used the same papers for another spring-themed card.  I love the pink on this one!


I colored the image with Copic markers.


I finished the inside again with the Fabulous Phrases stamps. 
I hope you enjoyed my post today! Thanks to The Rubber Cafe and DT member Karen for having me as a guest this month!

Thanks for looking!

The Rubber Cafe Stamps: Fabulous Phrases (J-1095), Grater Floral (G-794), Hand-picked Floral (H-975)
Spellbinders die templates: Stars Five, Labels Fourteen, Labels Ten
Cardstock: American Crafts Coffee, Stampin' Up! Whisper White
Designer paper: Jillibean Soup Southern Chicken Dumpling Soup, Homemade 6 Bean Soup, Blossom Soup
Ink: Tsukineko Memento Tuxedo Black, Rich Cocoa
Markers: Copic
Trims: Really Reasonable Ribbon
Buttons: Buttons Galore and More
Pearls: Doodlebug Designs mini pearls spring assortment, Want2Scrap
Adhesive: Scotch tape runner, Glue Dots adhesive dots, Scrapbook Adhesives by 3L foam squares; Beacon Fabri-tac

Monday, January 28, 2013

Hampton Art Stamps Feature on the CNT Blog!

Visit the Crafts 'n things Blog to see my article featuring Hampton Art Stamps! I have been working with Hampton Art since the fall of 2010 and joined their first ever design team in the spring of 2012. They are an amazing company to work with. Please go read the article...and leave a comment on the CNT Blog for the prize drawing!

And here is a peeky at a one of the cards I created for this blog post! I used brand new Graphic 45 French Country papers and the matching Hampton Art/Graphic 45 stamps!


Make sure you sign up for CnT Weekly, and check out the new Online features and Aps!

Crafts 'n things is an amazing magazine, published six times a year. They publish ALL sorts of crafts, from card making to sewing, to beading, to everything in between! They have print AND digital access! Subscribe HERE.

Thursday, January 24, 2013

IBSIC #43

My new Design Team, Inspired by Stamping, offers an inspiration challenge every Thursday (actually, it posts at 8pm PT on Wednesday nights)! I did not have a chance to take part this week, as I am still waiting for my design team package to arrive in California....all the way from Australia! But, here is the challenge!

 
WOW, right?! You should see the upcoming challenges! I am very excited about this as I LOVE color and photo challenges! I will also be sharing projects with each new stamp and die release! Keep you eyes focused here!
 
Basic rules of the challenge: Please use the colors in our photo as your main colors. Upload your card/project to your blog or online gallery and leave a link to your project using the linky widget at the bottom of the IBSIC Blog post. When uploading to online galleries please add IBSIC #43 to your post.
 
At this time ALL products (stamps, paper, dies) are welcomed with our challenge. You do not have to incorporate an IBS stamp set or flowers.


Wednesday, January 23, 2013

Graphic 45 - A Place in Time CHA Projects

When Graphic 45 introduced The Place in Time collection in November, I jumped for joy! My favorite papers in the collection are the Cut-Aparts! They are "right up my card making alley"! The Place in Time Collection contains wonderful images that are perfect for card making!

I have decided to make one card for each month, using the Cut-Aparts. I really wanted to have the whole set completed for CHA, but I did not have time. Plus, there is not enough room in the booth for me to cram so many projects in there!

What I plan to do is share the first three cards today (January, February, March), which I made for the CHA booth.  I used the same layout for all three cards, but each card is unique. I used this sketch, which I previously created for the Crafts 'n things Blog, for my layout.


I used the papers and images from each monthly cut apart sheets and added a few embellishments and a sentiment.


In February I will share the next five cards in the set (April, May, June, July, August), with a different sketch. In March I will share the last four cards (September, October, November, December), and a third sketch. Plus, in March I will share a card holder or box of some kind!

Here is the January card. If this card looks familiar, I sort of copied one of my other cards using all Graphic 45 paper this time. Sometimes, you don't have to re-invent the wheel! I loved the sketch and the image so much, that I used it for this CHA idea!


The January card is all about the cold weather. Doesn't it look frosty?!


The inside of each card is decorated to match the month.
 

February is all about Valentine's Day.


March is beautiful in green and purple. I mimicked the bird's nest by creating a flower "nest" on top of my bow.


What do you think? Are they worth coming back to see the rest? I hope you think so!

I want to share this next project with you again, since it was at CHA also. This was a group DT project from December when we each designed a Place in Time calendar page! We were all supposed to send them to G45 for use in the booth. Here is the original post with a tutorial.
 

I had to leave CHA before the show got started, but I snagged a few photos from the G45 FB page. These shots have some of my projects displayed!


I spy my calendar page on the back wall, behind the fence!


I spy both my January and February cards here!


And here I spy my March card, and on the left hand wall, my Secret Garden page layout! (Not sure why the layout it is hiding in the Place in Time display, but whatever!)

Thanks for looking! I hope you go away inspired!


Graphic 45 papers:
Place in Time: Cut-Aparts (January, February, March)

Graphic 45 Staples: Trims

Cardstock: Bazzill Heather, Butter Cream; American Crafts Black, Pomegranate; Neenah Natural White
Ink: Tsukineko Memento Tuxedo Black
Stamps: Papertrey Ink (Christmas Tags, Little Labels); Waltzing Mouse (Spring Baskets)
Ribbon and twine: Really Reasonable Ribbon
Flowers: Wild Orchid Crafts
Pearls: Creative Charms
Buttons: Buttons Galore and More; Craft Store
Markers: Copic
Die Cuts: My Favorite Things Die-namics Mini Tabs Quartet
Tools: Bow Easy; Sizzix Big Shot
Adhesive: Scotch 3M tape; Beacon Fabri-tac, 3-in-1 glue; Scrapbook Adhesives by 3L foam squares; Scor-tape

Saturday, January 19, 2013

Adoption Auction


Two dear friends of mine are in the process of adopting a baby! They are a swim coach and a teacher, so they are NOT made of money! To help them with their adoption fund, some friends are donating hand crafted items for an online auction!

The winning bidder will be notified and told whom to contact, then your items will be shipped to you, free of charge! (If you are the winning bidder for my items, I will ship internationally!)

I have donated a set of 10 Valentine's and Love-themed cards to the auction! You will receive one of each of the cards pictured below. All cards are finished on the inside and come with an envelope!


I would love to get a starting bid of $25 for the Bertana Adoption Fund! Please click on the Adoption Fund Link to place your bid!

ETA: The winning bidder will also receive a thank you gift from me!

Friday, January 18, 2013

Graphic 45 French Country Mini Album

Hello and happy Friday, Blogger peeps! I am going to share a jam-packed mini album with you today! This is another of my 2013 Winter CHA projects for the Graphic 45 booth. I was given one of the Graphic 45 8x8 Easel albums and asked to create a mini using the new French Country collection.

I created an 8x8 inch mini album with pockets for tags and photo mats for the photos. The album contains 16 decorated pages. I ended up decorating both the front and back of each page! The album got a bit "top heavy" but I was loving working on it so much that it was hard to stop!


This is the front cover. I layered the papers to create the perfect French Country mini in which to add photos of my trip to Paris. The design team did not get all of the new collection in time for CHA, but I did get the papers and stamps.


This is a close-up of the cover. I fussy cut the sunflower and then mounted it onto some of the Graphic 45 lace trim. I tucked a Key Hole Staples behind.


The chipboard word is from Imaginarium Designs. I inked it with blue ink and then stamped the French Country image over the top with Twinkle Watermark ink. It is hard to photograph the watermark ink, but you can see that it is sparkly!

 
Each page of the album contains photo mats and journaling tags. I decorated the front and back of each of the pages for a nice, chunky book! I confess that I have been WAITING for a French Country collection for a long time. I love the colors, but I really have a "thing" for roosters! Love!
 
Are you ready to see the inside?! I wanted to create lots of pockets and tags for this album, but I also wanted it to be easy to assemble and to use just the paper collection and minimal supplies. Let's see how I did

 
I trimmed one print to cover the album page, then another to make a band in the center. I also trimmed out a few images from the paper and added a photo mat. I used my postage-edge deco scissors to trim many of the images. I am so happy I kept those silly scissors all these years!


I created a pocket with a few strips of paper and a bit of ribbon. 


I trimmed out images from the paper to act as journaling tags and extra photo mats. I placed lined paper on the backs of some of the tags for extra journaling space.


I attached the photo mat with tape on only three sides in order to create a pocket for tags.

 
I mixed the paper images with stamped tags. I keep a large supply of shipping tags in all sizes.
 

For this page, I trimmed one of the postage stamp images in half to act as photo corners for the photo mat. I also created a pocket from the photo mat. The tabbed image slides out to reveal a space for journaling.


This is another pocket page. I mounted the printed paper onto black cardstock before attaching it to the page. The feather is a chipboard item from Imaginarium Designs which I sprayed with glimmer mist to match the rooster feathers in the paper.


I have a few pre-printed tags in my stash. I like having lines to keep my writing from sloping downhill!


Pocket pages are a great way to  use up paper strips. I combined two different prints to make this pocket.


The small Eiffel Tower chipboard is another ID chipboard. I inked it with Twinkle Watermark ink. It sparkles in the light, but it's hard to pick up in the photo.


I created some photo mats and journaling spots. I fussy cut one of the sunflowers to make a tab for the large photo mat.


This is a simple page, perfect for a large photo. The Graphic 45 Decades Bon Voyage ink pad is the PERFECT blue shade to ink up the chipboard photo corners! This is page is really the base of the album. I decided to decorate it to give you an extra album page!

Now flip the album around, and start from the other side!


Another pocket! I love the sunflowers and the Eiffel Tower! So pretty!


I found a few tab punches in my stash. Once again, I am happy I hoarded them as they came in very handy for this project!

 
I placed a blank piece of paper behind the chipboard frame to be used as a place to stamp the date or write a bit of journaling. The kraft button is the same shade as the album base pages, helping to tie it all together. (No pun intended!) 
 

Pockets galore!


I dangled one of the Ornate Metal Key Staples from the chipboard button with a bit of twine. 


A few of the tags are stamped images which I fussy cut. There is space for journaling or a small photo on the back.


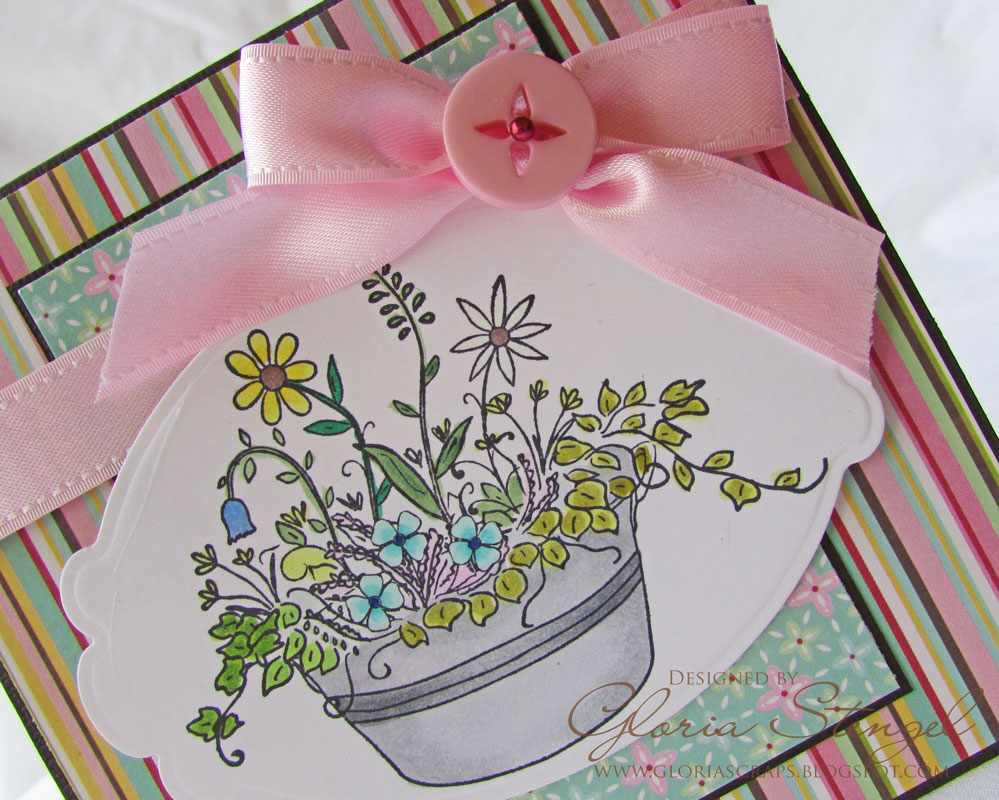
I love this flower garden image! So pretty!  I added a circle shaped journaling spot, stamped with one of the French Country stamps. I also stamped over the ticket with a stamped image of grapes.


I made this pocket a bit wider than the others, then stuffed it full of tags!


Stunning colors and prints!


I had a larger version of the Eiffel Tower chipboard and decided to use it here. Once again, I inked it with Twinkle Watermark ink.


I fussy cut the postage stamp image from the paper, stamped the message onto cardstock, then used a circle die template to cut out the sunflower. To make the sunflower pop, I mounted it to one of the chipboard clocks from one of the the other Graphic 45 collections (A Ladies' Diary, I think!)


The border paper is a bit fussy, so to ground it to the page I added a punched border. (Sorry about some of the photos. We had been having some very gloomy weather here!)

 
More tags and journaling spots.


This page is the back of the album. I added the Ornate Door Plate Staple to give it some weight and keep it from falling off the shelf! I wanted to add the Black Policy Album envelope page to give an extra place to put journaling or photos.

 
And there you have it! My very first French Country album project! The first of many, I hope! Thanks for stopping by!


Graphic 45 Paper:
French Country: French Country, Sunflowers, Grandeur, Promenade, Rendezvous, Bon Appetit, Bonjour, Déjà Vu, Abundance, Provance, A La Carte, Montage

Graphic 45 Staples: Graphic 45 8x8 Easel Album, Ornate Metal Key Holes, Trims, Chipboard Buttons, Ornate Metal Keys, Ornate Metal Doorplate, Black Policy Envelope Album

Hampton Art Stamps:
Graphic 45: French Country

Clearsnap Ink:
Colorbox Chalk Blackbird
Colorbox Graphic 45 Decades Antiquing Photogenic, Bon Voyage
Top Boss Watermark Twinkle Star Dust

Cardstock: American Crafts Black; Neenah Natural White
Die cuts: Spellbinders Standard Circles Small, Back to Basics Tags
Punches: Stampin' Up tab punch; McGill tab punch; Fiskars border punch
Decorative scissors: Fiskars
Embellishments: Craftwork Cards (candi); Imaginarium Designs (chipboard); Really Reasonable Ribbon (trims); 7 Gypsies (ATC tag); Tim Holtz Idea-ology (adage tickets); Jenni Bowlin (round journaling spot)
Other: Office supply (tags, notepaper); Teacher store (library card); Tim Holtz Tiny Attatcher and long brads; pins, large paper clip
Adhesive: Scotch ATG; Scor-tape, Aleene's Tacky Glue; Scrapbook Adhesives by 3L foam squares