I have used the NEW Authentique Frontier Collection along with some of the Homestead Collection. I think these two collection pair together very well!
I grew up in the country and my mom was a farmer's daughter, plus many of my extended family lived on farms. My dad's family owned fruit orchards and farms as well. I have not lived in farm country for over 30 years, but it's still in my soul and I miss it more and more as I age! I wanted to celebrate that with this sweet Down on the Farm mini album project.
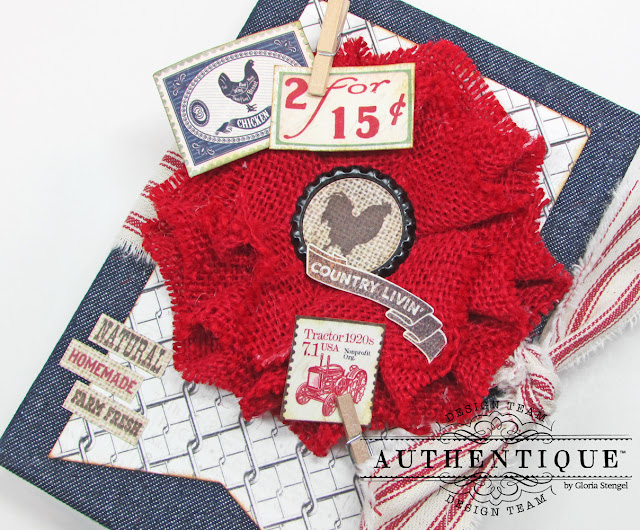
This mini is 6 1/4" tall, 4 1/4" wide, with a 1 1/4" spine. I used a simple tie closure by adding a bit of canvas ticking to the album. I love the rustic feel of the denim cover with the canvas ticking and the burlap flower. So very country!
The front focal point is a large, canvas flower. This flower measures 4" across! I used hot glue to add some tiny clothes pins and ephemera to the flower. (For the supply list, see the end of the post. I have some links there for you in case you need to shop!)
There are nine pages (18 sides) with lots of pockets, pull-outs, and flaps.
I have added some tags, tuck spots, and little booklets to the inside of this mini. You can see that the country feel is accented by the rustic papers.
When I was making this right-hand page, I accidentally cut the paper too short. I had a little strip of the red, barnwood paper left over, so I placed it at the bottom of the page horizontally and added some tiny brads. It makes for a fun effect! (I kind of wish I had added another strip with brads to the top of the page, too!)
Since I had the tiny brads on the desk, I added a few to the cut-apart element on the pocket of this left-hand page.
If you want to see a walk-through of the whole album, check out the video below!
Thanks for looking!
As you probably noticed, the whole album is wrapped in denim fabric! I love how the denim looks with the red ticking canvas ribbon! (Alas, I have used up every last bit of that ticking canvas ribbon!)
I cannot love this denim fabric enough! I have another sheet left, plus some odds and ends. It may appear on a book again in the future!I did NOT do a full tutorial for this mini, but I do have some tips and tricks for you. This mini is similar in style to other mini books on my blog. If you need some basic instructions, you can look around the blog or do a search on YouTube.
To make this mini, you will need some chipboard, a sheet of denim canvas, cardstock, and your paper collections. I kept the embellishments to a minimum, preferring to use the paper cut-aparts and stickers.
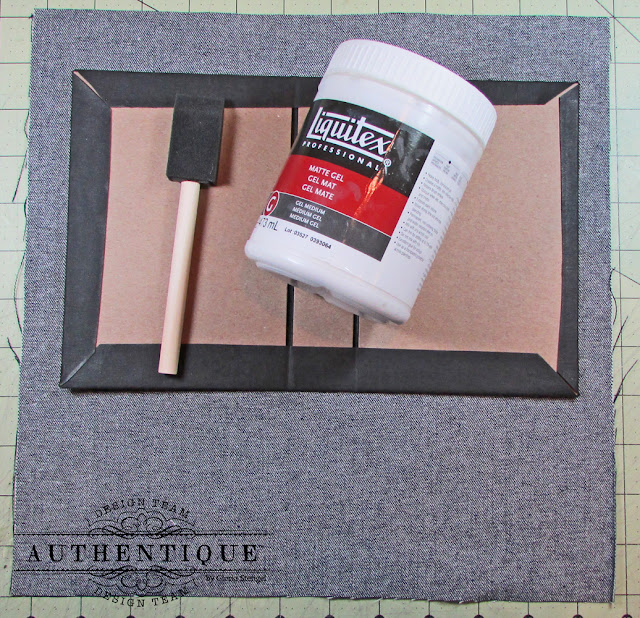
Because I used fabric to cover the mini, I needed to make sure it was constructed properly. To give your mini album stability, first wrap the chipboard with Kraft-Tex paper fabric or cardstock. I used black Kraft-Tex, which you can buy at most fabric and crafts stores. (I got a roll of it on Amazon for a good price. See the link in the supplies.) You need to really burnish the folds and joins well with your bone folder.
I then used a gel medium to attach the denim canvas to the book. Make sure to paint a layer of the gel medium onto the book surface AND onto the reverse side of the canvas. Wrap the canvas the same way as you wrap cardstock.
Since the denim was a bit bulky, I had a little issue with my corners. I wish I had taken more time with them or added some metal corner covers. Alas, I did neither! So, my corners are not as nice as I would like.
I used more gel medium to attach the decorative paper to the inside spine. You can see here I am using two large clothes pins to hold the paper until it dries.
I made an accordion tab hinge mechanism with three hinges. (There are lots of tutorials on my blog for how to do this.)
For each of the page sets, I used black cardstock cut to 12" long by 8" wide. I scored down the center in each direction to make panels that are 6" x 4". I cut one section, as shown in the photo above.
I folded the paper as shown.
Each of the page sections has three pages. I added pockets, flaps, and so forth to each section. I folded my cardstock in a few different configurations, but each started out exactly the same.
Each of the page sections attaches to one of the hinges. You will have a total of 9 pages and 18 sides, plus the inside front and back covers. That is a lot of decorating fun! See the video above to get a peeky of all the inside pages!Remember, each page panel is 6" x 4". You can add decorative paper or a photo to each page.
Thanks for joining me today! I hope you like this country mini as much I as I do!
Authentique Supplies Used:
Frontier 12x12 Paper Pad
Frontier Details Sticker Sheet
Frontier Bundle 6x6 Paper Pad
Homestead Authentic Life Cards
Homestead Bundle 6x6 Paper Pad
Spectrum Cardstock: Crocodile Smile
Additional Supplies:
Cardstock: WorldWin Midnight, Natural
Chipboard: Grafix
Canvas: Canvas Corp Red Ticking Canvas Fringe, Dark Denim 12x12 Fabric Sheet
Flower: Canvas Corp Red Burlap Flower
Brads: unknown
Mini clothespins: Canvas Corp Natural
Bottle cap: Bottle Cap Company Black Flattened
Tags: Graphic 45 Regular Black
Kraft-Tex: Amazon
Ink: Ranger Distress Brushed Corduroy
Magnets: Basic Grey
Dies: My Favorite Things Fishtail Stax Jumbo, Graphic 45 Regular Tag and Gears
Punch: Stampin' Up 1 1/4" circle
Adhesive: ATG tape, Scor-tape, white glue, hot glue, foam tape, Liquitex matte gel medium


Absolutely gorgeous album Gloria, I love it. Leanne
ReplyDeleteYour mini album is so cool! Love it! TFS!
ReplyDeleteAnother gorgeous album!
ReplyDeleteThis it too adorable! Although I like the paper collection alot, you've done so much to make it more interesting and fun - and I love the idea of denim on the cover! (Even when corners are bulky, I've learned the hard way not to use metal corners. I've scraped up the shelves of my custom made bookcases from the metal corners on older albums I made scratching the finish!)
ReplyDeleteThanks for sharing your photos, tips and tricks!
This is absolutely fantastic, Gloria! And thank for the SBS , it could be another gorgeous jeans upcycling project.
ReplyDelete