


To see all the pages and inside content, please view the video below. For the tutorial, keep reading.
I have a photo tutorial to explain how to create the album base, plus a few tips for decorating. Also, I have used a different hinge mechanism than the one I usually use. I have been finding that the old hinge piece is not always working the way I wish. So, I tried something else this time. See the directions below.

Splice together black cardstock to make a piece that measures 8 1/4" tall and 17 1/2" wide. Place your chipboard pieces onto the cardstock, with a one-inch border all the way around. Make sure to space your spine chipboard piece approximately 1/4" from the cover pieces to allow the album to open and close without cracking the cardstock.
Cut the corners of the cardstock an an angle, as shown. Add double-sided adhesive to the tabs. Then wrap your cardstock around the chipboard to give a finished edge.

Place double-sided adhesive on one side of each score line, as shown.


You can see in the photo above the gap between the spine and the cover chipboard pieces. I like to reinforce that and with the old hinge system, the space was always covered. With this type of hinge, we need to add a covering piece to the front and back inside covers to reinforce the gap. (This is optional and personal preference.)

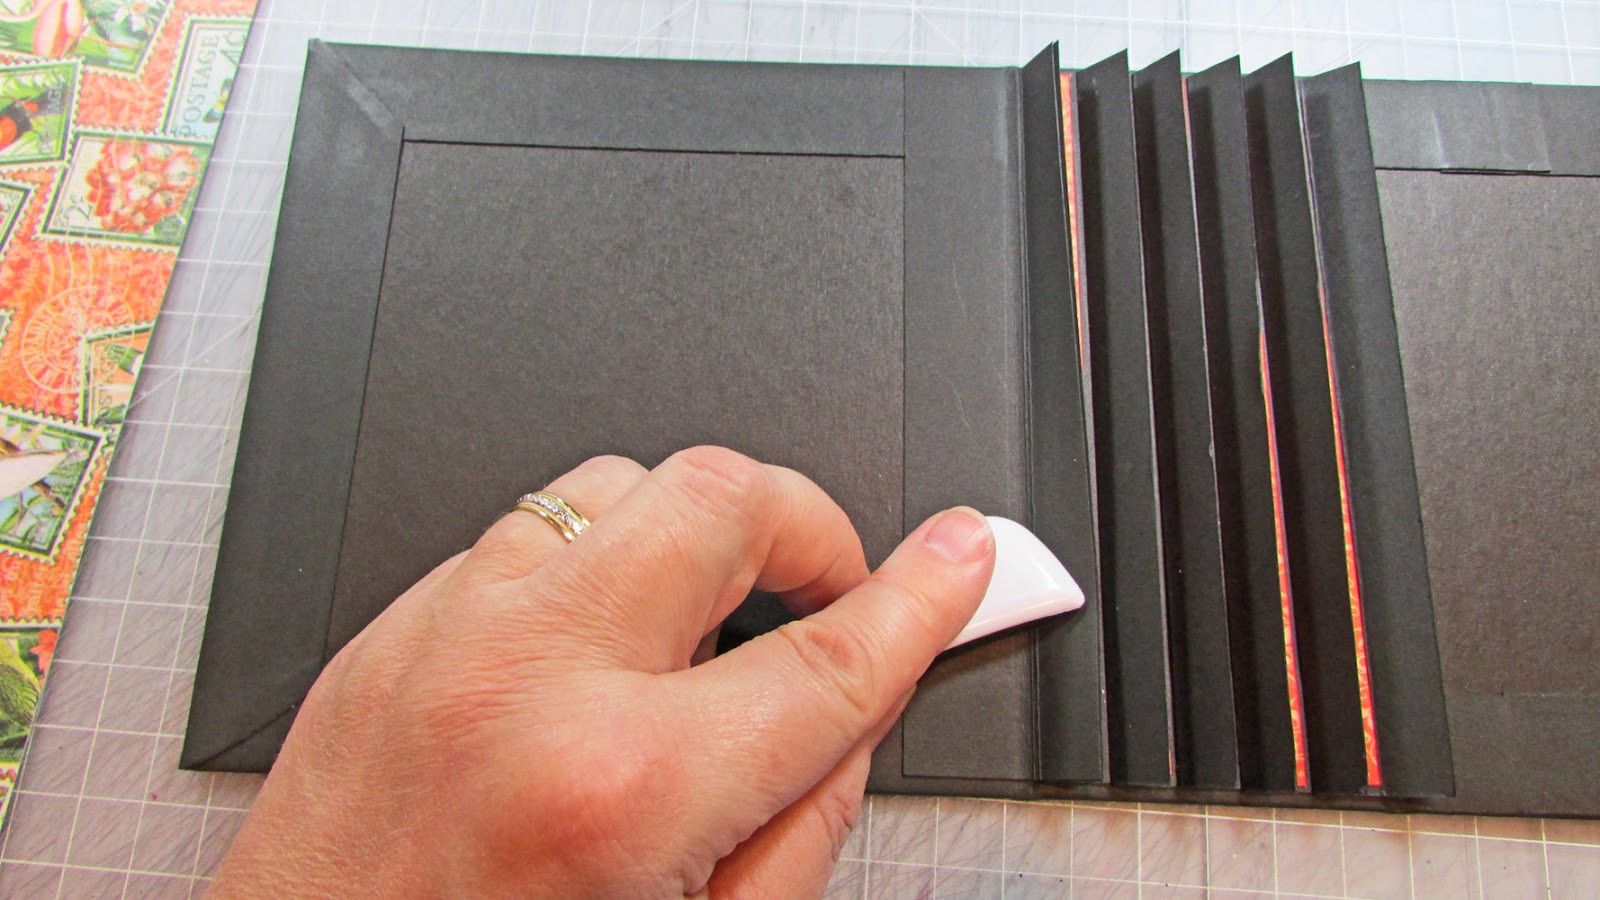


Fold on the score lines, making sure to fold the 1/2" tab to the back of the panel. Place double-sided adhesive onto the resulting 1/2" tabs. Start at the top edge of the cover and add your panels. Line up the first panel with the top edge of the cover, in the center.

Continue to attach the panels, lining up the folded edge of each panel to the bottom edge of the tab of each previous panel. Trim thin strips of paper to place over each tab, covering the black cardstock. These strips are approximately 3/8" x 4".
Place a magnet onto the bottom center of the top waterfall panel.
To see all the pages of the waterfall, view the video linked above.

Add a magnet to the strip. The magnet will line up with the magnet you placed on the first panel. This will also help your waterfall to stay neat and tidy. Cut decorative paper to cover both sides of the strip. Add an embellishment to the top, if desired.
Add ephemera cards and decorative paper to each panel. The papers are cut to 3" x 4". Round the corners, as shown.

Trim six pieces of heavy weight black cardstock to 6 1/8" x 6 1/8". Round the corners on one side of each page. Place adhesive on the left side of each hinge.


The pocket on page two measures 6 1/8" x 3", which means you need to cut your cardstock to 7 1/8" x 3 1/2" and score on three sides at 1/2" to make the pocket tabs.


To create the band on page four, cut a border strip from the decorative paper, and attach on either edge with foam adhesive. Use a chipboard element as a "stopper" to keep the little accordion mini from sliding out of the book.
The angled pocket on page five is easy to make. Cut a square of cardstock to 6" x 6" and cut it in half diagonally. Set one of the resulting triangles aside. Score the triangle on the two 90 degree edges at 1/2" to make the pocket tabs. Attach the pocket to the page.

The 4" x 3" ephemera cards are perfect for this accordion fold booklet. Lots of space for journaling! To see close-ups and the other side...you guessed it, view the video!

To create the flip-out piece on page seven, trim black cardstock to 10 1/4" x 5". Score at 3" and 7". Glue the center section to the center of page seven.

The photo booklet on page eight is 4 1/8" x 8 1/4" black cardstock, folded in half. For page nine, fussy cut butterflies and pop them up on the page to create tuck spots.

On page eleven, a chipboard element makes a great tuck spot for another photo booklet.

Page twelve and the back cover. Use a chipboard element for a tuck spot on page twelve.

Trim decorative cardstock to 6" x 3 7/8" and attach to the pocket. Use a circle punch to cut a notch on pocket edge. Decorate the pocket and place tags or other items into the pocket. (Too see all the tags for this project, view the video linked above.)

I cut a piece of computer paper to size, and used that as a template to select the portion of the signature sheet that I wanted. This step saves wasting paper with false cuts!
I fussy cut two postage images and popped them up on a few pieces of scrap chipboard to give the upper left corner of the cover some interest.

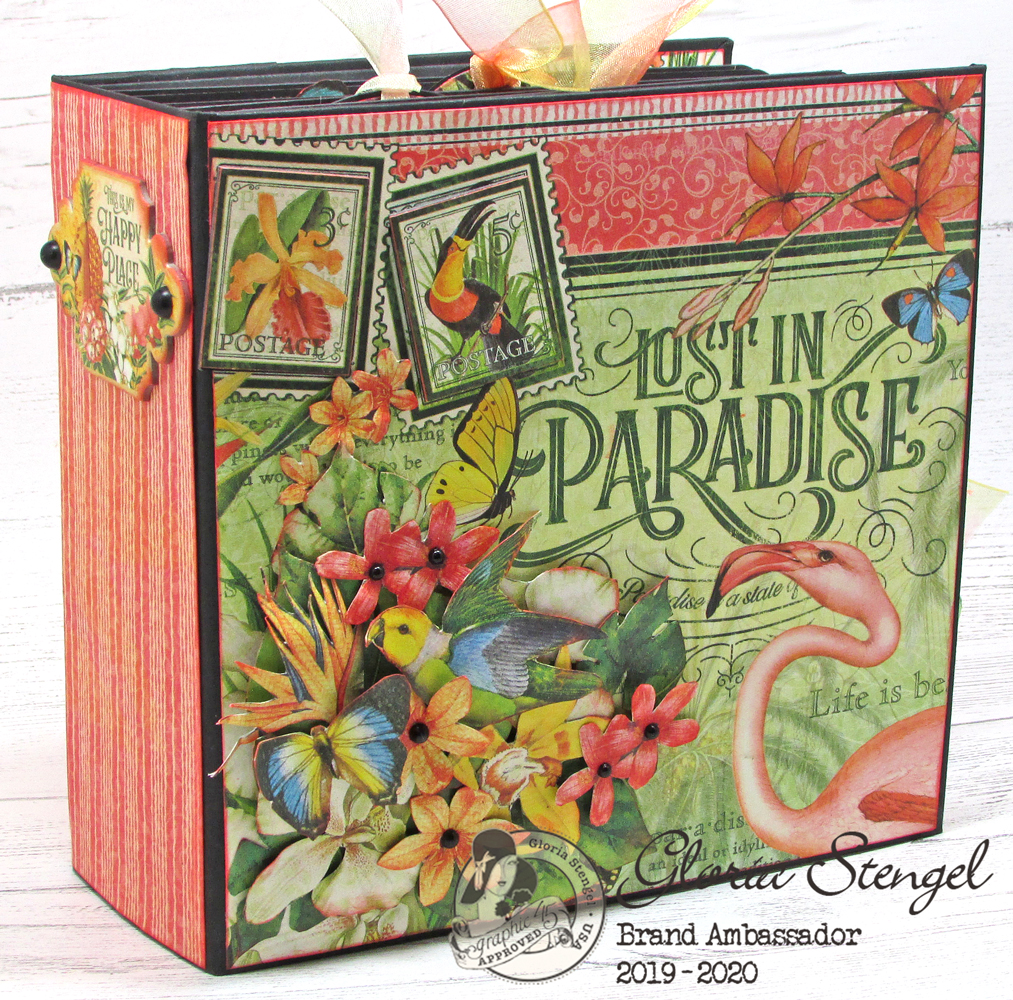


I used ombre sheer ribbon throughout the book. I used a yellow/pink ombre and a yellow/parrot green ombre. (Really Reasonable Ribbon has some lovely Sheer Ombre Ribbons.) I love seeing the ribbon peek out around the edges!


Graphic 45 Supply List:
Lost in Paradise Collection12x12 Paper Collection
12x12 Patters and Solids Pad
Chipboard
Tags and Pockets
Stickers
Ephemera Cards
Tropical Travelogue Collection (original)
12x12 Paper Pad
8x8 Paper Pad
Chipboard
Nature Sketchbook Collection
12x12 Paper Pad
6x6 Patterns and Solids Pad
Chipboard
Ephemera Cards
Safari Adventure Collection
12x12 Paper Pad
8x8 Paper Pad
Staples Embellishments
Matte Pearl Gems (black)
Regular Tags - Black
Square Tags - Black
Artist Trading Tags - Black
Large Tag, ATC Tag and Flower Dies
Regular Tag and Gears Dies
Square Tag and Clock Dies
Other Supplies:
Cardstock: WorldWin Papers Black, Recollections Black (110#)
Twine and ribbon: Really Reasonable Ribbon Burlap String (black, orange, natural), Sheer Ombre Ribbon (yellow/pink, yellow/parrot green)
Magnets: Basic Grey
Magnets: Basic Grey
Ink: Ranger Distress Abandoned Coral
Dies: My Favorite Things Stitch Mini Scallop Stax, Stitch Square Scallop Frame; Spellbinders Butterflies Circles
Tools: Kadumaru Pro corner rounder, Provocraft deco scissors (postage stamp edge), foam mat, stylus, sharp scissors
Dies: My Favorite Things Stitch Mini Scallop Stax, Stitch Square Scallop Frame; Spellbinders Butterflies Circles
Tools: Kadumaru Pro corner rounder, Provocraft deco scissors (postage stamp edge), foam mat, stylus, sharp scissors
Adhesive: white glue, ATG tape, Scrapbook Adhesives by 3L 3D Foam Squares, hot glue, Scor-tape
Gorgeous album! Thanks for the tutorial too.
ReplyDeleteabsolutely love it...thinking I might be able to handle these hinges better than the others...:)...love this collection of paper...will make a great Kauai album...thanks very much for the tutorial...xoxox
ReplyDeleteThis is amazing, Gloria. Thanks for sharing this detailed tutorial. I'm excited about giving it a try with one of the G45 sets I haven't touched yet. Your crafting always inspires me.
ReplyDeleteMe encanta es todo precioso,esa coleccion me gusta mucho,gracias por el tutorial felicidades por lo precioso que te ha quedado
ReplyDeleteI can't wait to try, I just got the paper and it looks so awesome. Thanks
ReplyDeleteThanks for another great tutorial, I have this paper and just love it, but wasn't sure what type of album to make but you have just inspired me to give this one a try.
ReplyDelete