
Good morning, Authentique Paper Fans! Who loves treats?! And who loves treats that come in cute packaging?!

My kids are grown now, and past the age for treat bags, and I don't have grandchildren yet...but who cares?! I still love making treat bags and other goodies!

I created this set of treat bags from the Twilight paper collection. If you want to make some sweet bags of your own, you will need a 12x12 paper pad, an 8x8 paper pad, a piece of black cardstock, some twine, and some tiny clothes pins, and your favorite adhesives. It helps to have access to a paper trimmer, scoring board, a large circle punch, and a tag punch or die.
Let's get started!
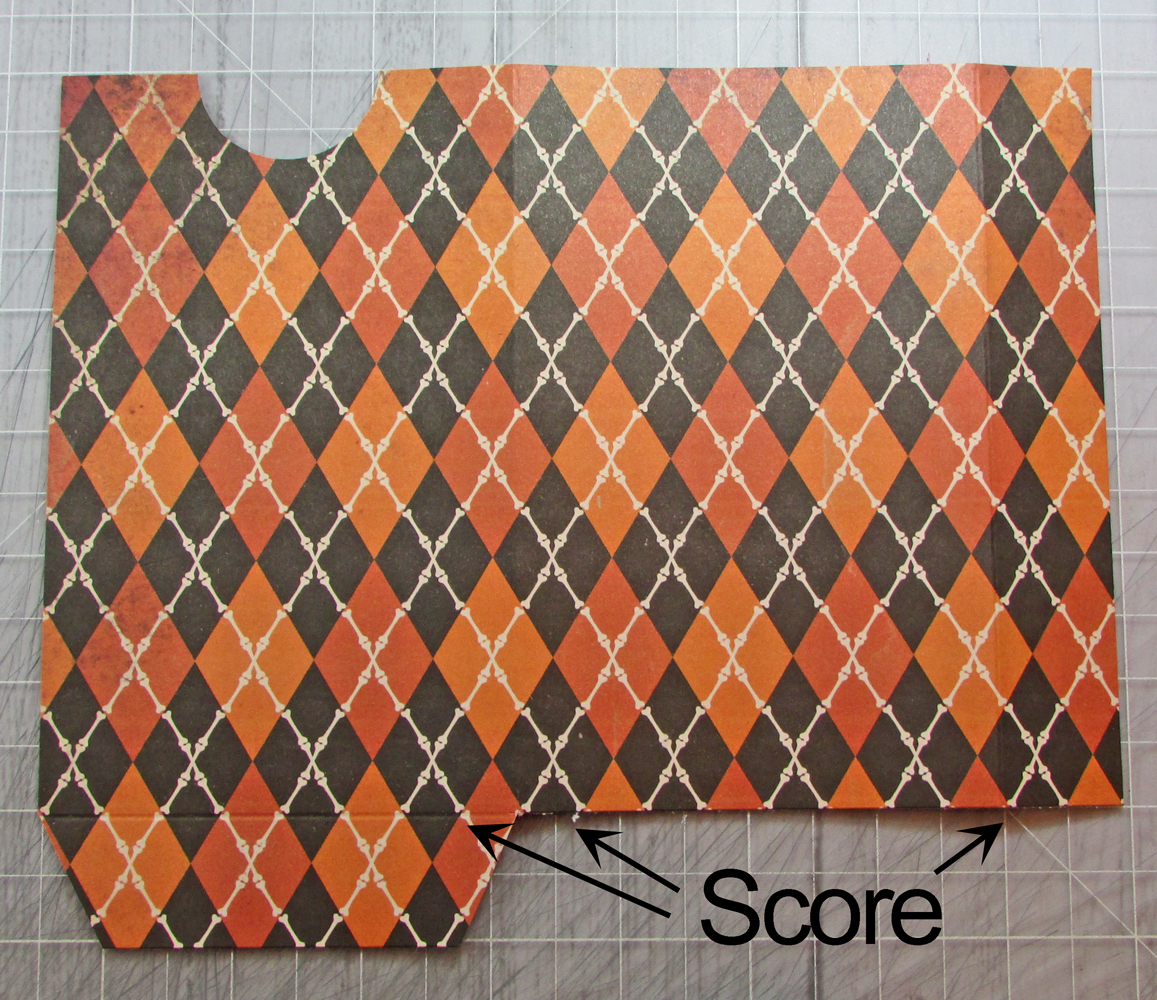
Rotate your paper back so that it is returned to the position of 7" tall and 8 1/2" wide. Use a 1 1/2" circle punch (or circle die) to cut a half-circle into the top of the paper, centered between the left edge and the first score line.
Next, trim away the 1" bottom section from the first score line to the right edge of the paper. You will have a 1" x 3 3/4" flap on the bottom left. Cut the flap at an angle on both bottom corners.


Tip: Rub all paper edges with black ink or a black marker.

Mat one of the small images with black cardstock and then attach it to the bag. Make a little name tag from black cardstock, cut with a metal die or punch. Use a white pen to write on the little tag. Attach the tag to the twine with a mini clothespin. Stuff your bag with treats!
Tip: If you don't have access to a tag die or punch, you can just cut little tag shapes from black paper with scissors. My little tags are roughly 1/2" x 1 1/4" in size.


The little images from the 8x8 pad are the perfect size for this project! I love all the vintage children getting dressed in their costumes! An orange mini clothespin finishes this bag.


As you can see, this project would be a great way to use up scraps, and would be fun in any theme!

Thank you so much for looking! Have fun making your own little gift bags! Make sure to share your projects with us on the Authentique Facebook Page or tag us on Instagram!

Authentique Supplies Used:
Twilight 12x12 Paper Pad
Twilight Bundle 8x8 Paper Pad
Spectrum Series Cardstock: Black Jack
Additional Supplies Used:
Twine: Really Reasonable Ribbon Black Burlap String, Orange Burlap String, Antique Gold Burlap String, Halloween Baker's Twine
Mini clothes pins: Michael's Crafts
Cardstock: WorldWin Papers Smooth Black
Gel pen: Signo Uni-ball White
Marker: Tombow Black Brush Tip
Tools: Martha Stewart score board, Fiskars paper trimmer, Stampin' Up 1 1/2" circle punch, Sweet 'n Sassy Stamps mini tag die
Adhesive: Scor-tape, Scrapbook Adhesives by 3L 3D Foam Squares, white glue
These treat bags are super! Love the paper, admire your talent. Thanks for sharing.
ReplyDeleteBeautiful catds
ReplyDelete