Introducing 3D Vignette Mini Album Collection by Becca Feeken! I am so excited to be part of this NEW release by Amazing Paper Grace/Spellbinders! Becca so generously sent me a packet of dies to work up a mini album! Her instructions were to "use as many dies as you can, but be true to your own style"! How could I refuse that?!!
To view the Amazing Paper Grace Team Blog Hop featuring the 3D Vignette Mini Album Collection, please click HERE.
I created a 6 1/2" x 6" x 1 5/8" mini album using the lovely Graphic 45 Dreamland Collection. I know, the size is a little strange, but I needed to accommodate the dies, as I will explain below. {smile} But, the beauty of creating your own mini albums from scratch is that you can make them any size you wish! No one can tell you that your book size is "wrong"!
I decorated the cover with this beautiful Grand Crested Tower die, cut from dark blue cardstock. I then layered the Double Halo Oval, cut from sliver glitter paper. The Double Halo Oval comes with a coordinating plain oval die (so handy!) which I used to cut out the image from the G45 paper.
You have no idea how hard it is to find a matching oval die! Every time I cut out a decorative oval, I can never find a plain oval die to match! I love that the Double Halo Oval comes WITH the matching oval! That is attention to detail!
I added a few of the Dreamland chipboard shapes and topped them with silver pearls. I looked through my ribbon stash and found this beautiful satin/sheer ribbon in the perfect shade of blue! (See, it is NOT hoarding, it is inventory for future projects!)
I created the mini album to use the Universal Accordion Fold Spine, which means I have four pages (eight sides). Using this die to make the hinges was so EASY! My only adjustment from my "normal" way of making a mini was to make sure I have the spine piece cut to the correct size!
I found the die cut hinges to be very sturdy and easy to add my pages. I have a little tutorial below to explain how I used the dies in place of my normal hinge pieces.
I started out as I normally do, but cutting medium weight chipboard to size. I cut two pieces to 6 1/2" x 6 and one piece to 6 1/2" x 1 5/8". I wrapped the chipboard with dark blue cardstock, just as I normally do. (The cardstock needs to be 8 1/2" x 15 7/8".)
I cut the Universal Accordion Fold Spine from dark blue cardstock using my crank die cut machine. (I use a Big Shot Plus.)
For detailed instructions on folding the spine piece to make your hinges, view THIS TUTORIAL. It is SO EASY to fold and assemble!
You will notice that the spine and hinge piece is shorter than my actual spine. The die cut piece is slightly taller than 5" while my spine is 6 1/2" tall. That is NOT an issue! It is perfectly fine to have that discrepancy! (The linked video shows you how to trim the die cut piece for a mini that is SHORTER than 5" as well!
I attached a piece of dark blue cardstock (6 3/8" x 3 1/2") over my chipboard spine to reinforce the gutters. I then attached a piece of decorative paper over the spine area. I then attached the die cut spine and hinge mechanism to the spine of the mini album, making sure to line it up appropriately.
I then assembled my mini album as always! Each of the inside pages is 6" x 5 1/2". I simply cut eight pieces of dark blue cardstock, and then attached one piece to the front of each hinge and one piece to the back, sandwiching the hinges in between.
To decorate the spine of my album, I cut one of the decorative pieces from Decorative Edges and Spines out of ivory cardstock and attached it to the spine. I added a chipboard moon from the Dreamland Collection.
Since my spine is taller than the spine cover die, I only used one of the decorative inserts. The spine cover is meant for albums that are approximately 4" tall, where my book is 6 1/2" tall.
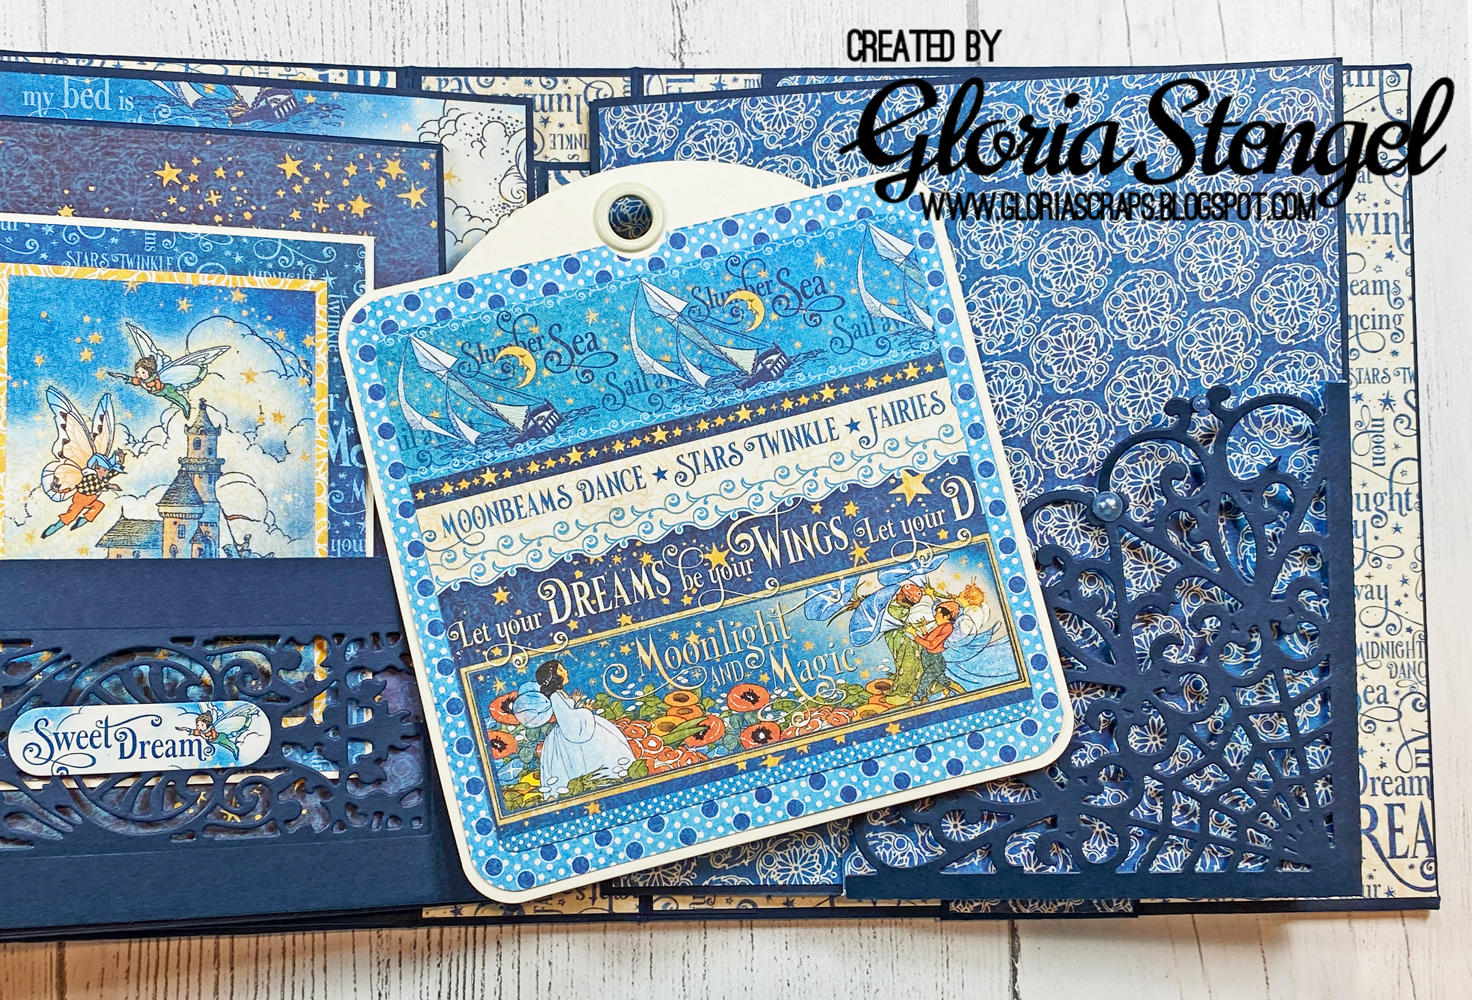
This is a photo of the Inside Front Cover and Page One.
I created a pocket for the inside front cover, adding the same decorative spine insert as decor for the pocket! I cut the decorative panel from ivory cardstock, then matted it with dark blue cardstock.
I added a square tag and a 6" x 4" journaling card to the pocket.
The journaling card opens for space for photos or more journaling.
I cut the large decorative oval from the Double Halo Oval set out of dark blue cardstock. I used the matching plain oval to cut a photo mat from ivory cardstock. The little silver swirl is from the Grand Crested Tower set, which I cut from silver glitter cardstock. Once I added the moon sticker, the swirl looks like clouds!
Pages Two and Three. I used the Woven Trellis Side Pocket to create a pretty pocket on Page Two. I repeated the oval on Page Three, but flipped the colors.
Another ivory square tag makes a nice photo mat and slips easily into the corner pocket. I added some gems to the pocket, bu they are hard to see in the photo.
Pages Four and Five. I used the ovals from the Grand Crested Tower and the Double Halo Oval to cut photo mats from ivory cardstock. To create a jornaling spot for Page Five, I matted one of the Dreamland Ephemera and Journaling Cards.
The accent piece from the Double Halo Oval set is perfect for making decorative corners on the pages! I cut these from the silver glitter cardstock.
Pages Six and Seven. More pockets!
I used the second decorative spine piece in the Decorative Edges and Spines set to cut a see through window in the pocket. A sticker adds just the right amount of decor!
I created another 6" x 4" journaling card/photo mat for the pocket.
Another pocket created with the Woven Trellis Side Pocket.
I love how great the square tags work for this project!
Page Eight and Inside Back Cover. I used the small die from the Double Halo Oval set to create a decor element on both pages. I cut the element for Page Eight from dark blue cardstock and attached it over an ephemera card.
I cut the second oval from silver glitter cardstock and glued it to a chipboard shape to make a closure for the waterfall pages. There is a magnet to keep the waterfall closed.
I created seven waterfall pages, each 3" x 4", the perfect size for the smaller ephemera cards!
Some of the pages have decorative paper, some have plain cardstock, and some have the ephemera journaling cards. Perfect for photos and journaling!
There is a cute journaling sticker hiding under the last page!
I hope you enjoyed this project! I had such fun making it!
I also created a matching card. To see that blog post, click HERE.
To watch Becca assemble an album using the 3D Vignette Mini Album Collection by Becca Feeken dies, click HERE. This is how the dies were intended to be used! I have taken them, and made the dies work for me!
To view the Amazing Paper Grace Team Blog Hop featuring the 3D Vignette Mini Album Collection, please click HERE.
Amazing Paper Grace/Spellbinders Products Used:
Other Supplies Used:
Cardstock: WorldWin Natural, Flag Blue; CutCardStock
Ribbon: Really Reasonable Ribbon Sheer with Satin Center
Bling: Eyelet Outlet clear glitter enamel dots, Bo Bunny Jewels (Blue Hues)
Magnets: Basic Grey
Marker: Stampin' Up Night of Navy
Tools: Corner rounder, circle punch
Adhesive: Scor-tape, ATG tape, hot glue, white glue, foam tape


Stunning!!
ReplyDeleteCheers
Dr Sonia
Wow! This is stunning Donna, congratulations on being asked to be a guest designer - I love Becca's dies but never do them justice, you certainly have and you are so right about her attention to detail. Your mini album is beautiful, your attention to detail is second to non as well, you have included so many fabulous details - it must have taken you ages.
ReplyDeletePauline - Crafting with Cotnob
x
Hey, ROCK STAR!!! My socks have officially been blown off by this album!!! This, by far, is my favorite even though all of your albums are fabulous! You had me at blue, but all of the amazing details made me fall in love more. This is silly, but my fave thing is how you embellished so many areas with the man in the moon.....genius touch! Love ya, GF! Mwaaah!!!
ReplyDeleteIt is beautiful!
ReplyDeleteBeautiful! Carolyn Rayl
ReplyDeleteyou make these dies shine, what a gorgeous album. its been a pleasure having you at APG this month
ReplyDeleteStunning projects!
ReplyDeleteBożena
Gorgeous project!
ReplyDeleteWow! This is so gorgous!
ReplyDeleteWhat a wonderfully professional looking and beautiful book!!!
ReplyDelete