

Granted, I have zero reasons to need a farm themed collection, other than I love farmhouse style and decor! We just repainted our kitchen cabinets so that I can switch from the late 1990's Tuscan/Mediterranean style that came with our house to a more modern farmhouse style! Every time I come into the new space, it is FLOODED with light and seems so much larger and happier!

Now, on to the real post...the Farmhouse album!


I hate even calling this a mini because it is so large! It is 8" x 8" x 2". The inside has four "stacked" pages! There are lots of pockets and flips and pull-outs!
Such a large mini requires a lot of cardstock and decorative paper! I used one 25-pack of black cardstock and one half of a 25-pack of ivory cardstock (for photo mats)!
For the decorative paper I used: 12x12 Farmhouse, 12x12 Farmhouse Patterns and Solids, 8x8 Farmhouse, 12x12 Domestic Goddess (a few sheets), 12x12 Home Sweet Home (soon to be available in a Deluxe Collector's Edition!), 8x8 Home Sweet Home, 6x6 Home Sweet Home Patterns and Solids, 12x12 French Country, 8x8 French Country, 6x6 French Country Patterns and Solids. I added in the extra papers so that the Farmhouse paper would "stretch." You can only get one full 8" x 8" section from each 12" x 12" paper, so you MUST plan well!

Note: The covers are 8" x 8" and the spine is 8" x 2". The inside pages are 7 3/4" x 7 3/4" and there are four hinges.


You are now ready to add your pages. I cut the base pages from black cardstock, sized to 7 3/4" x 7 3/4". For each hinge, I cut TWO base pages, gluing them together with the hinge sandwiched between. I only glued around three edges so that each page could have a side pocket. (The video linked below will show how the side pockets work.)


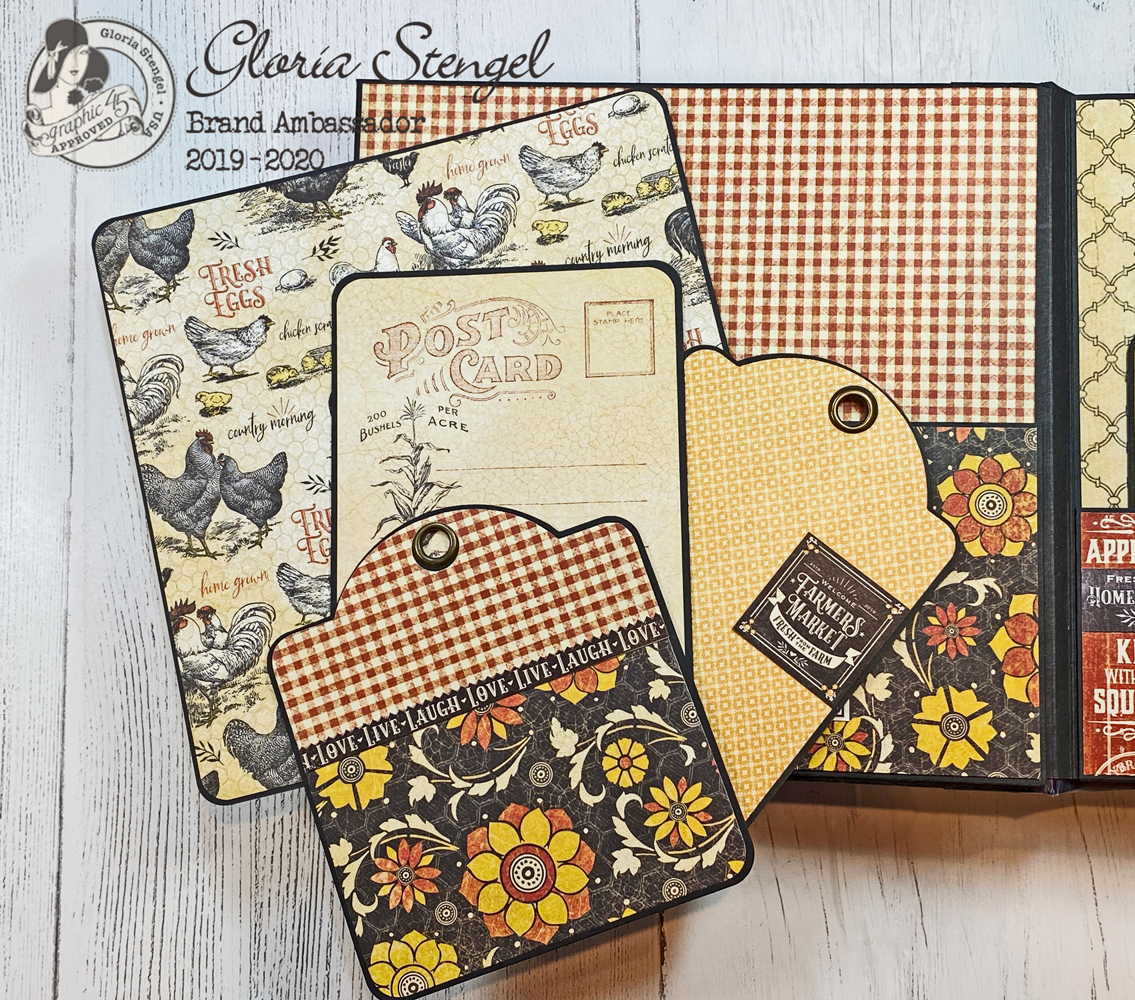
I created various sized photo mats and also used G45 regular and square tags. I mixed and matched the papers and all the embellishments. To make things easier, I also used the G45 Tag Dies to cut the paper for the tags.


A 4" x 6" photo will fit the photo mat on the base page.


 The side flip pages are 3 3/4" x 6 1/2" (plus a 1/2" score on the right edges to make the attachment tabs). The little pockets are 3 3/4" x 2 1/2" and hold ATC tags and 4" x 3" photo cards.
The flaps open to revel space for photos.

Page 5 has a side pocket and a pull-out photo mat, plus a triple flip up/down area for more photos.
Note: I made a mistake with this section by gluing the chipboard chicken sign off center! I had to improvise the center flip area to make the chipboard look centered.

The flaps fit 4" x 6" photos, ephemera cards, or decorative paper.

You can see that my center panel is cut wider to fix the chicken issue!

Pages 6 and 7. Page 6 has a side flip-out containing a pocket. The little pocket is 2 1/2" x 4". The page has a large pocket (3" x 7 3/4") to hold all sorts of things! Page 7 has a top flip-up and a bottom flip-up!

The pocket for Page 6 holds lots of photo mats and little 4" x 3" photo books.

The flaps for Page 7 are 4 1/2" x 7 3/4", plus you need to add the 1/2" tab to attach them to the base page. Once both flaps are open, you can see the large mat on the base page.

Page 8 contains a side side pull-out mat and a fun waterfall element, with a hidden pocket! I have created many waterfall pages, here is one example to help you make yours. For the Farmhouse waterfall, I made the pages all different sizes, rather than making them all the same.
The inside back cover contains a large pocket, the same measurements as the front cover pocket.

More photo mats, tags, and photo cards!
Check out all the interactive elements by watching this video!
I hope you enjoyed the "show-off" video of all the pages!


Graphic 45 Supplies:
Farmhouse 12x12 Collection Pack (with stickers)
Farmhouse 8x8 Pad
Farmhouse 12x12 Patterns and Solids Pad
Farmhouse Chipboard
Farmhouse Ephemera and Journaling Cards
Farmhouse Die Cut Assortment
Selected items from these retired collections:
Home Sweet Home 12x12 Pad (soon to be a DCE)
Home Sweet Home 8x8 Pad
Home Sweet Home 6x6 Patterns and Solids Pad
French Country 12x12 Pad
French Country 8x8 Pad
French Country 6x6 Patterns and Solids Pad
French Country Banners
Domestic Goddess 12x12 Pad
Other Supplies:
Cardstock: WorldWin Midnight, Natural
Flowers: Wild Orchid Crafts, Prima
Mini brads: stash
Mini clothes pins: Canvas Corp
Charm: unknown
Magnets: Basic Grey magnetic discs
Dies: various for photo mats
Tools: Kadomaru Pro corner rounder, Stampin' Up circle punches
Adhesive: ATG double-sided tape, 3M foam tape, Scor-tape, Blick Essentials glue
Gloria, I came here from your YT video that I watched first. I showed my husband your kitchen picture, because we too have dk cherry cupboards, and last summer, we painted the walls a light grey with white trim (from dk stained trim), and we love your before and after picture. Hope to see your finished ones too. I am going to start on my sister's album, using this tomorrow. Thanks so much!
ReplyDeleteJessica, I am so happy you can take inspiration from our kitchen re-do. I hope to share the process and more photos once we are able to finish the project! We are in LOVE with our new, white kitchen! ;)
DeleteGlad you like your bright kitchen too. We definitely loved our upgrade. I saw pictures of some kitchen cupboards that had been painted and then waxed, and loved those. I have no idea what we're going to do with them yet. I just made the base and put the pages in to this album. Hope I'll get it done in the next day or so. Thank you again!
ReplyDeleteOoooooooooow such a beauty. Stunning. Glad I've found you. Thank you.
ReplyDeleteKind regards,
Lia
Hi Gloria,
ReplyDeleteI am in love with this mini album. I am new to this and I was hoping and praying that you would consider doing a video tutorial for this album. Please consider as I am sure there are many people who would love this.
You are very inspirational and I want to learn all that I can from experts like you. Best,
Gorgeous! Love G45 papers and your designs are clever, interactive & fun. You're an artist Gloria! I wanna create all day when I see your work. And drool over G45; which I have a neck of a time cutting.😁
ReplyDelete