
Hello, and good morning my friends! Welcome to the November 2022 Heartfelt Creations Alumni Blog Hop!

To double the fun, Heartfelt Creations will offer a second $25 gift card for a randomly selected comment on their blog post! The winner will be announced on the Heartfelt Creations Blog and Facebook page on Wednesday, November 30th. If you are the happy winner, you can claim your prize by emailing socialmedia@heartfeltcreations.us. Please write “Winner of the November 2022 Alumni Hop in the subject line. You will have 72 hours to claim your prize.
Now, let's get started with the fun! You should be coming to my blog from Candy's Blog. After visiting me, head on to Lynn's Blog. If you are lost, see the blog link list at the end of this post.
This is the time of year when we all start to panic because we still have so many makes to complete and Christmas is racing toward us like an express train! However, Heartfelt Creations has done their part to help us out!


To cut out the images from this collection (or any paper collection) use the following die sets: Ornamental Tags, Ticket and Tags, Album Tags and Accents. There is also a strip of postage stamp images which can be cut apart with your trimmer, scissors, or postage stamp deco scissors.


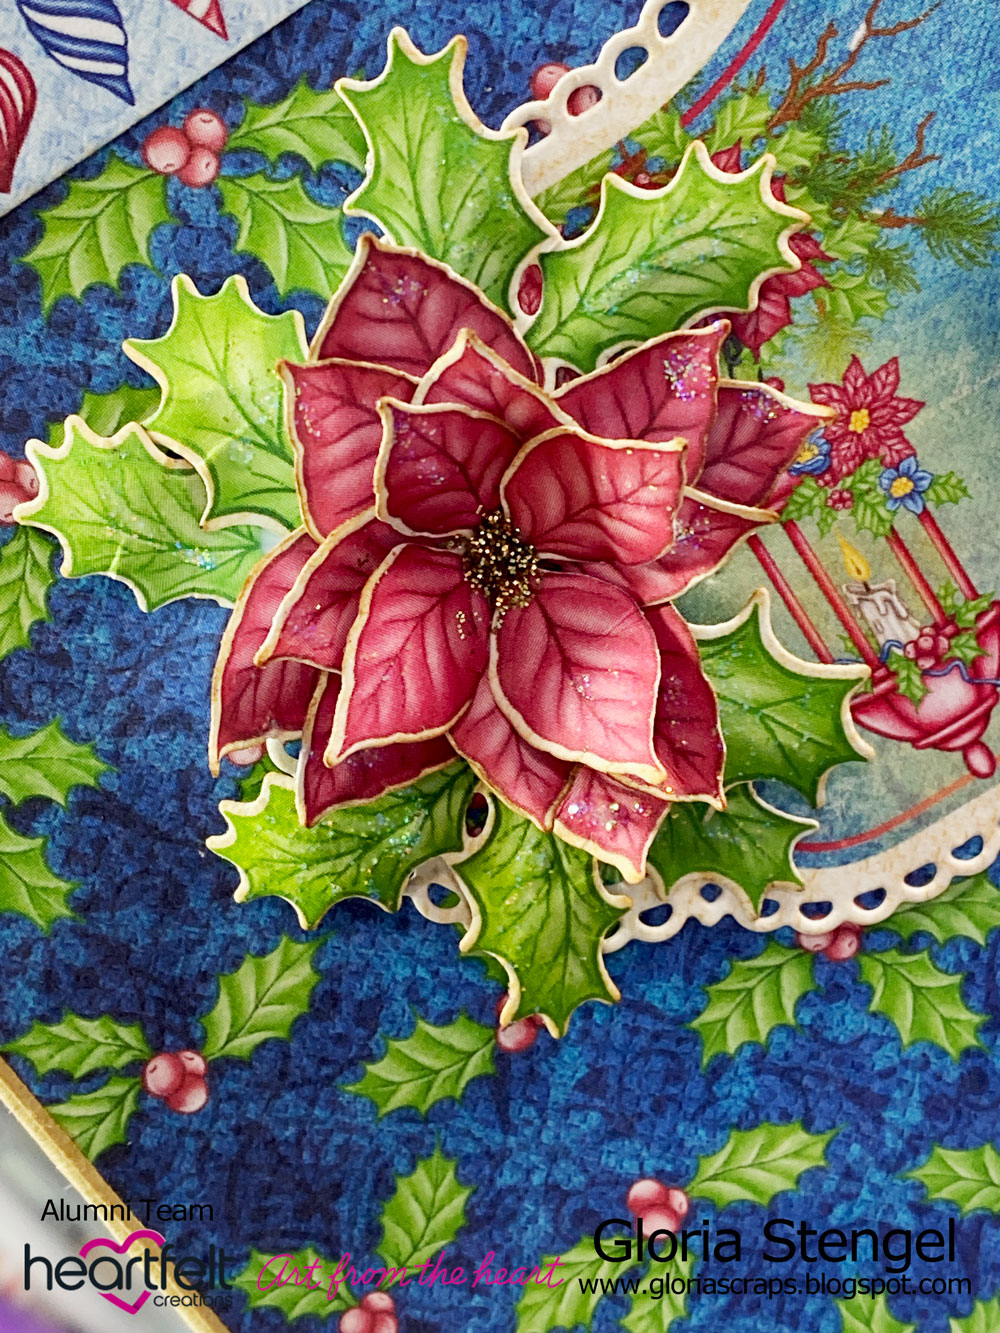
For this collection there is the Christmas Poinsettia and Holly die, Candlelit Poinsettia die, Glow of Christmas die, and the 3D Poinsettia Christmas Shaping Mold.
I often only purchase the paper pad and the main flower die for a collection so that I can just die cut the pre-printed flowers to create my blooms! I also will fussy cut some images if I do NOT have the matching die. I like to sit and watch YouTube videos on my iPad while I fussy cut or die cut a pile of images!

Remember, you can do this with EVERY Heartfelt Creations Paper Collection!


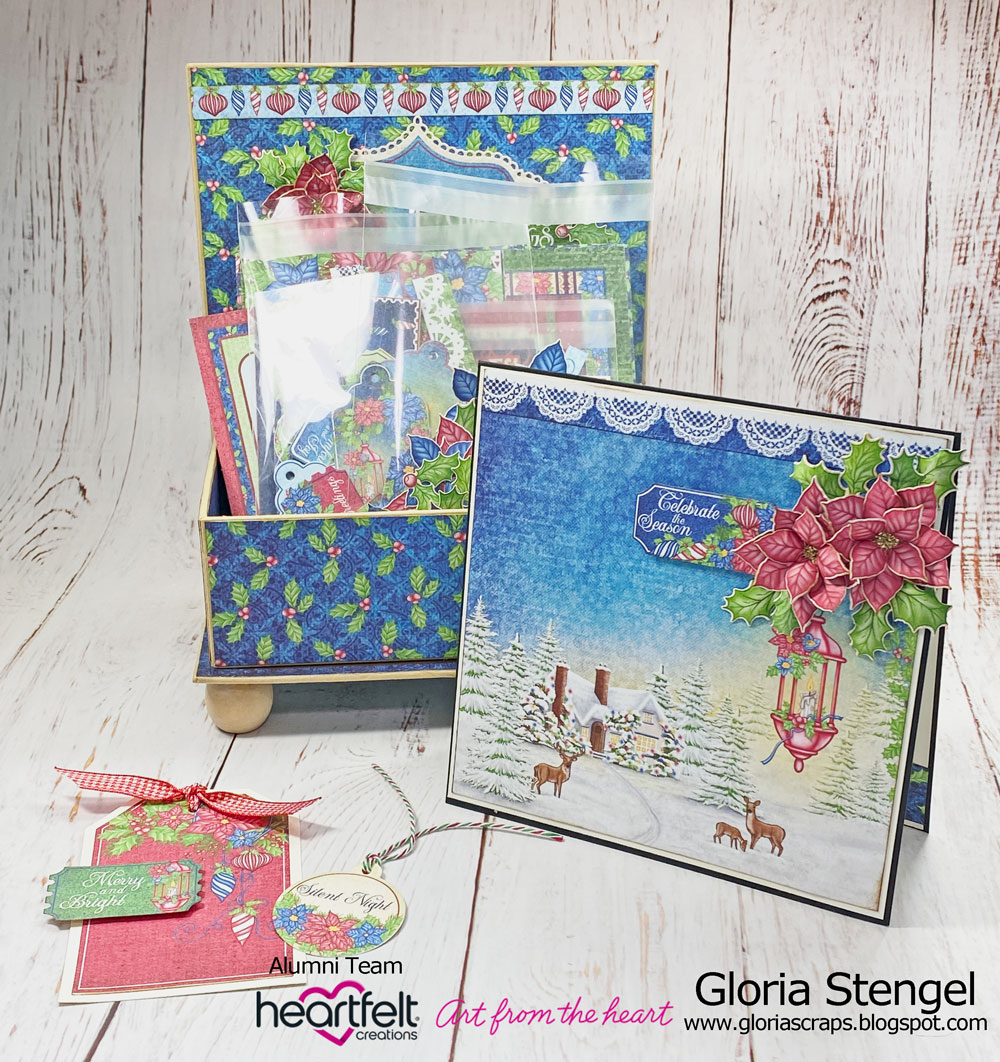
I trimmed some of the left over papers from the Candlelit Christmas Collection to fit all the surfaces of the box and attached them.

 I used strong adhesive to glue the lid of the box to the back edge of the box to create a display box rather than a box that closes.

I glued some wooden "knobs" onto the bottom of the box to act as feet. These knobs can be found at most craft or art supply stores. They can be painted any color you wish, but I decided to keep them as is to match the kraft color of the box.


Thee are enough pieces in my box of fun to create many projects, not just cards, but all sorts of Christmas projects!


Have fun creating your own "box of fun" this holiday season!
Thanks for hopping by! Hop on over to Lynn's Blog next. DON'T FORGET...POST A COMMENT FOR YOUR CHANCE TO WIN A $25 GIFT CARD TO HEARTFELT CREATIONS!
November Heartfelt Creations Alumni Blog Hop List:
Kathy Clement Monica Edwards Bozena (BBart Cards) Alissa Wells Lisa Gregory Candy Slabaugh Gloria Stengel - YOU ARE HERE Lynn Stanborough Amarilys Doria Vicki Dutcher Heartfelt Creations Blog

Heartfelt Creations Products:
Candlelit Christmas Paper Collection
Designer Dries Clear Adhesive (Art Glitter Glue)
Other Products:
Box: Graphic 45 Kraft Book Box
Cardstock: WorldWin Black and Natural
Ribbon and twine: Really Reasonable Ribbon 3/8" Houndstooth Red and White ribbon, Christmas Bakers' Twine
Pocket Page: Simple Stories
Enamel dot: Eyelet Outlet
Glitter glue: Stickles Gold, Stardust
Clear envelopes: Stationery supply
Wood knobs: Craft supply
Tools: Paper trimmer, Craft knife, WRMK Layers
Adhesive: ATG tape, Scor-tape, Foam squares, Hot glue
Oh my little goodness! What a genius idea! I love this so much, I may have to make one of these pretties for my front hall table! I love all the wonderful tips for getting the most out of the paper pad, Gloria! And the box is stunning! Wow! So impressed! Thanks so much for sharing this amazing idea! Happy Thanksgiving! Hugs!
ReplyDeleteWhat a great idea for a box and your card is so pretty.
ReplyDeleteGreat gift box full of Christmas cards Gloria.
ReplyDeleteWhat a beautiful idea. I would love to make one just like it!
ReplyDeleteI have loved seeing your poinsettias in use! As much as I appreciate this box, it's the decorations and the card that have drawn my creative attention. I so love that HC has provided us with so many poinsettia stamps and dies!!
ReplyDeleteWhat a fantastic and beautifully decorated box to hold all your bits and pieces. I love the way you have pulled all your heartfelt collections together to create this stunner. Thank you for sharing xxx
ReplyDeleteThank you for showcasing this terrific collection and these gorgeous projects!! The box as a Christmas keepsake will be terrific!! Stunning!!
ReplyDeleteMarvelous! So glad you highlighted all the little tags and extras in the paper collections. Love your box and cards. Thank you!
ReplyDeleteGreat idea to make a pretty box and I like the scenic card.
ReplyDeleteLove this and the box you made is gorgeous to hold everything. Thanks for sharing with us.
ReplyDeleteBeautiful box and cards! Love this way to organize all the pieces!
ReplyDeleteBeautiful post Gloria! So organized and ready to craft!
ReplyDelete