
Hello, Graphic 45 Fans! I have the task of sharing an upcycled version of one of the #ClubG45 projects with you! Because I like to think out of the box (no pun intended), I decided to combine two different ClubG45 projects into one! I was inspired by Volume 12: Flutter Easel Calendar Box by Maria Cole and Volume 6: By the Sea Matchbook Box by Robin Shakoor. I wanted to decorate a box in a simple style and use it to store calendar panels.I also wanted to show you that you can use the ClubG45 project sheets as “jumping off points” to your own unique projects!
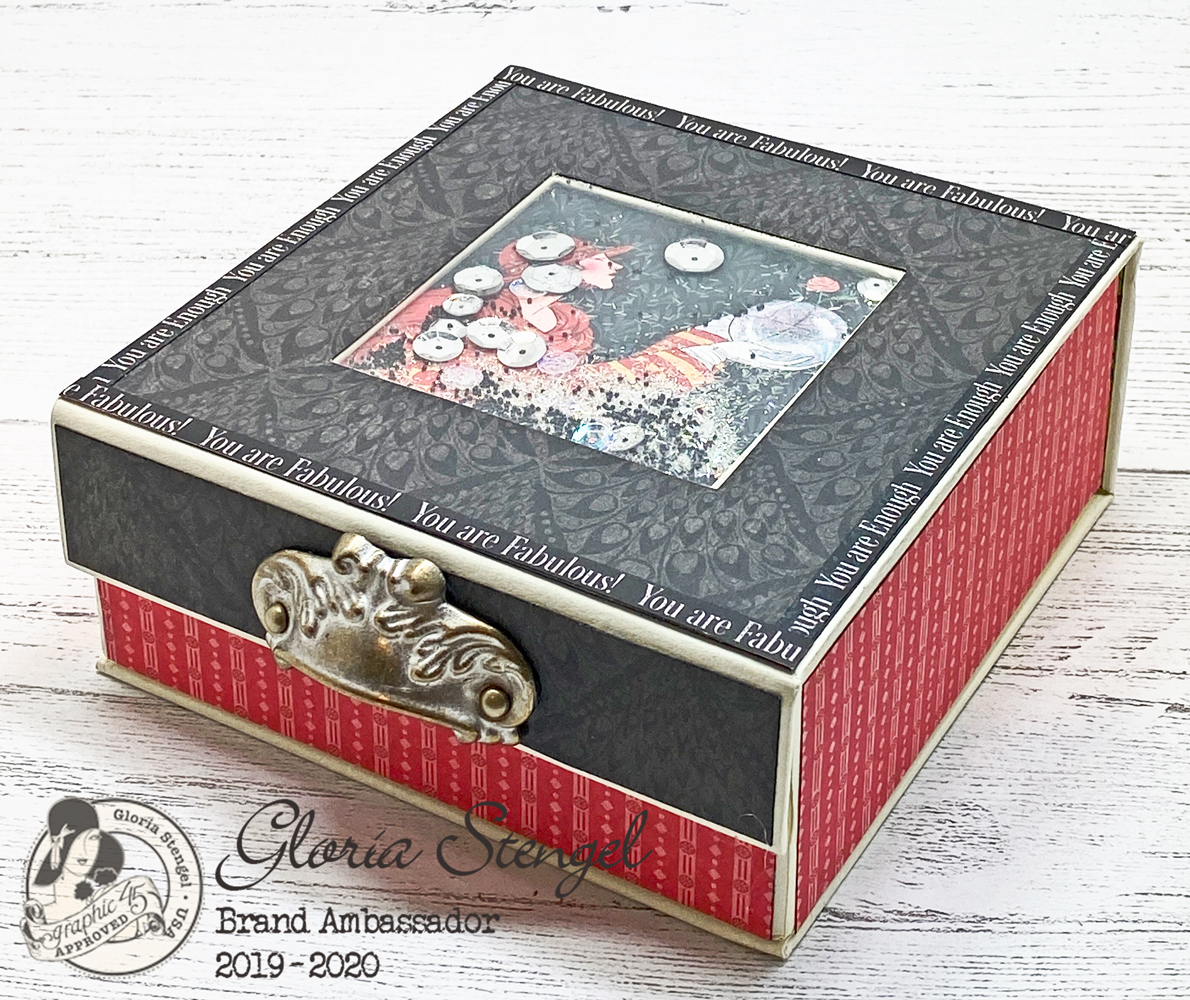
The year has rolled around yet again and it’s time to make our planners, calendars, and journals for 2020! I have created a cute calendar storage box with 12 calendar panels. The top of the box has a shaker element for lots of sparkly fun! The back of each panel has space to write birthdays and special events for each month! This is a beautiful way to stay organized in the new year!
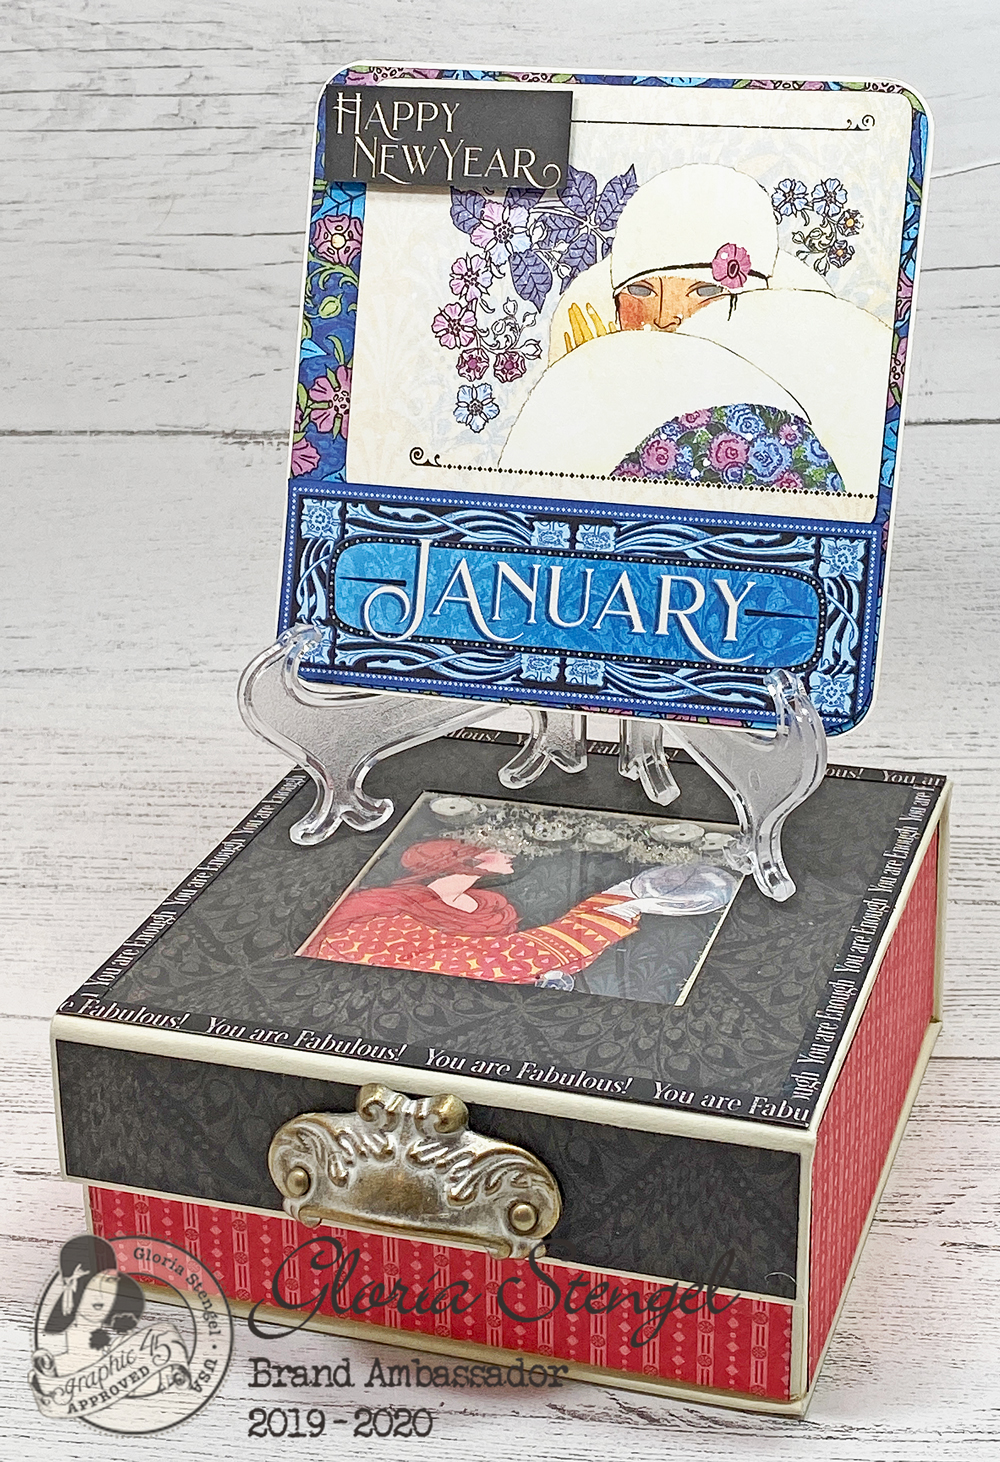
I added a small, clear easel stand to the box so that I can place my calendar panels on display for each month. The easel can fit on top of the box. You can secure the easel or allow it to be free-standing.
Tip: I found the little clear plastic easel at my local hobby store for a few dollars.
If you would rather place your easel on your desk or table, that is also an option!

Start with a Mixed Media Box (Ivory, 5” x 5”). This particular box is retired, but you could use the Deep Square Matchbook Box instead. The Matchbook Box is a little larger, but you can create a similar project with the substitution.
Use a piece of computer printer paper to create a template of the top of the box by tracing the edges and the location of the window. Cut out the window section on your scrap paper with a craft knife. Set the template aside.
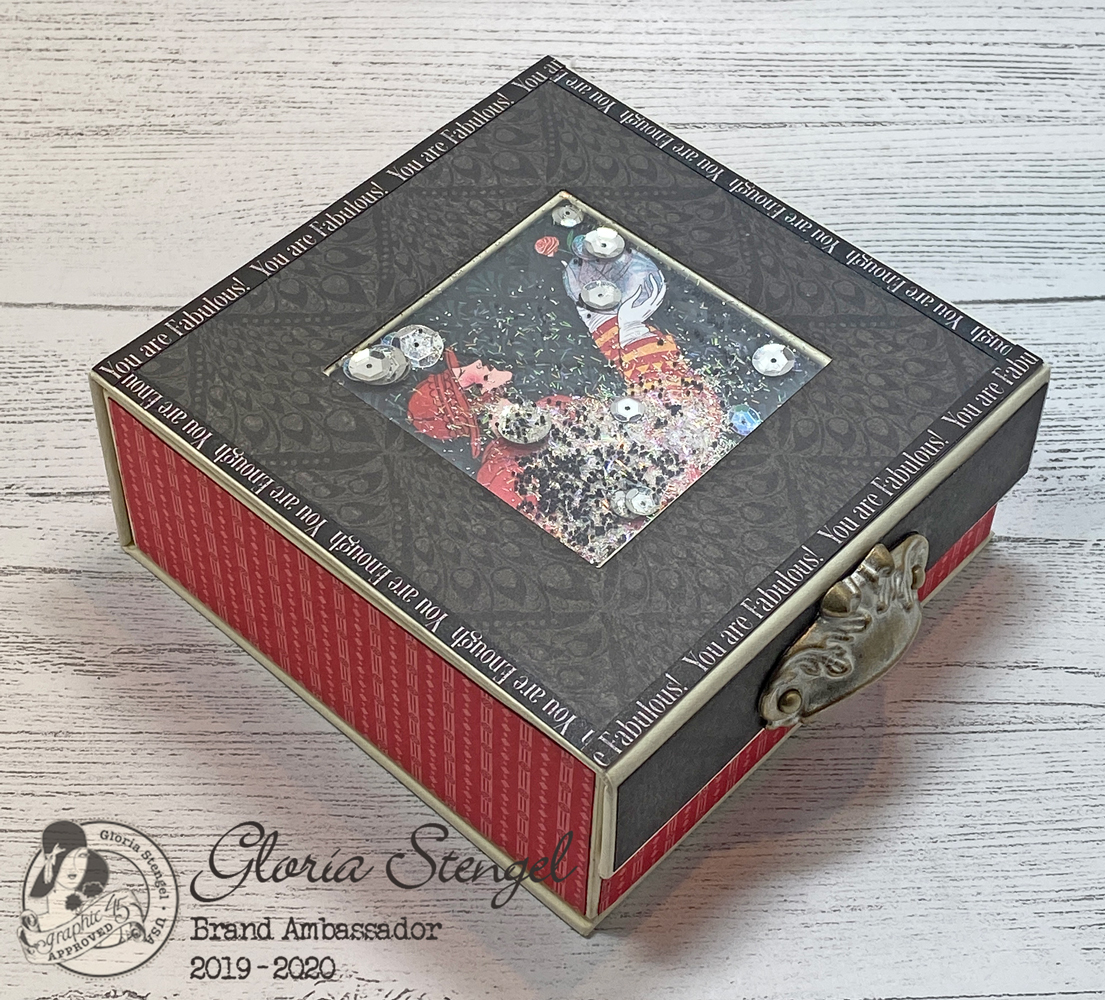
Trim an image from one of the Fashion Forward papers to fit the window and attach it to the back side of the window, as shown. (I used an image from the September sheet.)

Let’s create a shaker element for our box. Place double-sided tape around the edge of the window on the top of the box. Place your shaker elements, such as sequins, glitter, and micro beads, on top of the image.
Tip: Make sure your shaker elements are quite flat and fit into the shallow indentation of the window. If you wish to use bulky elements such as beads or buttons, you will have to use foam tape rather than double-sided tape.
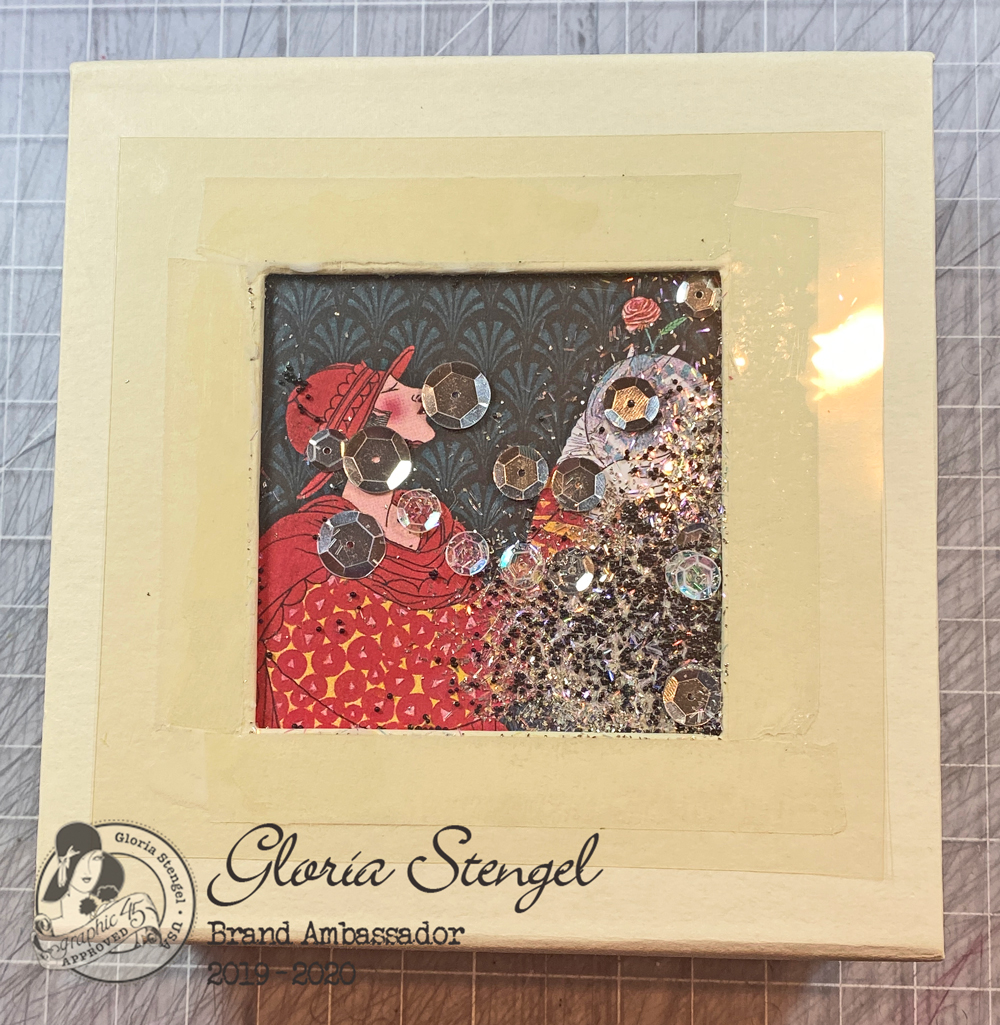
Add a piece of clear transparency over the window, securing with the tape. This will keep your shaker elements contained.

Using the template you created, cut a piece of the Fashion Forward Patterns and Solids paper to size. Trim a black border from one of the monthly papers and attach sections to the left and right edges of the box top. Trim a second border and attach it to the top and bottom edges of the box top (not shown).
Tip: Ink the edges of the papers with a black marker or a black ink pad.
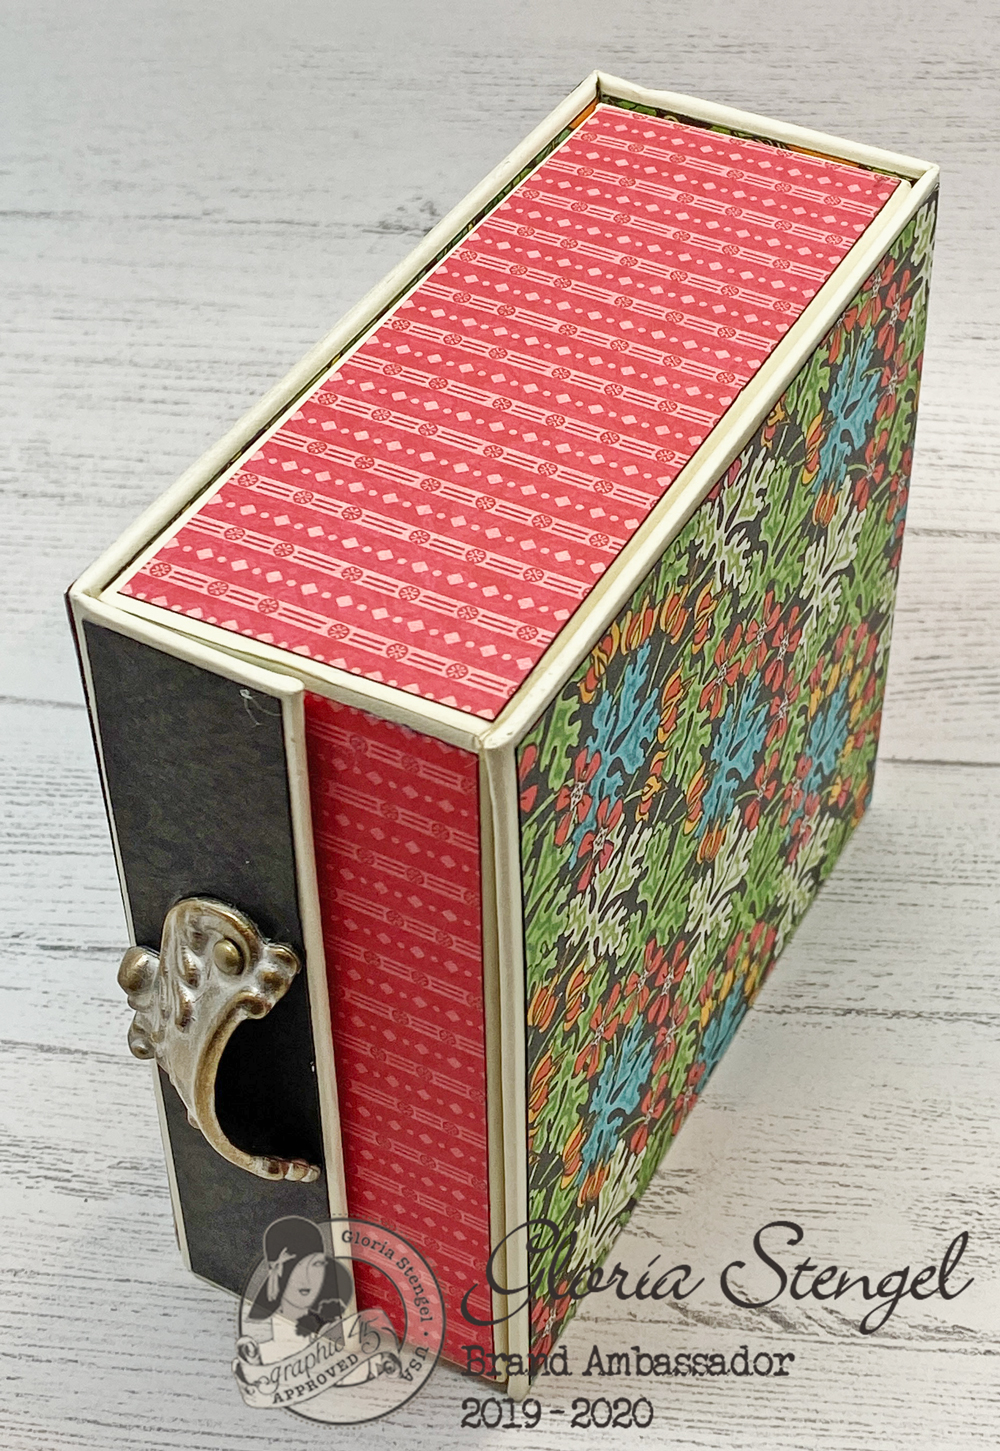
Add decorative papers from Fashion Forward Patterns and Solids to the other exterior sides of the box. Measure your box to determine the size of your paper. If you are using the same style of box shown, glue a Shabby Chic Door Pull to the closure flap.
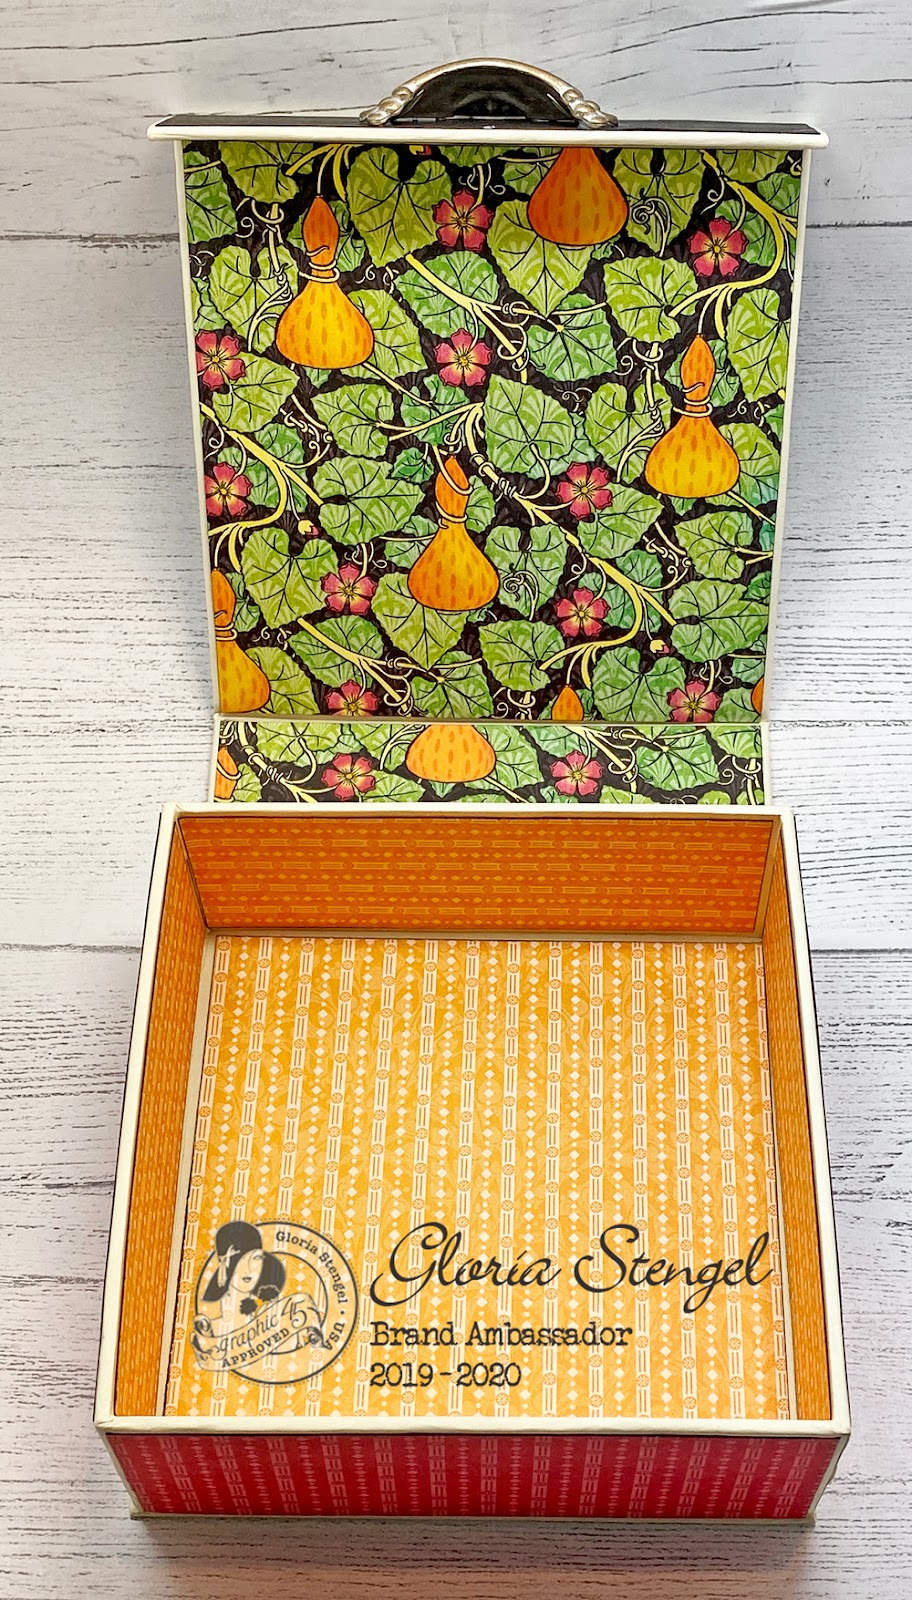
Add printed paper to the inside surfaces of the box as well.
Close the box and set it aside. Now we can work on the calendar panels.
This style of box comes with six (6) ivory cardstock panels, approximately 4 ⅝” square. We need 12 panels, so you will need to cut six more from ivory cardstock. Round all four corners.
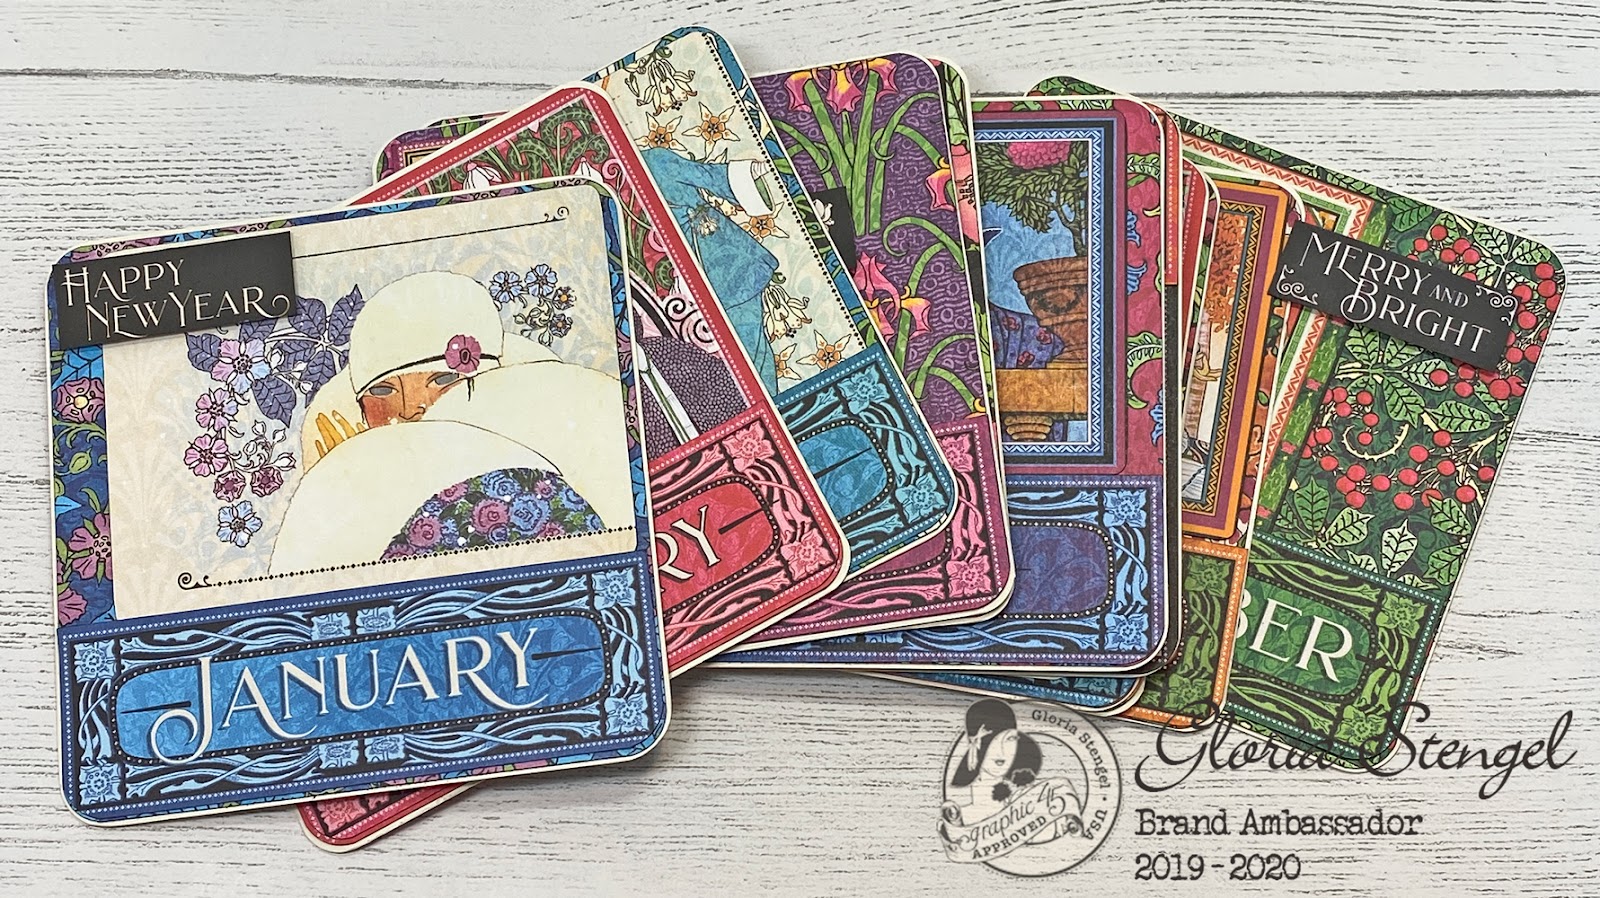
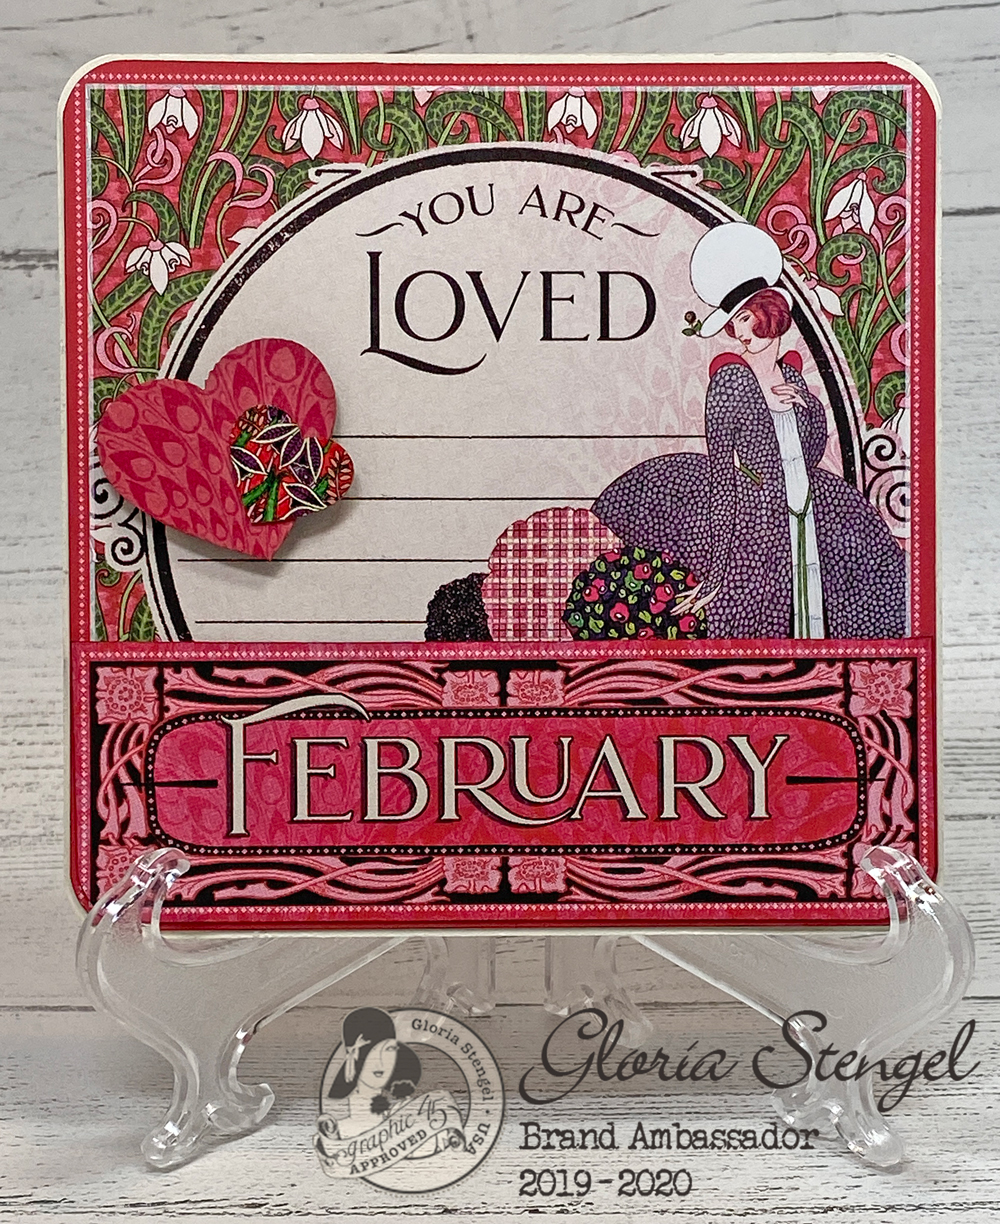
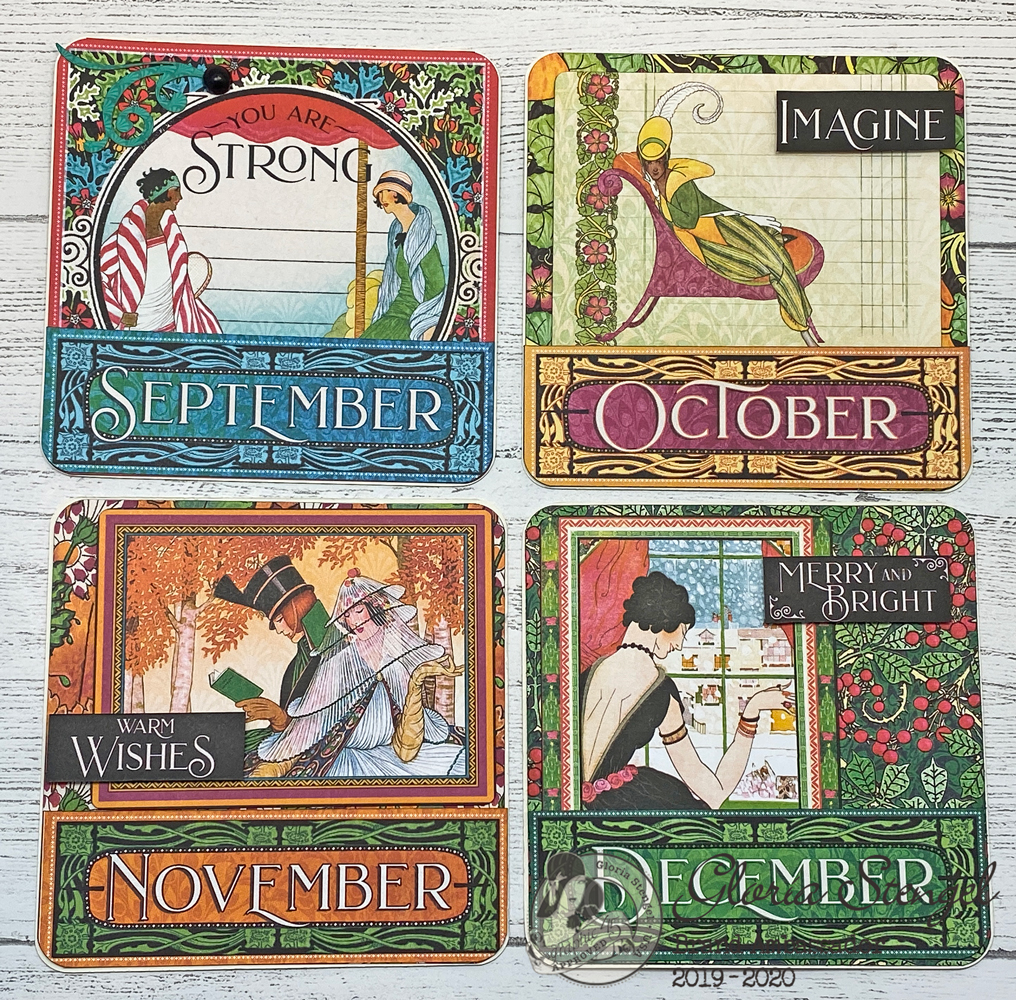
For the front of each panel cut decorative paper to 4 ½” x 4 ½”, round the corners, and place it onto the ivory cardstock. Next decorate the panel with Fashion Forward images from each month sheet, the month borders, and sentiments from each month. You may also use the Fashion Forward Ephemera Cards.
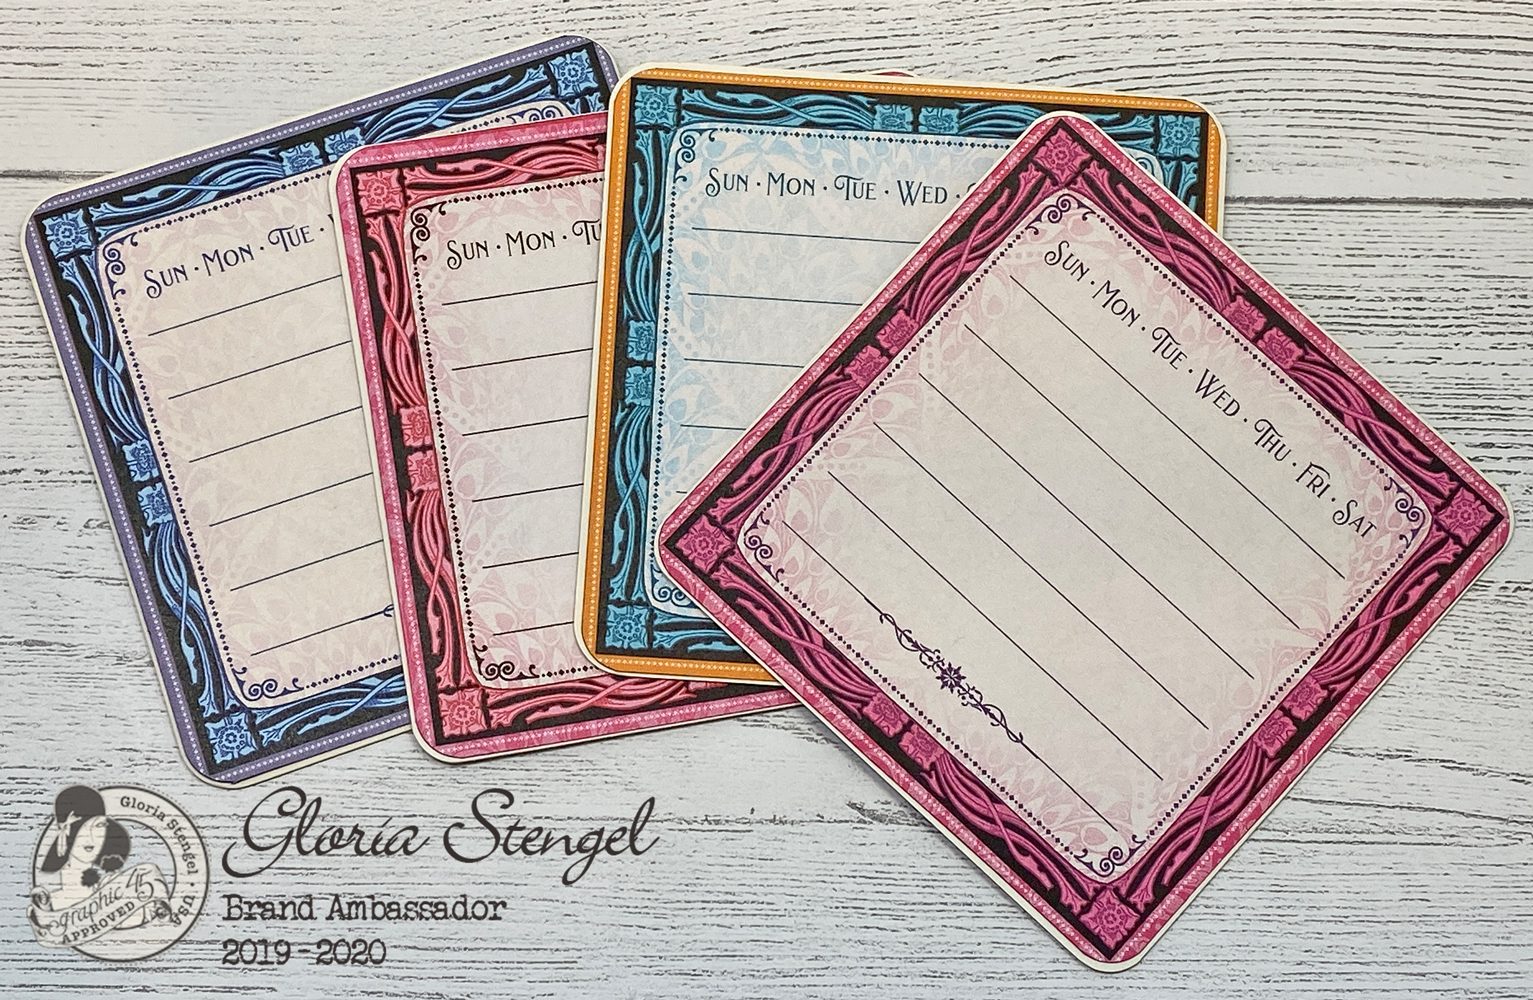
For the reverse of each panel, trim the calendar image from each monthly paper and round the corners. Attach it to the back of the matching month.
Tip: Use the calendar panels to record birthdays, holidays, and special events that you need to remember throughout the year. This is a very useful “birthday reminder” card sitting right on your desk!

Each month will have unique images and colors. You may also use die cuts from the Fashion Forward Die-cut Assortment to decorate your panels.

The rich colors of this paper collection will brighten up your desk all year long!
This stunning and unique collection was so fun to work with.

Use the box to store all of your panels and your little easel.

Tip: To make your panels look extra special, tie them up with a length of ivory satin ribbon. This also makes it easy to lift your panels out of the box!

This little project will make the perfect gift!
Thanks for stopping by!

Graphic 45 Supplies Used:
Mixed Media Box (retired - similar here)
Other Supplies Used:
Sequins
Glitter
Micro beads
Transparency film
Black marker
Double-sided tape
White glue
Ivory cardstock
Ivory satin ribbon
Corner rounder
5” tall clear, plastic easel
What a great project, Gloria! This makes such a great gift to give for the new year. I was also thinking that it could be used as a birthday gift, starting with the birthday month on top, as a count down to the next birthday and memory record for something special from each month of that year...so many possibilities. tfs
ReplyDeleteAbsolutely beautiful!
ReplyDeleteAn absolut amazing project here again Gloria. I just LOVE it. Thanks sooo much for ahring your awesome ideas eith us here, it´s very much apreciated, that´s for sure.
ReplyDeleteWishing you and your family a wonderful Christmas and a Happy New year too, and hope that 2020 will be an amazing year for all of you.