Merry Christmas (and a last minute gift idea)!
Good morning, Authentique Fans! Merry Christmas!! I hope you are having a wonderful day with friends and family!
But...do you still need a last minute gift? Do you have a post-Christmas holiday party to attend and need a "white elephant" or hostess gift? Do you need a gift for Aunt Marge or cousin Dorcas? Well, look no farther!
Remember back in October, when I told you that we would be making a bunch of 6" x 6" home decor panels? Remember? On THIS post? And I shared a bunch of panels with you?
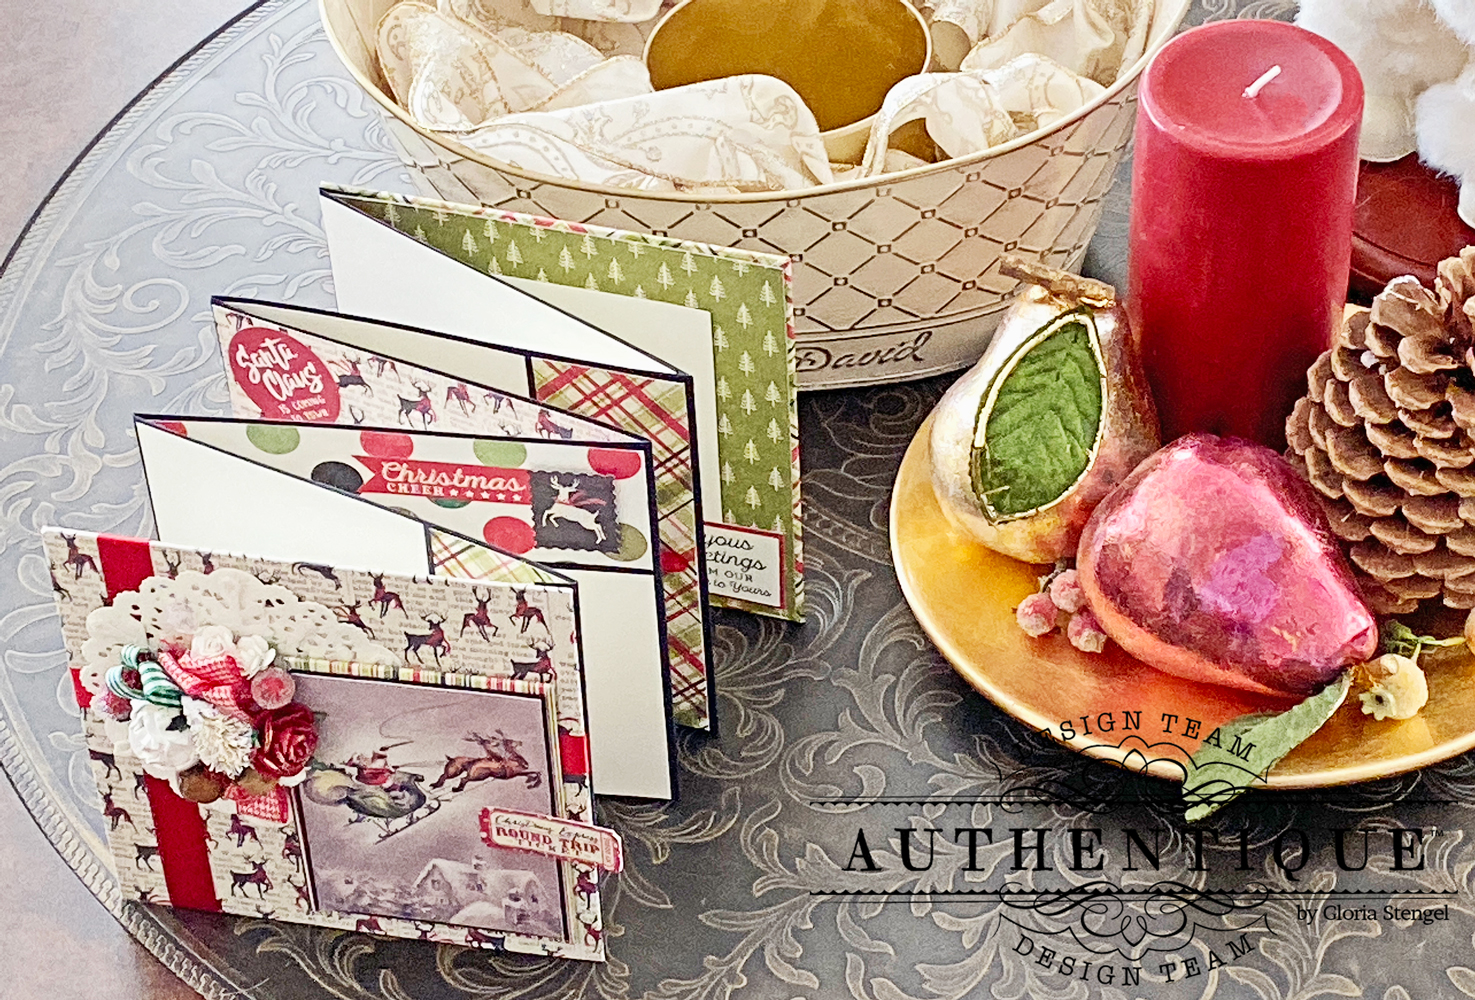
Well, I had a few folks asking me, "What do you DO with those panels other than display them?" I am here today to show you how to make a quick accordion fold mini album with one of the panels! All you need is your panel (made using THIS tutorial) and some of your Christmas scraps! Don't worry if you still need to make your panel, the linked tutorial will walk you through it, and you may use any paper you have on hand, in any theme!
You will need your 6" x 6" decorated panel and one piece of 6" x 6" chipboard for the back cover. You will also need your FAVORITE Authentique paper collections!
Next cut one piece of black cardstock to 6" x 7" and score at 1/2" and 6 1/2" on the longer side (the left-hand piece above). Cut four (4) pieces of black cardstock to 6" x 6 1/2" and score each at 1/2" on the longer side. Add double-sided tape to each 1/2" flap.
Cut decorative paper to 8" x 8" and wrap the back cover panel. Flip the panel over so the front side is facing down. Attach the 6" x 7" piece of cardstock to the left edge of the back cover panel.
Attach one of the 6" x 6 1/2" pieces of cardstock to the previous cardstock piece, as shown above.
Keep adding the cardstock pieces. Add the front cover panel last. You will have a front cover, five (5) cardstock pages, and a back cover panel.
Decorate the panels as desired. I kept it simple using paper scraps. This is also the perfect project for using up 6" x 6" paper pads! Decorate the front of each panel.
And also, decorate the back of each panel! I used mostly stickers, die cuts, and flat embellishments. I placed 6" x 4" photo mats and 4" square photo mats on the pages.
The little book folds up flat for mailing or storage!
I cut the photo mats from pale ivory cardstock at 3 7/8" x 5 7/8" and oriented some in a vertical position and some horizontally. The paper strips are cut to 1 7/8"" x 5 7/8".
I made sure to orient some of the printed paper vertically and some horizontally. For some pages I cut the paper to 5 7/8" x 5 7/8" to cover the full panel. I also cut some 4" square photo mats.
While this is a simple mini, the accordion style of mini can be very elaborate, like THE ONE SHOWN HERE. If you love accordion albums, here are a few other accordion albums I have made (HERE, HERE, HERE).
I kept the back cover panel very simple, with just a few stickers.
It was fun to dig around in my Christmas embellishments to find low-profile items to use on my pages.
The Authentique sticker sheets are perfect for this project!
Buttons are always a great choice for decorating!
Thanks for looking! Have a Merry Christmas and a Blesses New Year! See you back here in 2020!
Authentique Products Used:
Rejoice Collection: 12x12 paper, Details stickers. Elements die cuts
Nostalgia Collection: 12x12 paper, Details stickers
Other Products Used:
bottle cap, brads, flowers, buttons, twine, cardstock, chipboard, adhesive


Very nice! Love Authentique christmas paper! Makes a great little gift.
ReplyDeleteThis is great I have bits and pieces of these papers-quick and easy project. Thanks & Merry Christmas
ReplyDeleteSimply gorgeous!
ReplyDeleteHow fun this is
ReplyDeleteand looks easy.
Would be wonderful
for any occasion.
Carla from Utah