Good morning, Crafters! It is almost Christmas! The year has just flown by! Last year at this time I was just coming home from the hospital after having extensive surgery! What a difference a year has made! Here were are, soon to flip over to 2020! Can you believe it?!
I have a few more projects to share in 2019. This one is a cute "repeat" project share. I made a version of this little mini back in May (you can see it HERE). But, it's so cute, I wanted to do a remake! When I have crafter's block, or when I am short on time, I often "copy off" myself! {smile}
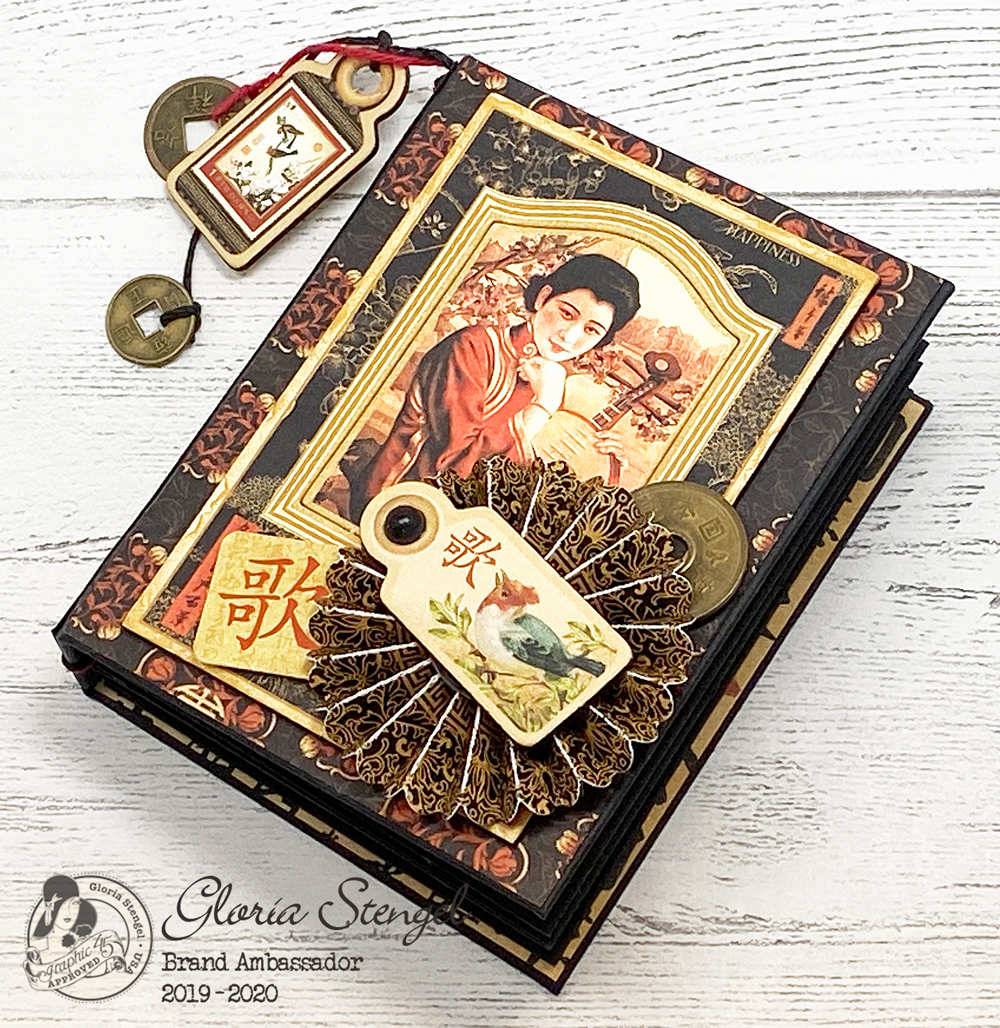
Graphic 45 recently re-release the Bird Song Collection as a Deluxe Collector's Edition! I still have a bunch of this paper in my stash from when it was released the first time! So...I decided to make a little mini with this lovely paper!
This little book is 4 1/4" tall and 3 1/4" wide with a 1" spine. Is this the CUTEST size of mini ever?! It is perfect for attaching gift cards to the pages, or wallet-sized snapshots, or little notes! It could make a great little book to jot down your goals for 2020!
I used the original Bird Song Collection 12x12 paper, sticker sheet, and the chipboard elements. This little book makes up fairly quickly, but you can always JAZZ it up more by adding pockets and flip outs like I did with this summer-time version HERE or this sweet mini HERE.
To create this book, cut two pieces of chipboard to 4 1/4" x 3 1/4" and one piece to 4 1/4" x 1" for the covers and spine. For the hinges, cut black cardstock to 4 1/8" x 4 3/4". On the 4 3/4" length, score at 1", 1 1/4", 1 1/2", 1 3/4", 2", 2 1/4", 2 1/2", 2 3/4, 3, 3 1/4", 3 1/2", and 3 3/4".
Cut black cardstock to approximately 6 1/4" x 9 3/4". Place the chipboard pieces onto the center of the paper, making sure to keep 1/8" of space between the spine piece and the cover pieces.
Angle the corners and add double-sided tape to the edges of the paper, as shown. Wrap the paper around the chipboard, gently scoring the space on each side of the spine piece.
Your hinge piece has 13 sections. There are one-inch sections at the beginning and end, and eleven 1/4" sections in the middle. Place adhesive on the first 1/4" section, then on the fourth, seventh, and tenth 1/4" sections, as shown above. (I used 1/4" wide double-sided tape.)
Accordion fold the hinge piece to adhere the first and second 1/4" section together to form a hinge tab. Repeat for the 4th and 5th, and again for the 7th and 8th, and for the 10th and 11th. You will end up with a 1" gutter, four hinges with 1/4" gutters between, then a 1" gutter at the end.
Attach the hinge piece to the spine. Once again, gently score the space between the chipboard covers and the spine, taking care to NOT tear or crack the paper.
Trim four (4) pieces of black cardstock to 4 1/8" x 6 1/4" and score on the long side at 3 1/8". Fold and burnish on the score lines.
Attach one scored piece by the open end to each hinge, creating four pages.
Close the book and decorate the cover. Trim the cover pieces to slightly smaller than 4 1/4" x 3 1/4" and the spine piece to 4 1/4" x 1".
Tie a few pieces of twine together to add some charms to the spine.
The chipboard piece I used for the cover is from the Bird Song original collection. I used a die cut to make rosettes from some of the Bird Song decorative paper. I love the dark red, black, and gold colors of this paper! I also found some Asian coins in my stash to use as charms and embellishments. (Actually, my husband travels extensively to Asia, so he brings home coins from many countries. I filched these from his stash!)
This book is so perfect for using up scraps or 6" x 6" pads of paper!
The inside is very simple. Each page contains a 4" x 3" piece of decorative paper. So EASY!
The inside front cover contains a sticker mounted on some cardstock to make a tuck spot. For page 1, I added a journaling spot by using one of the chipboard pieces.
Page 2 contains one of the lovely lady cut aparts. Page 3 contains a small rosette and one of the word stickers (original collection sticker sheet).
Page 4 contains another word sticker added to the beautiful lantern paper. Page 5 contains a sticker mounted onto cardstock to create a tuck spot.
I added a little pocket to page 6 and placed a small, ATC-size, tag inside. There is another little rosette on the pocket. Page 7 contains a cut apart and more of the word stickers.
Page 8 has another tuck spot made from a sticker, to which I added a few cut aparts. The back cover also contains sticker tuck spot.
This "tiny mini" is so easy to make, and simple to put together! I hope you have fun making your own, with your favorite Graphic 45 collection!
Thank you so much for looking!
Graphic 45 Products Used:
Other Products Used:
Cardstock: WorldWin Black
Dies: Tim Holtz Rosettes
Coins: found items
Deco scissors: Provo Craft stamp edge
Adhesive: ATG tape, Scor-tape, white glue, foam tape


Beautiful album Gloria. I love this collection. I haven't used it much but your album gives me inspiration to make an album too. Merry Christmas and thanks for all your beautiful creations you shared with us this year. God Bless you.
ReplyDeletewow what a beautiful booklet Gloria! As soon as I am able I sure willl make this too....think I have still a few Birdsong from the past, so have to dig into my G45 "storage".....Lots of love from me, blessings for X-mas and the coming year! HUGS Mieke
ReplyDeleteSo Beautiful Gloria... so you ! Thank you for tutorial ! I feel a scraplift coming on :)
ReplyDeleteThis is amazing, love your design and those beautiful papars
ReplyDelete