
Hello and welcome to the Blog! The Power Poppy Bloom Brigade is bringing you a monthly challenge the third Monday of every month! The lovely and super talented Christine Okken is your hostess each month! The challenge is called The Blossom Challenge and will be a different theme or type of challenge each month!

This month the theme is: Glassy Eyed. So grab a Power Poppy image and create a project featuring glass containers, something under glass, or containing glass elements! To top it off, the BEST Power Poppy glass images are on discount at 25% OFF too!
Note: You do NOT have to make a card! If you like to color at 8 1/2 x 11, you may print your image at that size and share your finished coloring page! Or, you may create another type of paper craft project featuring Power Poppy images.
Our challenge WINNER will receive a $20 gift card to use at the Power Poppy Store!! The challenge is open until July 18th! Link up your project to the Power Poppy Blog for a chance to win! Winners will be posted next month on the Power Poppy Blog.
The May winner is posted today on the Power Poppy Blog...hop over to see if it is you!
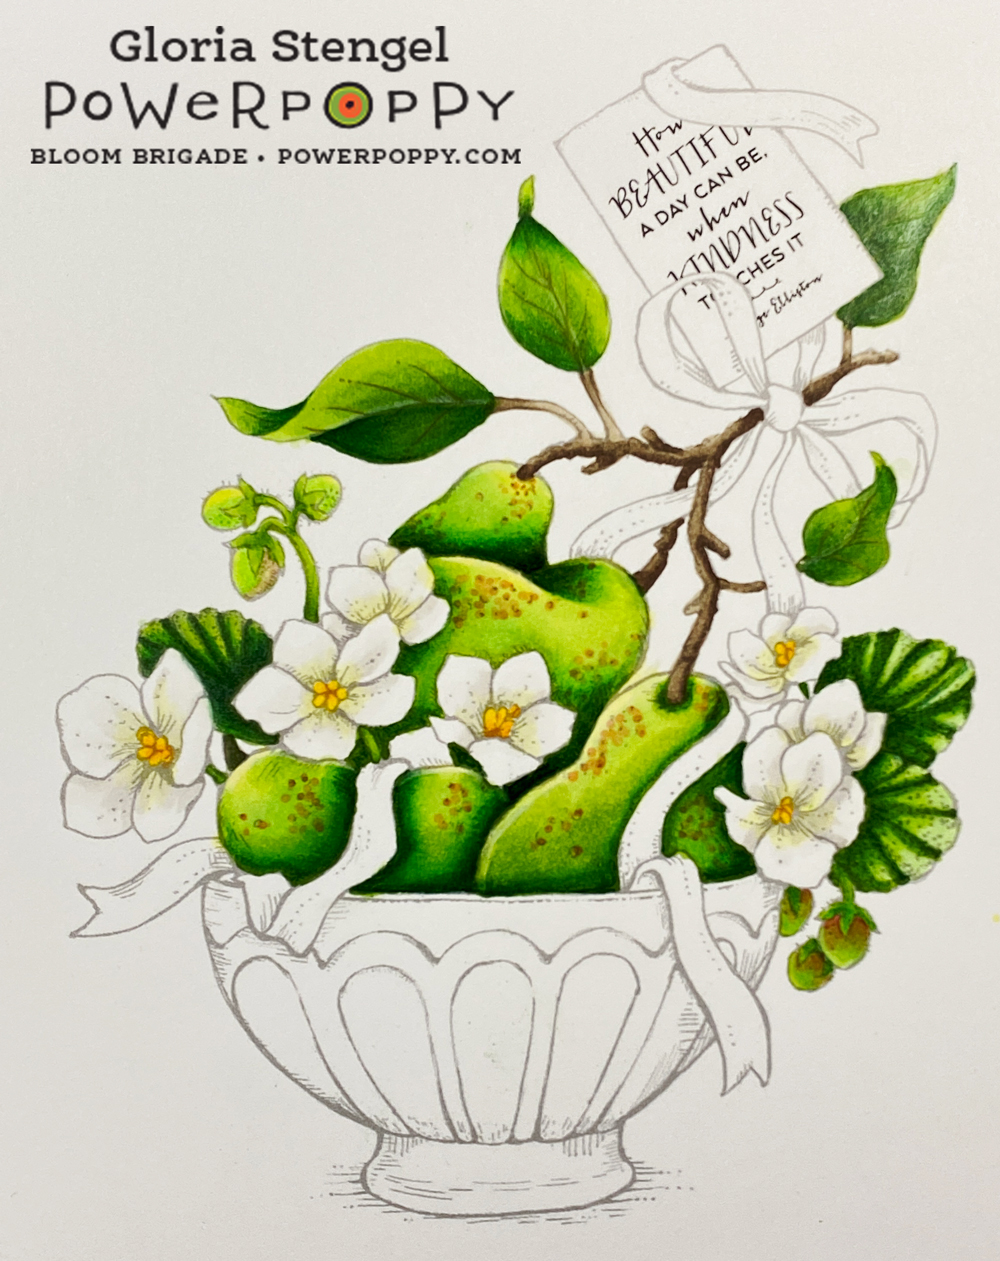
Now here is a look at my inspiration project for the challenge, Glassy Eyed!


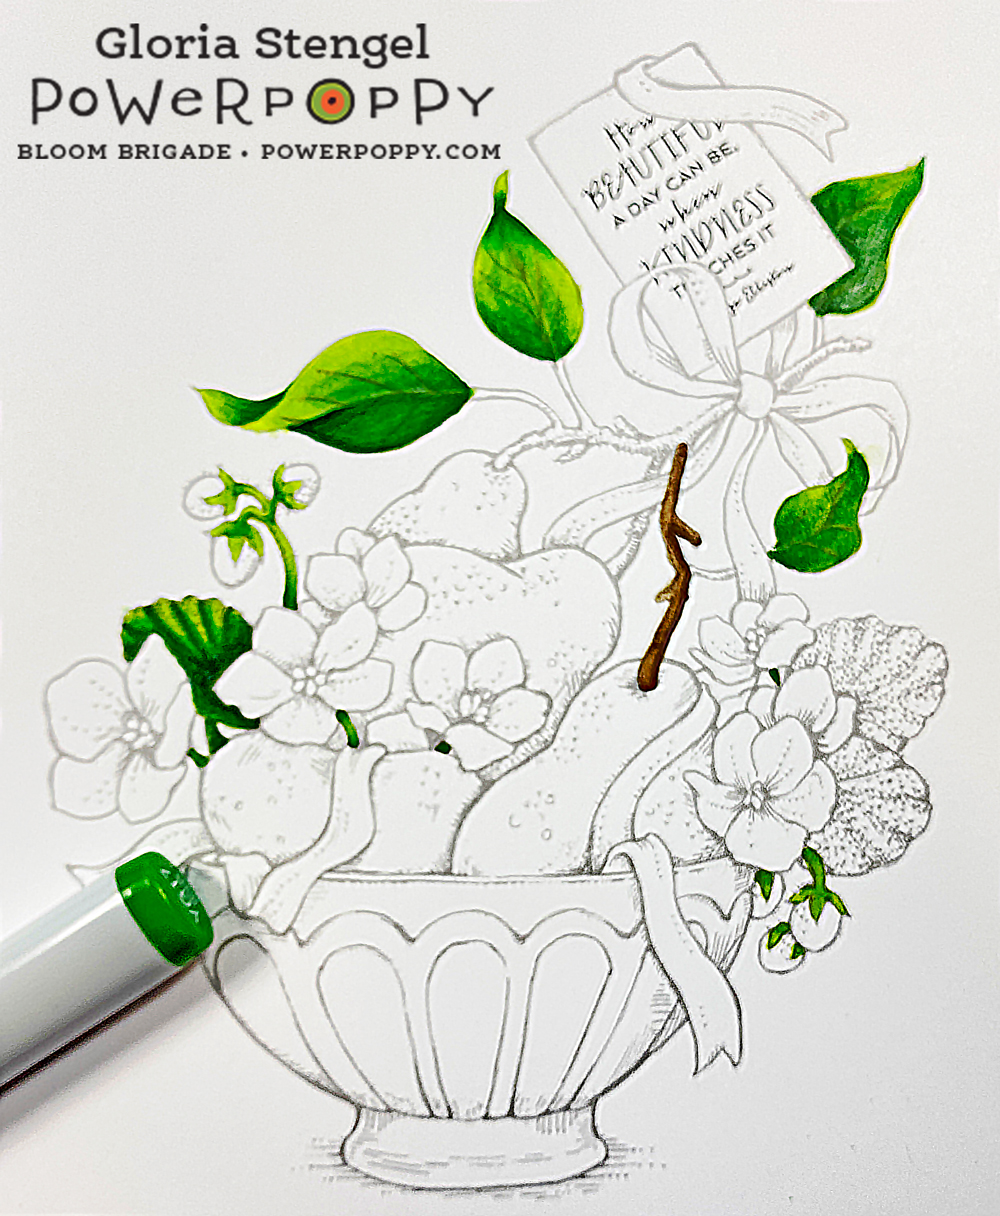
I positioned the sentiment onto the blank message card using some Photoshop magic. Here's how!
1. First, I created a blank, transparent page onto which I placed the main image, which I then sized to 6" x 8".
2. I used the Magic Wand tool (told you...magic!) to select and delete the white background from the little card element.
3. I then placed the sentiment onto the message card, adjusted it and sized it to fit.
4. I then selected the main image and chose the Bring to Front option, to make sure the sentiment was behind the bits of ribbon.


I hope you have fun with the challenge this month, and please tell your friends! It will be great to have a lot of participants in our monthly Blossom Challenge at Power Poppy!
Make sure you visit the Shop, because there are a few NEW things to grab! Plus there is a 25% off sale on the "contains glass" offerings!
To see all the inspiration, and to read the challenge details, visit the Power Poppy Blog HERE.
Inspiration List
Power Poppy Blog
Essie
Gloria - YOU ARE HERE
Barbara C.
Lisa
Nancy
Christine

Power Poppy Digital Stamps: My Perfect Pear, Peonies
Gloria your pears look good enough to eat and I like the glass bowl. Very cool! Beautiful card.
ReplyDelete